If you are looking for a water-resistant flooring material that is affordable, long-lasting, and easy to maintain, then vinyl sheet could be just what you seek. It is perfect for bathrooms, kitchens, living rooms, and any other area that needs 100% waterproof covering.
And here is the best part; you don’t necessarily need a professional to do the installation for you. With the pointers shared in this post, you can easily learn how to install vinyl sheet flooring and do the job yourself. Sounds like something you would enjoy? Let’s dive right into it!
Table of Contents
Materials Needed to Install Vinyl Sheet Flooring
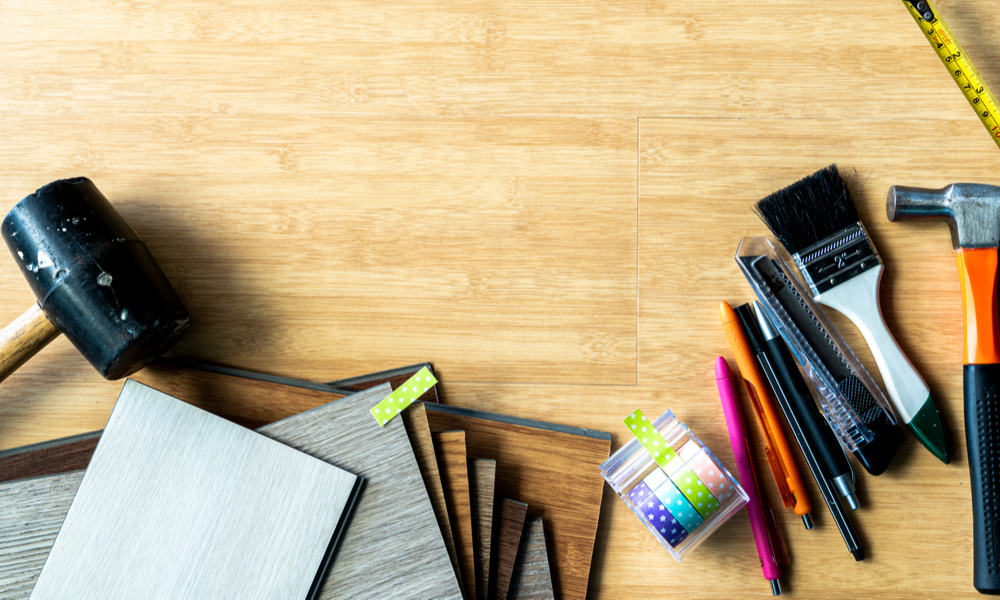
Before starting your installation, you have to gather all the tools you need for the job. If you are laying a glueless sheet, then you will likely not need as many supplies as someone installing a glued sheet. Nonetheless, a professional vinyl sheet flooring installation will require the following:
- Vinyl sheet: You can choose a loose lay sheet or one that needs adhesive. Store the vinyl in the job site for 24 to 48 hours before doing the installation. This will give it time to acclimate and make it easier to unfold and flatten.
- Prybar: This will come in handy whenever you need to pull two objects apart, for instance, when removing the base trim from the wall.
- Plywood (optional): If the subfloor is completely uneven, you may need an underlayment. This is especially important if you are installing glued vinyl sheets. The underlayment will provide a smooth surface so the flooring adheres properly.
- Joint gap filler (optional): This will only be necessary if you will be using a plywood underlayment.
- Measuring tape: You will need this to make measurements.
- Utility knife: Use this to cut your vinyl sheet.
- Straightedge: This will help you make accurate score marks and clean cuts.
- Adhesive: You can use either an adhesive paste or spray contact adhesive. Read your vinyl sheet installation instructions to see what is recommended by the manufacturer.
- Notched trowel (for glued vinyl sheets): Use this to apply adhesive to the subfloor or underlayment. The regular bricklaying towel may work, but a notched towel is the most recommended.
- Flooring roller (for glued vinyl sheets): A flooring roller will help you seat the vinyl firmly and evenly into the underlayment and remove any air bubbles. If you don’t have one, use a rolling pin.
- Seam roller (for glued vinyl sheets): A seam roller will come in handy if you are installing more than one piece of vinyl sheets on the same floor. It will help you properly close the seams.
- Vinegar: You will need this to remove stray adhesive from the vinyl.
- A clean piece of cloth: Use this to wipe any adhesive off the flooring.
8 Simple Steps to Install Vinyl Sheet Flooring
Laying vinyl sheet flooring is a job you can do even without prior experience. Below are simple steps to guide you. You can also watch the simplified process here.
Step 1: Clear the Room and Prepare the Subfloor
Remove any objects that may hinder you from accessing the floor. This will include moving any portable furniture and appliances to another room.
Use a pry bar to pull any obstructing trim from the bottom of the wall. Depending on how thick the sheet and underlayment are, you may also need to trim door frames a little bit to accommodate this thickness.
If the subfloor is flat concrete that doesn’t have cracks, you won’t need to do anything other than cleaning and drying it. However, if the floor is cracked or bumpy, you will need to fill the fractures or sand down the bumps.
No matter what type of subfloor you will be laying your vinyl sheet on, make sure it is completely flat and clean before you begin your installation.
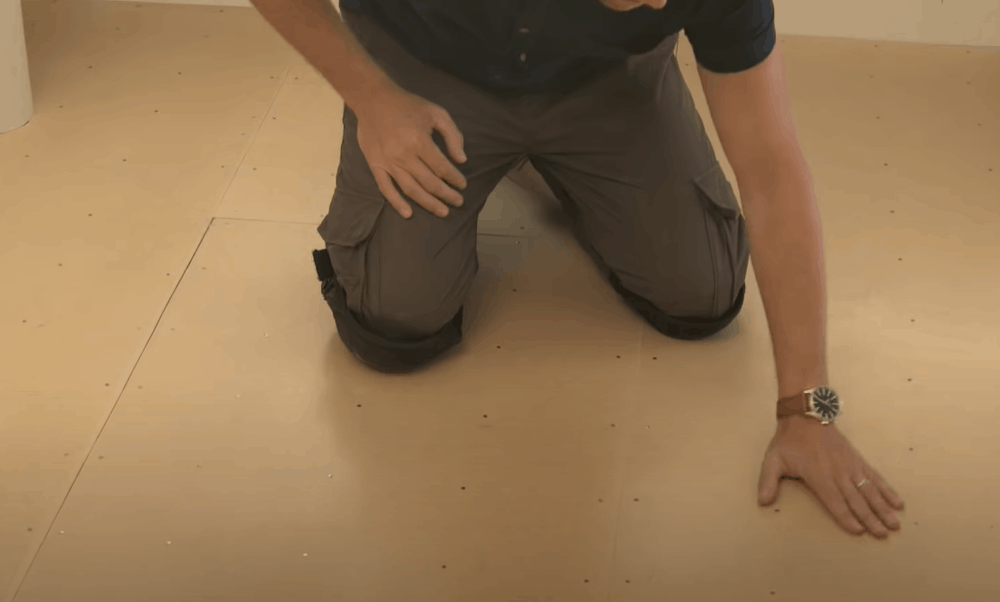
Step 2: Install an Underlayment (If Needed)
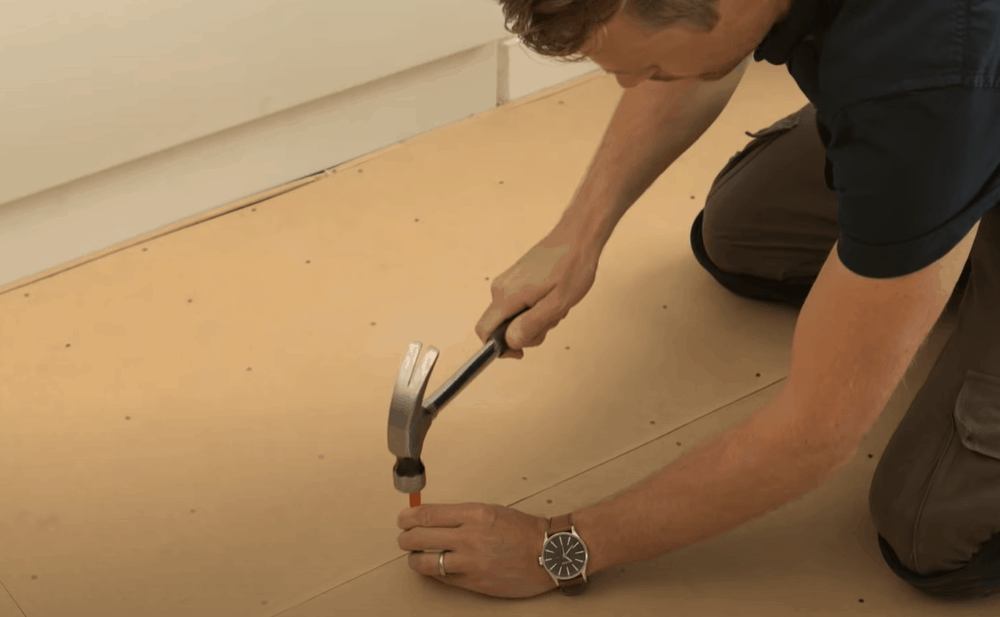
If you are dealing with an extremely rough subfloor, consider installing an underlayment like plywood; it could be much easier than having to sand the bumps.
However, do not forget to smooth the high points, which will mostly be found around the points where pieces of plywood meet. Also, make sure to fill these joints with an appropriate filler.
Step 3: Measure the Installation Area
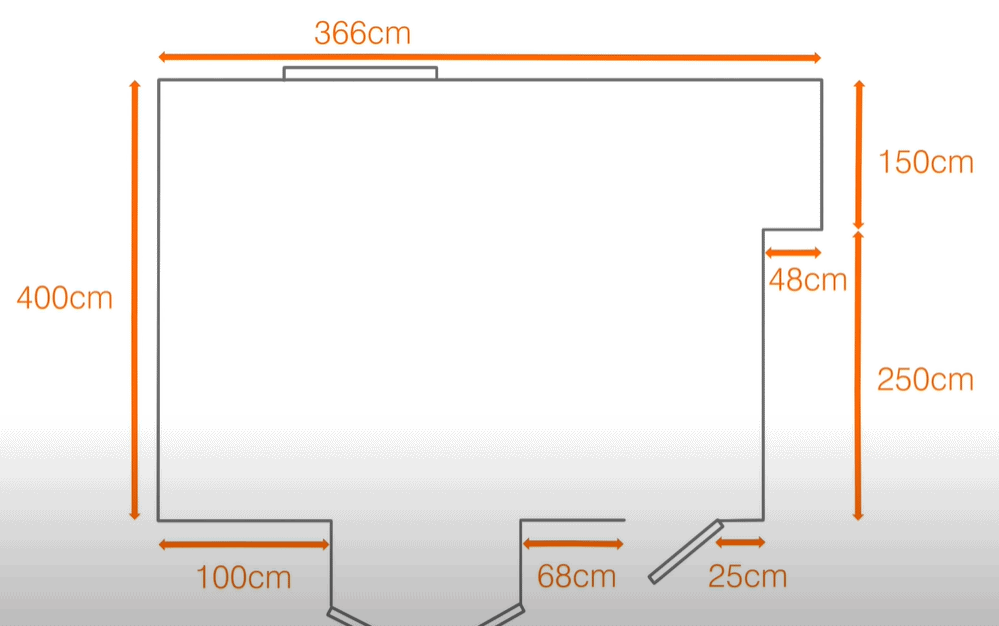
Using a measuring tape, measure the space on which the vinyl sheet flooring will be installed. Then, using these measurements, carefully draw the subfloor outline on the vinyl so you can know how much sheeting will be needed.
Spread the sheeting on a large working area before transferring the dimensions. If you are worried about messing up the vinyl, you may use a large piece of paper as prototype instead.
Step 4: Cut the Vinyl
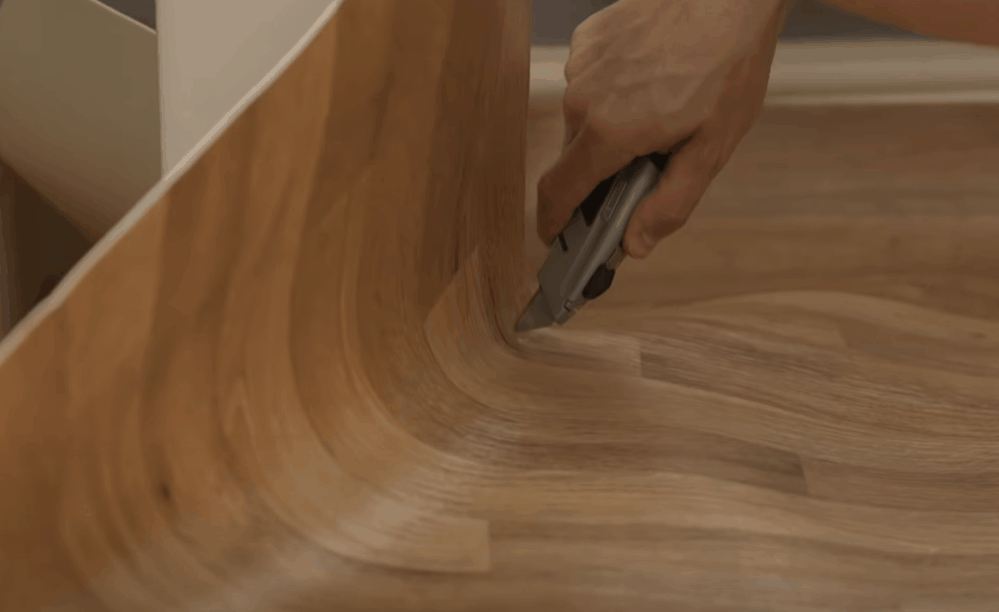
Use a utility knife to score and cut out the vinyl sheet. Make sure to leave a few inches on the edges of the flooring; you will trim these later once you have set the sheet on the subfloor.
Step 5: Lay the Vinyl On the Subfloor
Carefully lay the vinyl flooring in position and cut the sides so it can properly fit the area. You may want to put a piece of plywood under the sheeting when making the cuts to avoid cutting through the underlayment.
If you are installing glueless vinyl sheet, your installation is pretty much done. You can go ahead and put the trim and baseboards back in place. For glued vinyl, proceed to step 6.
Step 6: Spread the Adhesive
Apply the adhesive recommended for your specific flooring and underlayment. Roll the flooring up to expose a section of the underlayment.
Then, holding your trowel at an angle, spread the glue evenly on the underlayment. Unfold the rolled half and carefully press it to the ground. Now, roll up the remaining half of the flooring, spread the adhesive, and press it back.
If you are using spray adhesive, simply roll back the vinyl, spray over the underlayment as instructed on the label, then replace the flooring.
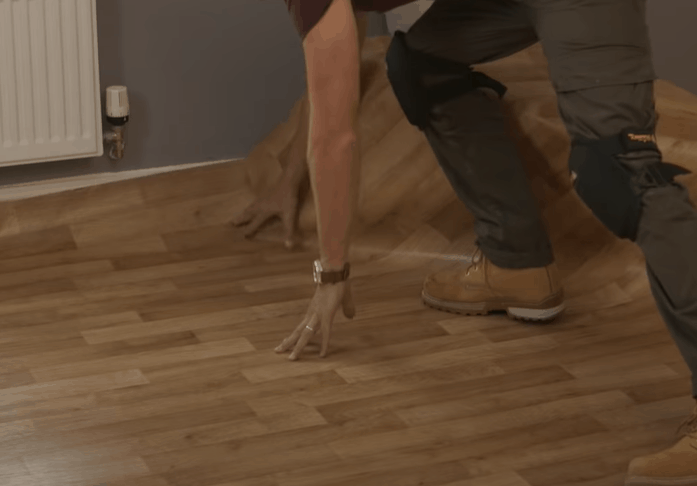
Step 7: Press Bubbles Out of the Vinyl Sheet
Run a flooring roller over the vinyl to press down the flooring and remove any bubbles. Start from the middle of the floor and work your way toward the edges. If you don’t have access to a flooring roller, try a rolling pin. Use a seam roller to properly lay the vinyl edges near the wall.
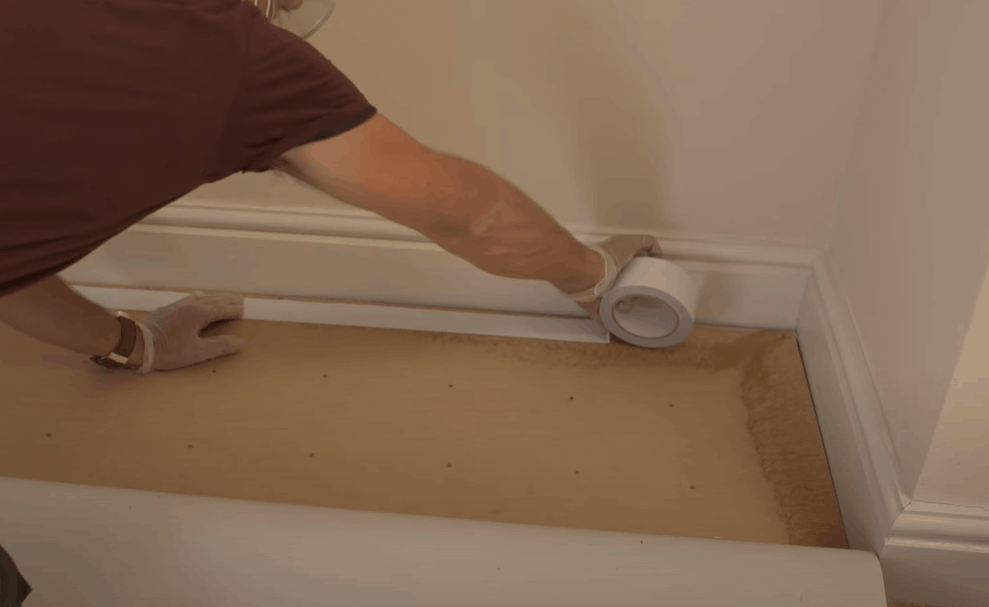
Step 8: Clean Stray Adhesive and Replace the Baseboards
Pour a few drops of vinegar on a clean piece of cloth and wipe any stray adhesive off the vinyl sheet. Do this immediately before the glue dries up on the surface and becomes harder to remove.
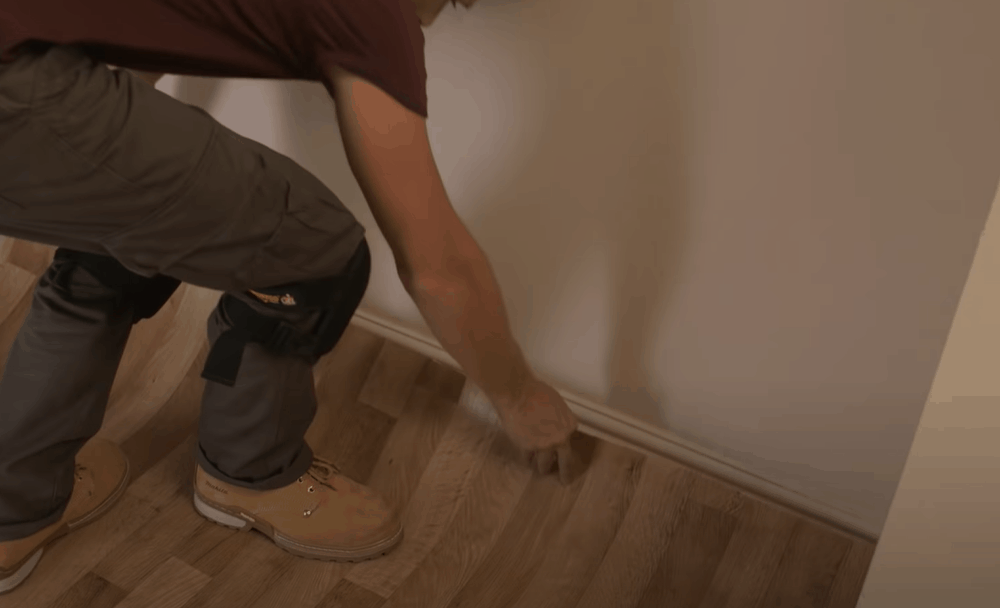
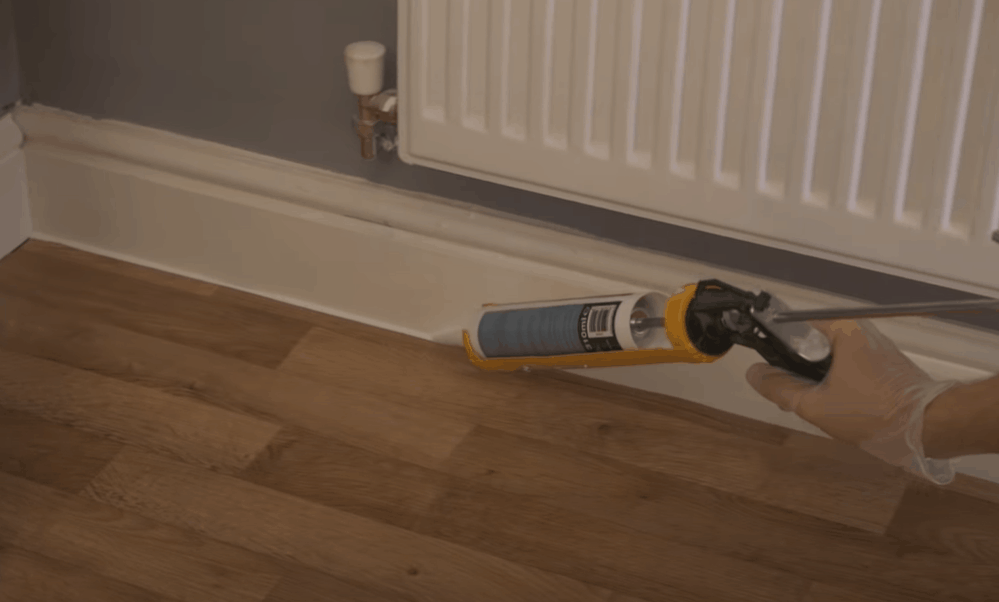
If you are content with your work, put any trim and molding you removed earlier back in place and caulk any vulnerable seams around structures like bathtubs and sink pedestals.
Additional Tips for Installing Vinyl Sheet Flooring
Buy a Larger Vinyl Sheet Than You Actually Need
Even if you know the exact measurements of the space on which the vinyl will be laid, do not buy a sheet that measures exactly as the space. Get about 5% extra of the flooring to cover any expected wastage.
Minimize Seams on Glueless Vinyl
Because seams are potential points of separation, make sure you have the least possible, especially if you are installing glueless vinyl. Experts recommend using only one seam with this type of vinyl.
Keep the Room Warm During the Installation
Turning on the heater during the installation helps make the vinyl sheet more flexible, which in turn makes it easier for you to lay it on the subfloor.
However, if the subfloor has a radiant heating system installed, this must be turned off before glued vinyl is laid. A heated subfloor will soften the adhesive, reducing the vinyl’s ability to stick to the subfloor or underlayment.
Wear Safety Gear
Your safety should always come first, so make sure to wear the appropriate protective gear before you start the installation.
For example, use knee pads so you can kneel more comfortably. You may also want to wear a pair of gloves to avoid cuts and bruises from the tools you will be working with. Don’t forget a mask especially if you are installing glued vinyl; it will keep you from inhaling harmful adhesive fumes.
Don’t Apply More Adhesive Than Necessary
Applying huge amounts of adhesive on the subfloor will not help your vinyl flooring stick more firmly; it will only make the installation more frustrating because the glue will take a longer time to dry. It also means you will have more stray adhesive oozing from the seams.
The Takeaway
Installing vinyl sheet flooring is usually not as difficult as many people tend to think. The first thing you need to do is decide which type of flooring you want to install. After that, follow the steps outlined here to prepare the room and lay the vinyl.
And before you start, make sure the subfloor is as smooth as possible; if you can’t get it smooth enough, consider using an underlayment.