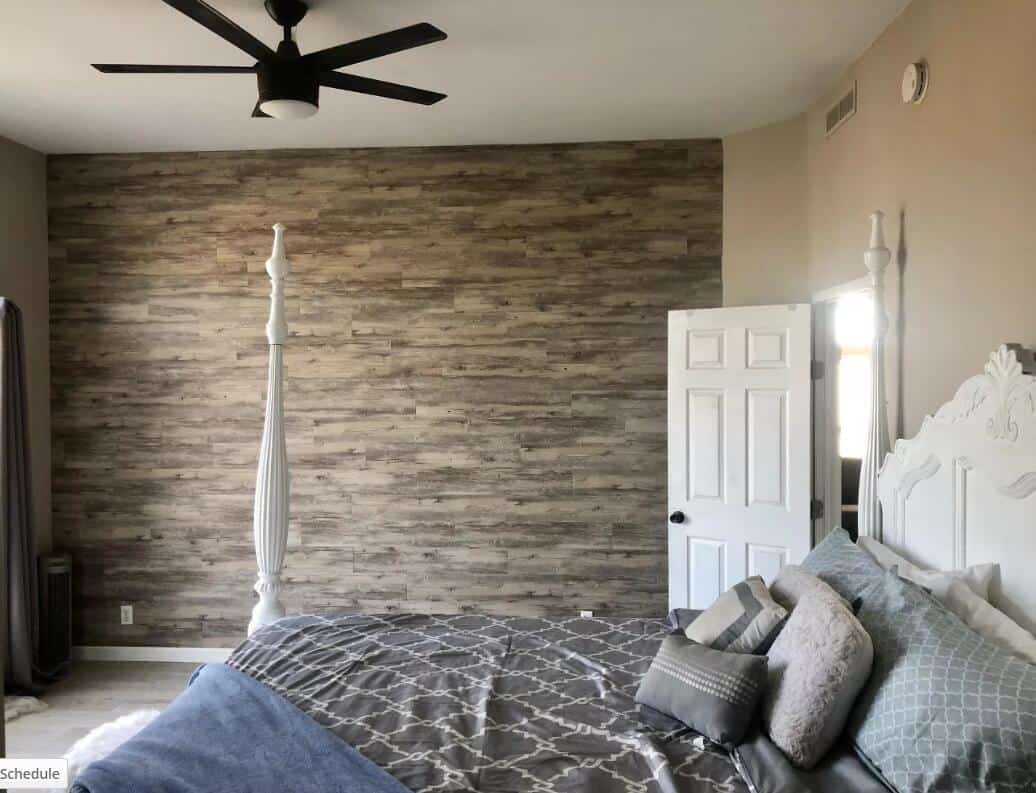
So you are thinking of installing vinyl plank flooring on your walls? Well, why not! Vinyl planks are durable, cost-effective, and come in many beautiful colors and patterns that liven up even the dullest of walls.
And guess what? You don’t necessarily need a professional to do the installation for you. As long as you have the right tools, the rest of the process is pretty straightforward.
Read on to learn how to install plank flooring on wall, what tools you need, and how to properly care for the wall after the installation to maintain its elegant appearance.
Table of Contents
Tools Needed
- Enough vinyl plank flooring to cover the area of installation
- Sandpaper/ sanding machine or hardboard sheets
- Primer for currently painted walls
- Pry bar
- Screwdriver
- Stud finder
- Chalk line
- Tape measure
- Pencil
- Construction adhesive
- Nail gun
- Gloves
- Dust mask
- Safety glasses
Prepare the Wall for the Installation
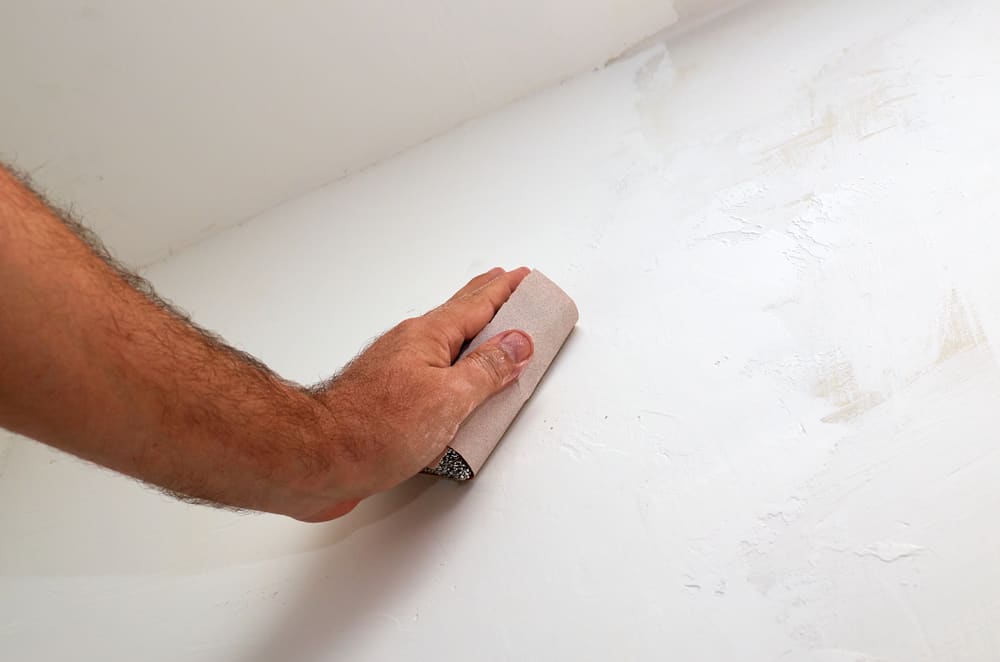
1. Clean and Smooth the Wall
Before you even get started with the installation, check to see the wall is smooth, clean, and dry. You must also remove any existing texture, tiles, or glossy paint, as these may prevent the planks from adhering correctly.
Preparing the wall this way not only results in a sturdier layout but also prevents lumps and uneven sections from showing through the planks.
To ensure the wall is as smooth as possible, sand it down. We recommend doing this with low grit sandpaper. To get results even much faster, throw in a sanding machine too.
Regardless, sanding in general can be time-consuming and may not be the most viable option if you don’t have much time at hand. So instead, you can simply lay hardboard sheets over your wall and it will be smooth enough for the vinyl floor planks installation.
2. Add a Primer
If the wall is currently painted, ensure to add a layer of primer over the paint; it will help the adhesive stick more firmly on the wall.
Get a primer product that matches the color of the planks you intend to install on the wall if possible. That way, if there happens to be a gap on the wall after the procedure, it will be well disguised until when the problem can be fixed.
Plan Your Vinyl Plank Flooring on Wall Installation
- Grab your pry bar and remove any baseboards that may be currently mounted on the wall.
- Check to see if the wall has any electrical outlet covers and remove them too using your screwdriver. Avoid touching any exposed cables while doing it. To be on the safe side, it is best to have the main electrical supply turned off.
- Use a stud finder to locate studs. Mark the studs from top to bottom using a chalk line.
- Decide whether you will be installing your vinyl planks from the floor working upward or from the ceiling coming downward. If the wall has an existing crown molding, you can start your installation from the ceiling working downward.
- If you choose to work from the ceiling down, start from the top left corner, making sure the tongue of the plank is facing the ceiling. For bottom-up installation, start from the bottom right corner, ensuring the tongue of the plank is closest to the floor.
- Measure the width of the wall from the bottom to top, and divide it with the width of one plank to determine how many rows of planks the wall will hold.
- As you take this measurement, remember that vinyl planks can expand and contract when temperature changes, so make sure to leave about 1½ inch for expansion between the floor and the bottom row.
- Using a tape measure, establish where you want your start line to be. Measure the wall from the bottom to the start line. Ideally, this measurement should be the width of one plank plus the 1 ½ inch expansion gap.
- Mark this width with a pencil. Use the chalk line to draw a line across the wall. The line should pass across the pencil mark (s) and its purpose is to help you keep the planks in the initial row straight. That way, the rows that follow will also be evenly aligned.
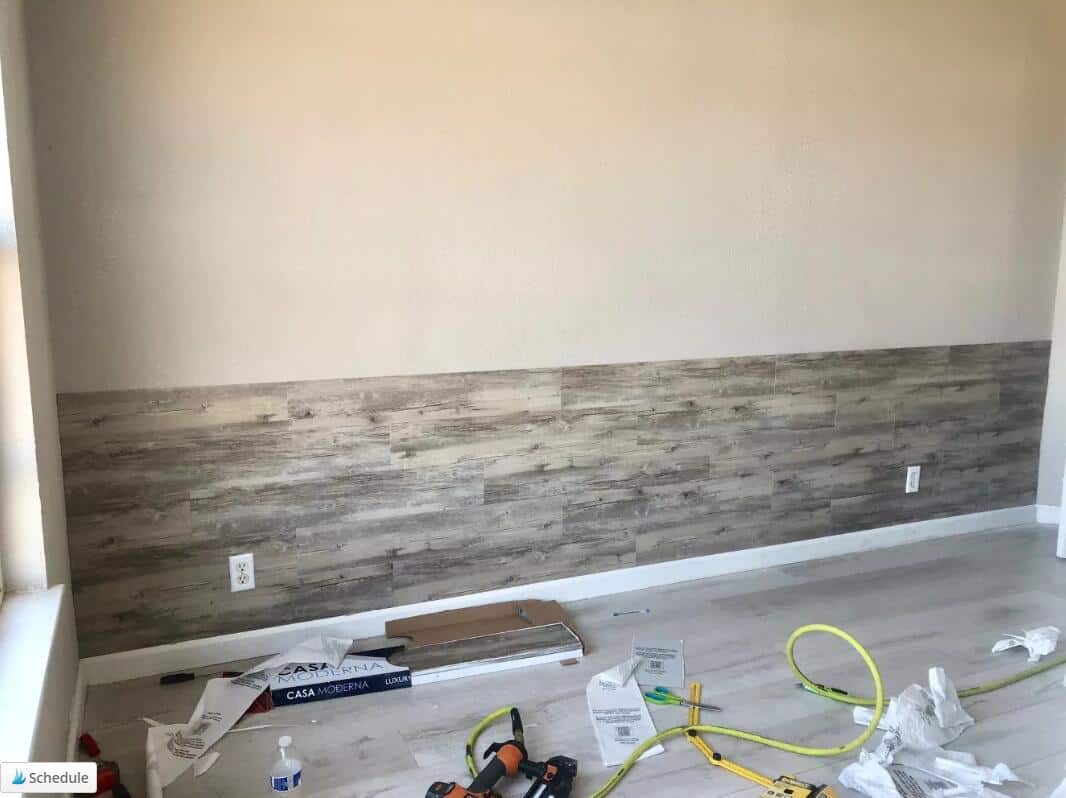
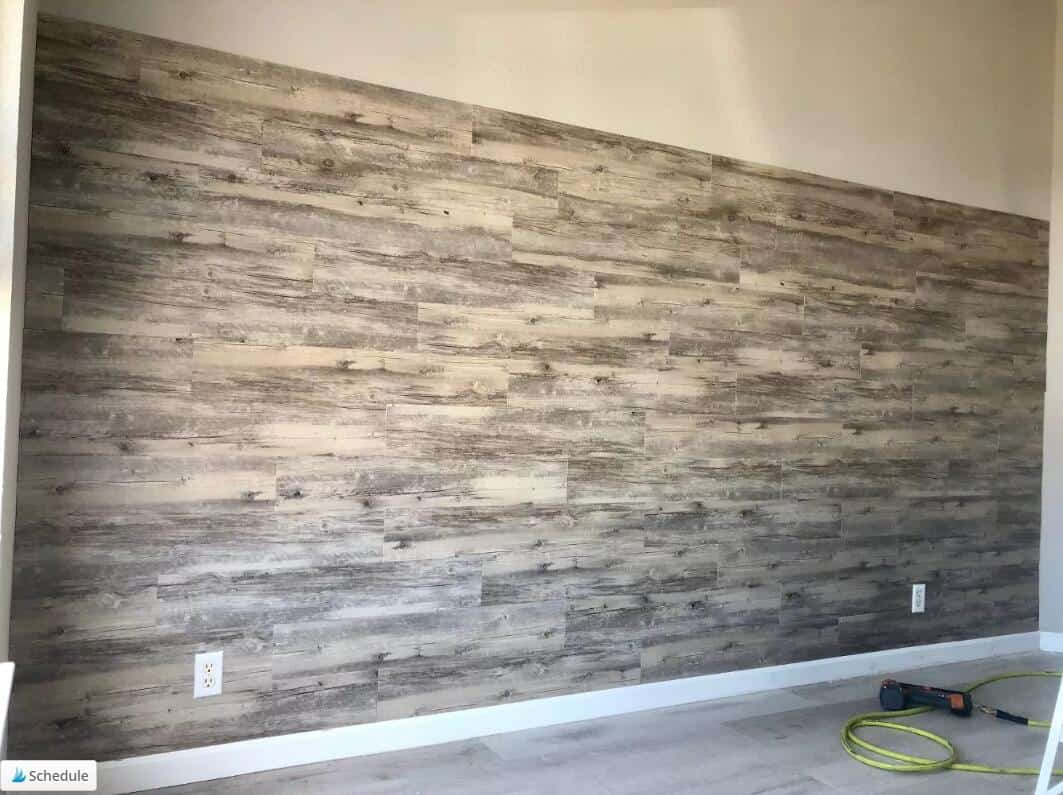
Do Your Vinyl Plank Flooring on Wall Installation
- Pull the planks from different boxes so you can achieve an even pattern and color across the wall.
- Apply construction adhesive on the side of the plank designed to attach to the wall.
- Attach the plank to the wall making sure it aligns with the starting line you established earlier.
- Use a nail gun to drive a nail into the plank’s groove to hook the plank to the wall stud. Ensure the nail head sits properly. You don’t want to leave it sticking out or push it too hard and risk losing it into the wall.
- Grab another plank, apply adhesive on the back and push it to the wall, making sure it interlocks with the first plank. Drive a nail into the plank’s groove to hold it in place. Repeat this process until the bottom row is complete.
- Begin the second row, interlocking each plank with the one below it. Use the procedure you used for the first row to complete this specific row and the remaining ones.
To further understand how to correctly plan and install vinyl plank flooring on walls, watch this video.
How to Care for Your Vinyl Plank Wall After Installation
1. Keep Curtains Closed
Unfortunately, most vinyl planks are prone to damage from direct sunlight. If you made your installation on a wall that is constantly hit by sun rays, this continued exposure to sunlight can cause the planks to fade, leaving the wall dull and less attractive.
It is imperative that you keep your curtains closed at all times to protect your wall, particularly during the hotter days of summer.
2. Use Mild Cleaners and Wipe Gently
Even though vinyl plank walls may not require regular cleaning, when they do need it, ensure you are doing it gently. A solution of vinegar and warm water is one of the most recommended cleansers, as it doesn’t rob the planks of their shine.
Just make sure you are not splashing too much water on the wall and you are not scrubbing too hard. The drier the planks are and the more gentle you are, the longer your wall is going to serve you.
3. Remove Stains While Still Fresh
If you accidentally stain your vinyl plank wall, it would be best to clean the spot as soon as possible. The good news? You won’t need anything more complex than a moist piece of cloth. You can add a mild detergent if you like but warm water will wipe off fresh mess just fine.
4. Remove Scuff Marks
Depending on how serious the mark is, you can use a pencil eraser, baking soda paste, toothpaste, WD-40, or over-the-counter products.
- Eraser: Works best with smaller scuff marks. Simply rub the mark firmly until the spot disappears.
- Baking soda: If the pencil eraser doesn’t work, try baking soda. Mix two tablespoons with water to create a smooth paste. Apply the paste over the scuff and let it sit for five minutes. Then wipe off with a damp cloth.
- Toothpaste: Another remedy for stubborn scuff marks is using toothpaste. Rub a small amount in gentle, circular motions, then wipe the area with a moist cloth.
- WD-40: Spray a small amount on a paper towel or soft cloth and gently rub the scuff off the vinyl plank. Then dip another piece of cloth in warm water and wipe the area. Dry thoroughly.
- Over-the-counter products: If you are still having trouble getting rid of the scuff marks, consider using over-the-counter cleansers. There are many products specifically manufactured to remove scuff marks on various surfaces.
Check the package to make sure the one you pick is safe for vinyl planks and follow the directions given by the manufacturer.
5. Repair Scratches
The easiest and most effective way to repair scratches and cuts on a vinyl plank wall is to replace the affected plank. This is especially true if you are dealing with deep and easily noticeable dents. Just remove the damaged plank, clean and smooth the area, and install a new plank.
When initially buying your planks, it’s best to purchase an extra box to cover potential repairs. It will save you the hassle of having to contact the plank manufacturer every time you need replacement pieces.
The Takeaway
Installing vinyl plank flooring on walls is an innovative way to add some extra pizzazz to your living spaces. Here is how to set it all up:
- Prepare the wall by cleaning it, smoothing rough spots, and removing power outlet covers.
- Measure the width of the wall to find out how many planks you need.
- Do your installation.
- Constantly care for your wall to keep it looking good, longer.
Have any questions on how to install vinyl plank flooring on wall or some pointers you would like to share? Tell us in the comment section.
How do you remove it? Previous owners of house put this on the wall and it is hideous.
Can you mount anything on it? I want to use this on a walk in my garage. Maybe mount a tv to it. Thanks!
Why the picture shows self adhesive floor vinyl and the steps mention to apply glue and nail gun ?