Have you been wondering whether you can lay tile over plywood?
Tiles offer a great way to update the flooring in a home. They look great and come in many shapes, sizes, colors, and styles to complement anyone’s interior design taste. But can you tile over plywood?
It is possible to tile over plywood. However, there are a few considerations you must keep in mind for the project’s success.
For instance, the plywood must be in good condition and thick enough to support the weight of the tile. It’s also paramount to prepare the plywood before tilling, but more on that later.
Here, we will discuss everything you need to know about tilling over plywood and how to do it successfully.
Table of Contents
Is Plywood a Good Subfloor for Tiles?
Laying tiles straight on plywood flooring can be difficult since a plywood subfloor is not as smooth or stable as a concrete slab.
Besides, plywood and tiles have different expansion and contraction rates. As a result, the tiles and grout can develop cracks and become loose over time. In addition, plywood is porous, which can affect the adhesion of the tile.
Another consideration is that standard plywood is 3/4 inch thick. This might not support the weight of the tile or foot traffic. Thicker plywood is resistant to flexing or movement, preventing the tile from cracking.
Furthermore, moisture or humidity can affect the overlying of tiles on plywood. Plywood often swells when exposed to moisture. When this happens, it can cause the lifting of the tiles and grout. This holds, especially in wet areas like bathrooms or showers.
How to Tile Over Plywood?
As said above, a standard ¾-inch-thick plywood flex easily. This can lead to loose or missing grout and cracked tiles. Fortunately, there are a couple of ways of building a plywood subfloor resistant to flexing, including:
1. Use a Thicker Plywood
The key to increasing the thickness of the plywood subfloor is adding another layer or layers of thinner plywood. The second layer of plywood must be at least ½ inch thick or ¾ inch thick.
Ensure you use exterior-grade plywood and not veneer-bond plywood. The latter is interior-grade plywood and features a thin layer of hardwood bonded on the top and bottom layers.
Tilling over this plywood is not recommended, as you can release the veneer, resulting in an unstable base for the tile.
- Install the extra plywood with the sheets staggered from the bottom layer of the plywood to increase the subfloor’s overall strength.
- Maintain a 1/16-inch gap between the plywood boards to allow room for expansion and contraction. The gap prevents the edges of adjoining sheets from pressing against each other and losing shape when the plywood expands. They are more like expansion gaps.
- Next, screw (nail) down the top layer of plywood every 6 inches around the perimeter of the room and 8 inches in the middle or interior. Ensure the screws go through the existing subfloor but not into the floor joists below.
- Another thing, the screw heads (or nails) should sink to the level of plywood or even below to prevent uneven tile arrangement.
Test The Plywood for Flexing
Before tile installation, conduct a plywood flexibility test. The best way to test for deflection is to place a dinner plate on the plywood, then a cereal bowl on the plate.
Fill the bowl to the brim with water. Walk around the bowl and observe the water. If the water vibrates but does not spill on the plate, the plywood resists movement.
If the water spills, reinforce the plywood boards with more screws. But if this solution fails, you are dealing with faulty floor joists. Solve this problem by strengthening the bottom joists with 2x8s or 2x10s.
2. Add Cement Backerboard
In most cases, a cement backer board is set on top of plywood when laying tile in the bathroom or shower stalls. The reason is, a cement board is waterproof and offers a stable surface to mount a porcelain or ceramic tile.
Additionally, it’s resistant to mold and moisture and more durable than plywood. Therefore, it is a great option for wet areas. Let’s not forget cement backer boards, like HardieBacker, have insulation properties.
Besides wet areas, a cement backboard makes a perfect choice for floors too. Just ensure the fasteners (screws or nails) sink below the level during installation. You also need a smooth and flat surface to ensure a uniform organization of the ceramic or porcelain tile.
3. Use an Uncoupling Membrane
You can also add an uncoupling membrane over the substrate to strengthen it and prevent cracking in the tile and grout. Schluter-Ditra is perhaps the most popular brand of this membrane. However, you can choose from many brands on the market.
As the name suggests, these membranes uncouple or separate the ceramics or porcelain tiles from the subfloor. They replace the second layer of plywood and prevent the movement of the substrate (expansion and contraction) from being transferred to the tile.
A tight bond between the subfloor and thin-set (tile mortar) causes cracking in the tile. The uncoupling membrane bonds to the substrate using an adhesive, allowing the plywood and tile motor to move independently.
In addition, the membrane adds a waterproofing feature, preventing the surfaces below from moisture infiltration and damage.
Step-By-Step Guide for Tile Installation on Plywood Subfloor
Step 1: Gather Your Materials
Before laying tiles over plywood, there are a few materials you will require, including:
- Spirit level or bubble level
- Tile cutter
- Tile spacers
- Tilling mortar
- Tilling grout
- Chalk string
- Notched trowels
- Sponges
- Cement board
- Thinset
- Uncoupling membrane
- Scraper
- Broom or Vacuum
- Tiles
- Tape Measure
- Buckets
- Mixing paddle
Step 2: Prepare Plywood Surface
The next step to tile over plywood is to inspect the surface. Check for any damage, such as rooting and wrapping.
Ensure you clean the plywood surface. Scrape off any dried plaster, adhesive, or glue from the surface. Vacuum all the dust, dirt, and debris.
If the plywood is in good condition, apply a sealer to prevent moisture infiltration.
Step 3: Install A Cement Backer Board
You can either add a layer of plywood or cement board to increase the subfloor’s strength and life. In this case, we will use a cement board.
Spread the board and use a thin-set adhesive to secure it in place. Alternatively, you can use the nails to install the board. Mark the area where the nails need to go using chalk. A general rule of thumb is to drive a nail every 6 inches at the edge and 8 inches throughout the center.
Step 4: Determine The Tiles Layout
Arrange your tiles on the subfloor to get a sense of how they will look after installation. Lay out the tiles in the center of the room and confirm if their edges align. Mark the layout with a pencil or chalk.
If you lay the tiles from the edge, you will end up with a larger tile on the opposite side of the room. But if the end tile is too thin, start with a half-sized tile. Use a tile cutter to cut the piece of tile that fits the designated space.
Step 5: Install An Uncoupling Membrane
After determining the layout of the tiles, remove the tiles and install an uncoupling membrane over the surface. Seal any seams and overlap the edges to create a moisture barrier. This also allows plywood and tile mortar to move separately from each other.
Step 6: Add Thinset
Mix the tile mortar or Thinset based on the manufacturer’s instructions. The Thinset should contain a higher latex content to help in bonding the plywood.
Apply the mortar at the back of the tile, approximately 1/3 inch thick. Using a notched trowel, groove the Thinset.
Use 1/3-inch (7 mm) grooves for standard-sized tiles (about 30 cm2). However, you can adjust the notches in the tile motor based on the size of your tiles. If using smaller tiles, opt for shallow notches. Deeper notches work best for bigger tiles.
Additionally, ensure the mortar covers the entire bottom of the tile when installing the tile.
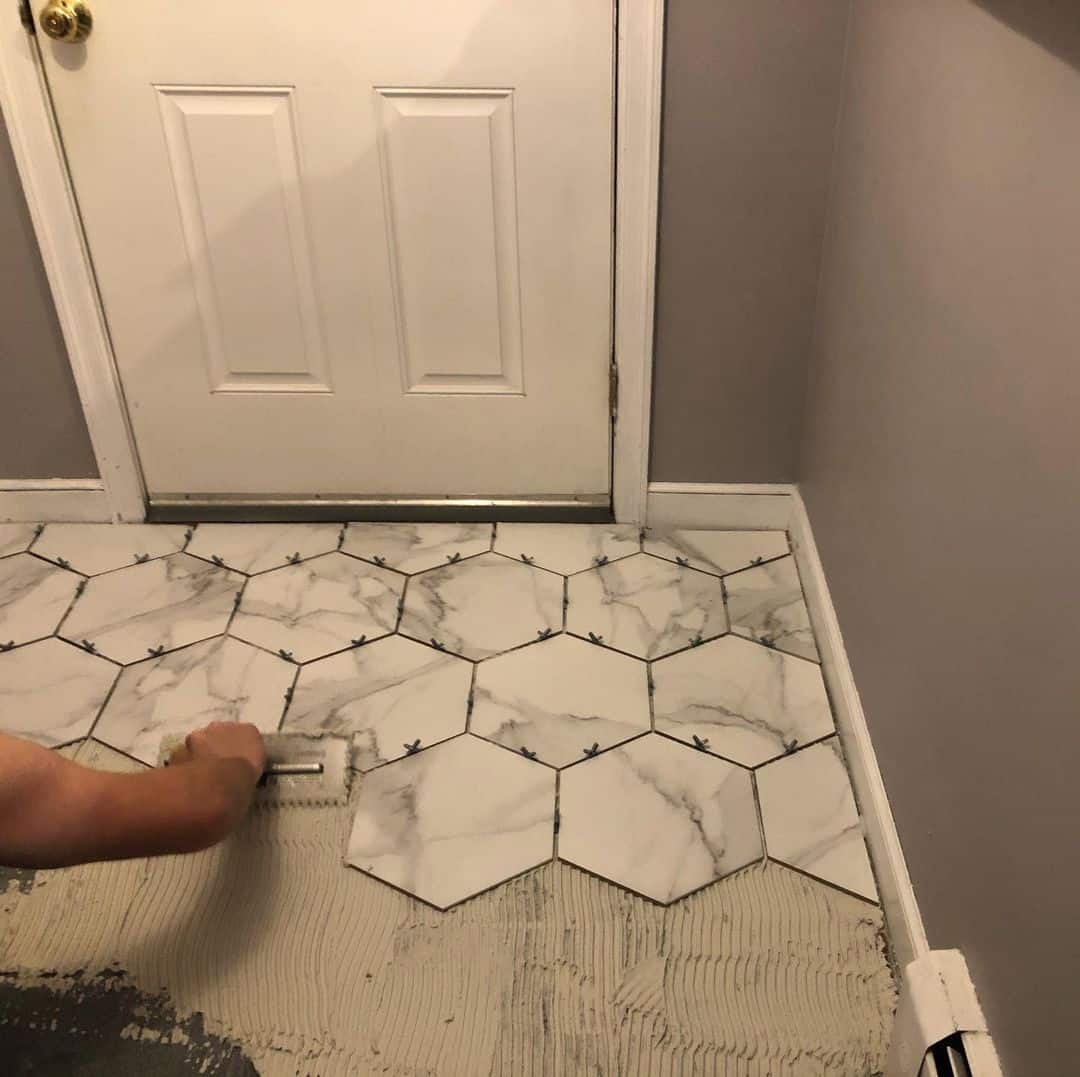
Step 7: Set The Tile
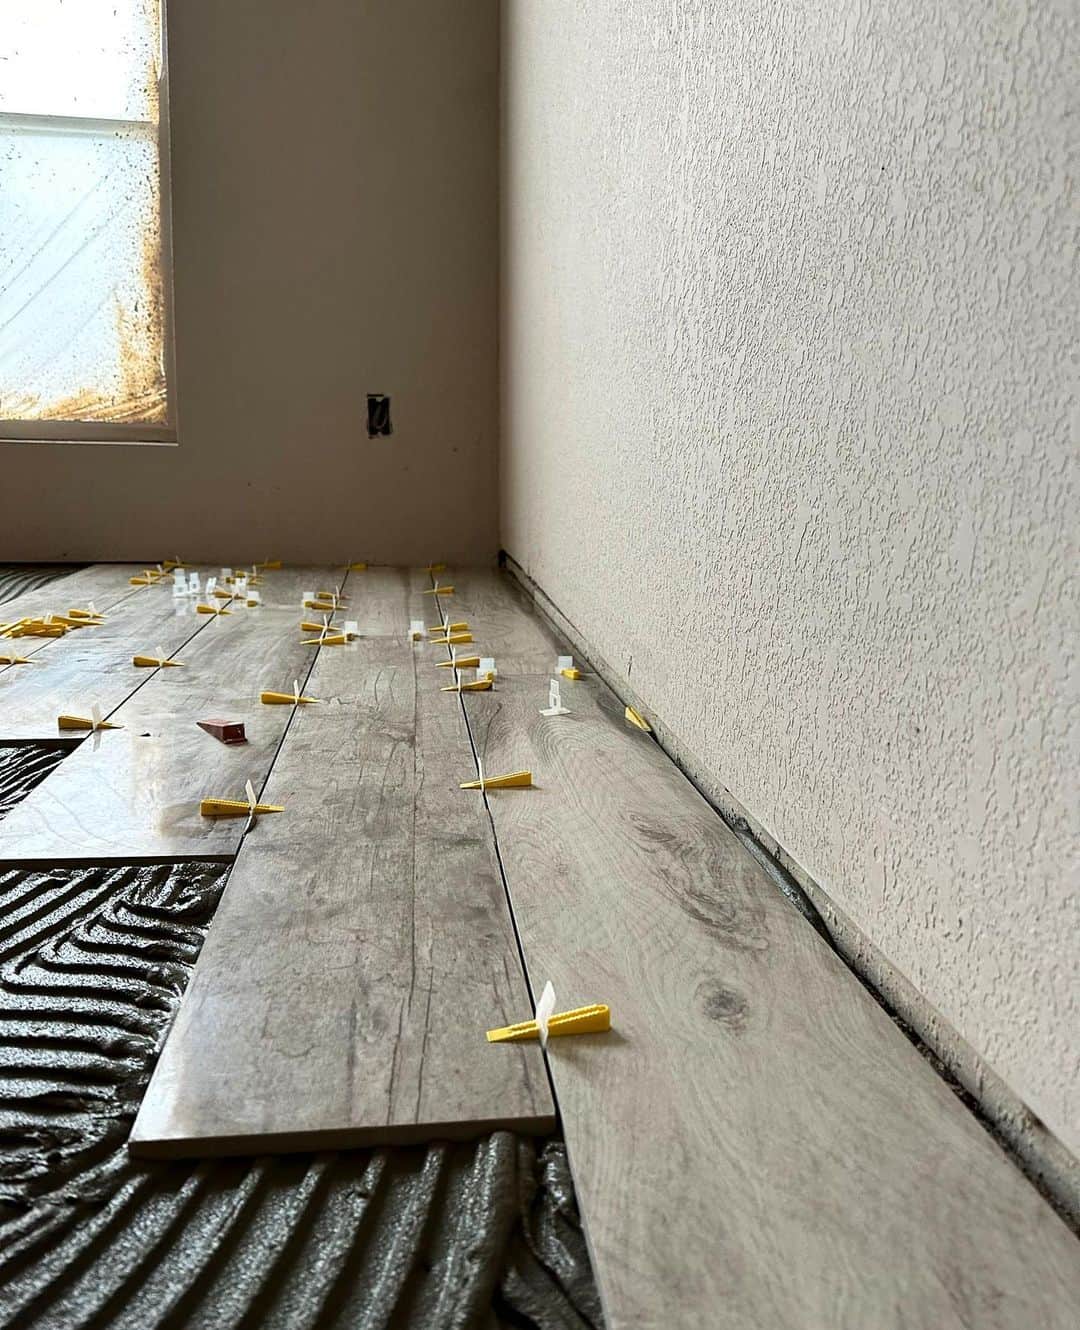
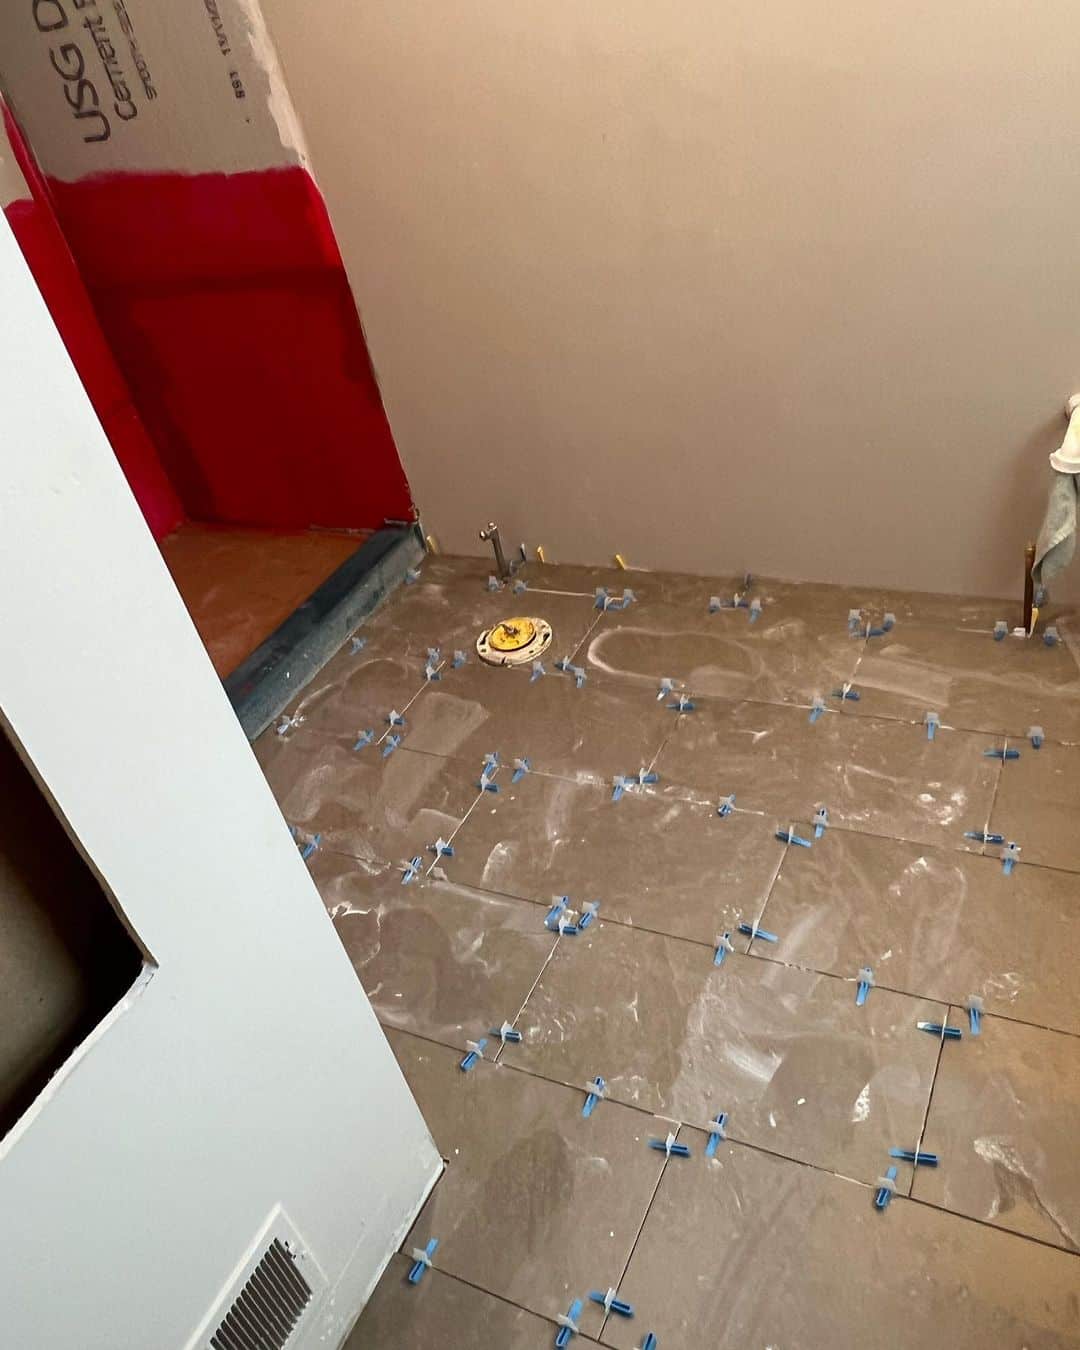
Lay a tile gently on the mortar in the center of the room (working outwards) or along a straightedge. Using your fingertips, push down the tile with a slight twist of the wrist. This helps to prevent lippage (one tile appears lower or higher than its neighbors)
Use spacers to create even spacing between the tiles. You might need to cut the tiles to fit the corners or edges of the room.
After installing all the tiles, leave them for 24 hours to allow the mortar to dry.
Step 8: Grout The Tiles
Once the tile sets overnight, use a scraper to remove any Thinset from the tile surface and joints. In a bucket, mix the grout to a mayonnaise-like consistency.
Scoop a trowelful of grout onto the surface. Use a rubber float held at 45° to spread the grout evenly into the joints between the tiles. Begin from the edges, working your way towards the center.
After 20 to 30 minutes, wipe the excess grout with a damp sponge. Rinse the sponge after every wipe in a bucket of clean water.
Allow the grout to dry completely overnight, then seal it to prevent moisture exposure.
Conclusion
While laying tiles on plywood might seem difficult, it’s not impossible. However, you must ensure the plywood is thick enough to support the weight of the tiles.
You can increase its thickness by adding another layer of plywood sheet or a thick cement backer board. In addition, ensure the plywood subfloor is in good condition.
Follow the steps above to tile over plywood successfully and improve your home aesthetics. But remember, these general steps might vary with the specific tile types, subfloor condition, and adhesive. It helps to consult a professional if you have any doubts.
If you need more clarification, inform us by leaving a comment.