Ceramic tiles can be a nice upgrade from old, worn vinyl or linoleum flooring. But removing existing vinyl or linoleum in order to install new flooring can be a labor-intensive project, not to mention expensive.
For most people, therefore, it makes more sense to lay the tiles directly over the old flooring. If this sounds like you and you would like to learn how to install tile over vinyl or linoleum flooring, read on. We have provided easy guidelines below to help make the process less intimidating.
Supplies Needed to Install Tile Over Vinyl or Linoleum Flooring
Most of the tools and materials listed below can be bought online or from any home improvement store.
- Oscillating sander/random orbital sander: You can use any of these to sand the floor. Random orbital sander, however, will be more appropriate for smaller rooms.
- Knee pads: Wear these to protect your knees.
- Utility knife: Use this to slice out any bulging parts of the vinyl or linoleum flooring.
- Thin skin fabric: This will be your underlayment.
- Putty knife: A putty knife will help you scrape bumps off your vinyl or linoleum flooring or spread materials over the flooring.
- Mortar: Mix a batch of mortar that will be enough to cover the entire surface over which the tiles will be laid. Make sure the mortar is of medium consistency; not too thick and not too flowy.
- Notched trowel: Use this to apply a second layer of mortar. While you could still use your putty knife to spread this layer, a notched trowel is more recommended because it creates ridges over the surface of the mortar, preventing air gaps.
- Ceramic tiles: Get enough boxes to cover the entire floor and an extra box just in case some of the tiles break or get damaged during the installation process.
- Spacers: You will need these to keep the grout lines uniform. If possible, get double-sided spacers that can be used both at the intersection of four tiles or between two tiles.
- Rubber/plastic mallet: Use this to gently tap over each tile to force out any air underneath the tile.
- Tile puck: This simple leveling device will help you identify any high tiles so you can fix them accordingly.
- Grout: Tile grout is used to fill in spaces between the tiles to prevent dirt and debris from getting between and under the tiles.
- Grout float: You will need this to work the grout into the tile joints.
- Sponge/soft rug: Use any of these to wipe excess grout off the tiles.
- Clean water: Use clean, cold water.
- Bucket and mop: You will need these to clean the floor.
- Eye and breathing protection: Wear this to keep dust from sand and cement from entering your eyes and respiratory system.
6 Simple Steps to Install Tile Over Vinyl or Linoleum Flooring
The best vinyl or linoleum to lay ceramic tiles on would be sheet flooring that is fully glued down. If you are doing your installation on glued tiles or planks, make sure none of the boards are loose, peeling, or curling up. Here are the steps to follow to install ceramic tile over a vinyl or linoleum floor.
Step 1: Examine the Floor

Before anything else, make sure your vinyl or linoleum can actually accept ceramic tile and is in good condition. The subfloor and joists supporting the floor structure must also be stiff and free of damages. This will ensure that the floor is able to withstand the substantial weight of the tiles and the mortar holding them in place.
Thin, soft, or damaged subfloors or undersized joists are likely to flex, causing the tiles and grout joints to crack. If your subfloor is too thin or not as stiff as it should be, try installing plywood over the vinyl or linoleum flooring, followed by a thin layer of cement board.
Step 2: Prepare the Floor
If your vinyl or linoleum flooring and its subfloor meet the basic requirements for ceramic tile installation, you can go ahead and start prepping the surface on which the tiles will be laid.
First, you need to thoroughly clean the floor with plain water. Simply pour clean water into a bucket and use your mop to remove dirt, dust, and grease.
Then, using an oscillating sander, lightly sand the flooring to create some texture for the thin skin adhesive to stick to. If you are not working on a large area and you don’t mind kneeling, you can use a random-orbit sander.
Once you are done sanding, wipe down the flooring again with plain water to remove the sanding dust.
Now, check for any protrusions like nails or screws and pound or screw them back into place. If some parts of the flooring are warping, cut out the warped parts with a utility knife.
Your floor needs to be completely smooth before you start your installation. Make sure it is fully dry too.
Step 3: Lay the Thin Skin Material
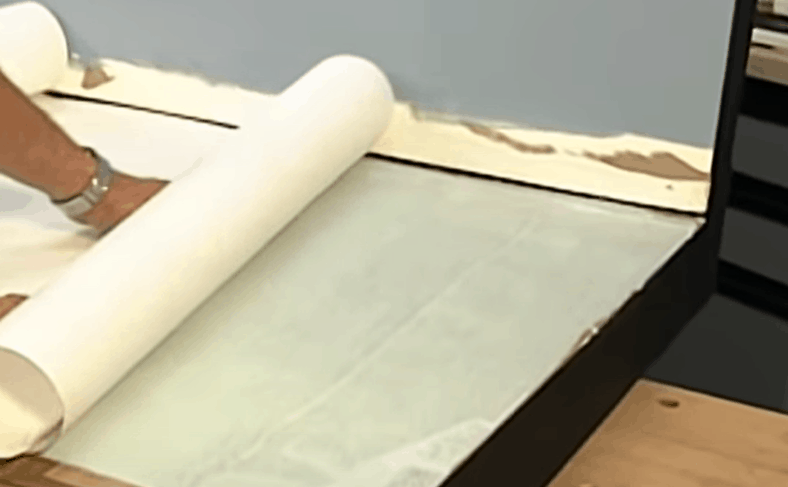
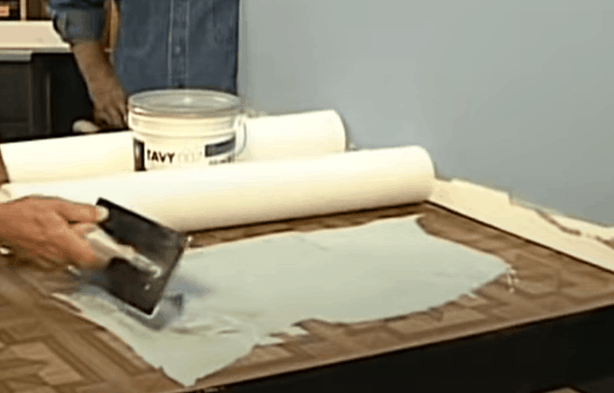
Spread a thin skin fabric over your vinyl or linoleum flooring to provide the ceramic tiles with a surface to sit on. To do this, apply a thin layer of adhesive across the entire flooring so the thin skin can attach firmly to the ground.
Then, using a putty knife, press the skin into the glue to create a surface for spreading the mortar. Leave the fabric for about thirty minutes to give the adhesive enough time to harden and attach the fabric firmly to the flooring.
Step 4: Coat the Thin Skin Fabric With Mortar
Spread a coat of mortar over the thin skin fabric. This layer should be thin enough so it can dry quickly, yet thick enough to bond firmly with the fabric.
Leave the surface for a few hours to dry. The result will be a smooth, masonry surface over which you can lay your ceramic tiles.
This new layer of mortar will literally cover all the dents and blemishes that may make it difficult to lay tiles over your vinyl or linoleum floor.
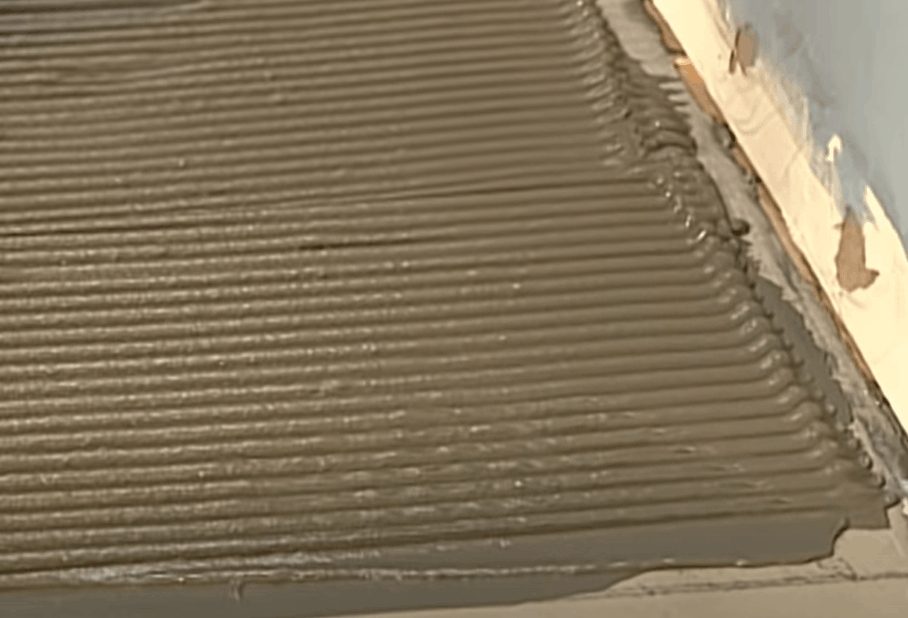
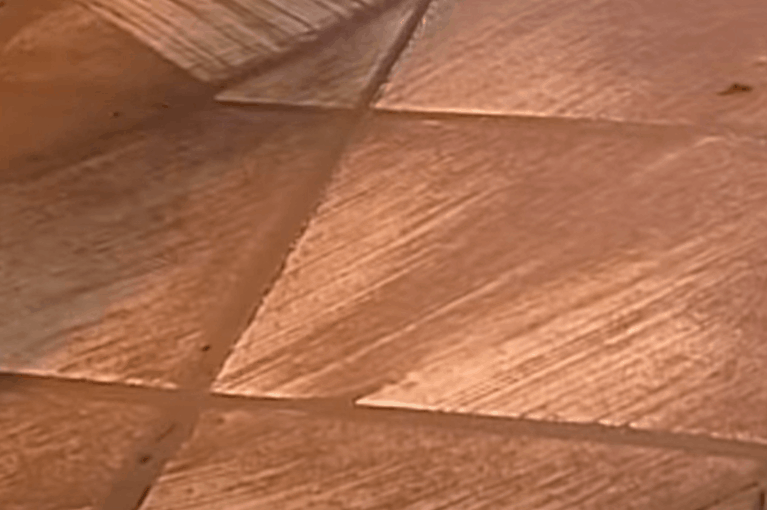
After the mortar is completely dry, use a notched trowel to apply another coat of mortar, making sure to create even grooves across the entire surface. The whole purpose of this step is to prevent air gaps that may cause the tiles to crack down the road.
Step 4: Install the Tiles
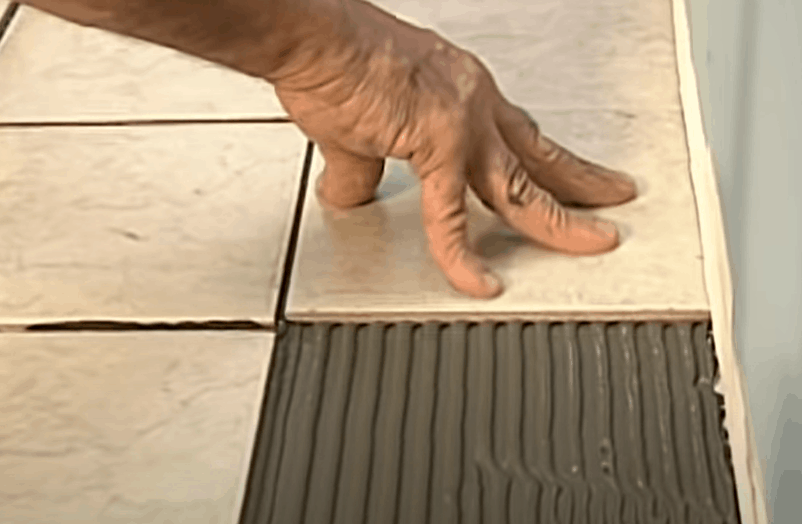
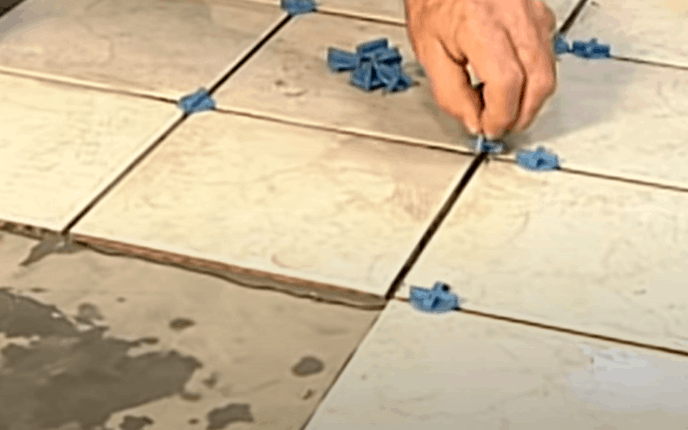
Set your tiles on the mortar when the surface is still fresh. Wiggle each tile lightly as you press it down into position. This will ensure the mortar covers the back of the tile uniformly.
To obtain cleaner edges, place each tile next to the edge of the adjacent tile, then slide it just a little bit away from the adjacent tile to create the right spacing.
As you work across the floor, install spacers at the corner where four tiles intersect or between two tiles. This will help keep the grout lines straight and uniform. Use a plastic or rubber mallet to tap over each tile; it will get rid of any air underneath the tile.
Step 5: Get Rid of Elevated Spots
Once all your tiles are laid, run a tile puck back and forth over the joints to find out if your new flooring is as level as it is supposed to be. If the device finds a tile with a height higher than the adjacent tiles, it will click.
Work your way across all the joints with your tile puck and rubber mallet to make sure your floor does not have any elevated spots.
Step 6: Apply Grout Between Tile Spaces
Using a grout float, apply grout between the tile joints, making sure the float is slanted at 45°. Once you have made the first application, dip a sponge or any soft piece of cloth in water and clean around the joints to remove any grout from the surface of the tiles.
Depending on the thickness of your tiles, you may need to apply the grout a few more times to make sure the joints are completely covered. Clean the area after every application, allowing it to completely dry before the next application.
Do not allow any grout to dry on the surface of the tile, as it will be more difficult to remove afterward.
Once all the work is done, put water in a bucket, add a few drops of mild detergent, and mop your new floor to get rid of any dust or residue grout.
The Takeaway
Installing ceramic tiles without pulling out an existing vinyl or linoleum can save you a considerable amount of time. And this guide is all you need to get everything done from prepping your floor to finally laying your new flooring.
It’s important, however, to make sure that the floor structure itself is in good condition and can support the added weight of tile and mortar. Also, to avoid disappointments, only consider this project if your vinyl or linoleum flooring is glued down.