Did you even know that grouting vinyl tile was an option?
This option is available to you if achieving a more authentic look and feel to your vinyl flooring is your goal. In addition, applying grout to your vinyl tile will provide an additional defense against moisture damage to your flooring.
This article will first explore various grout materials available on the market. Then I will provide a list of pros and cons, including helpful tips and advice on its application, which you can use to help decide whether or not groutable vinyl tile is the right solution for your flooring.
Table of Contents
What is Grout?
In its generic form, grout “fill(s) the voids; it makes the floor, wall, or countertop stronger by bonding the tiles together and prevent(s) the edges of a tile from chipping and cracking.”
Grout, therefore, serves both an aesthetic and functional purpose. You can use a sealant, colorant, or latex additive to achieve the goal that you have for grouting your flooring.
Is All Grout the Same?
Grout is available in cementitious and epoxy versions. As the name suggests, the cementitious version is cement-based whereas, the epoxy version comprises a two-part epoxy.
Because cement is naturally more porous, it is also more prone to cracking and staining. On the other hand, epoxy is waterproof and stainproof due to its non-porous characteristics.
You will want to select the appropriate grout for your vinyl tile to withstand the stress that foot traffic, along with other factors, places on your flooring.
Especially true of vinyl tiles, the corners are susceptible to peeling and lifting. A proper grout job can prevent this unfortunate occurrence.
1. Cement Grout
I want to preface this discussion with a quick side note for your consideration. With either of the below options, it would be wise to apply a sealer to protect the integrity of the grout itself.
Let us first look at the two main types of cement-based grout: sanded and unsanded. Afterward, I will discuss the grout sealer in more depth.
Sanded Grout
Sanded grout is recommended for joints greater than 1/8 inch because the sandy composition makes this grout option denser. Sanded grout gives off a courser finish both visibly and to the touch. In addition, due to its thicker density, sanded grout will better stay inside joints.
Sanded grout is the less expensive option and has excellent anti-shrinkage properties. However, it is best to use sanded grout on horizontal surfaces such as flooring.
Unsanded Grout
What unsanded grout lacks in binding power, it makes up for with its stickiness and smooth finish. As a result, this type of grout is excellent for joints less than 1/8 inch, such as on vertical installations.
Unsanded grout takes more effort to fill the joints between tiles, but this is your go-to if you have a more delicate tile surface because its sand-based alternative can easily scratch vinyl tile, marble, and most mosaics.
Note: Sanded cement grout is preferable for flooring solutions because it is usable for wider tile joints. Although unsanded grout is less durable, this issue is less significant when used with an appropriate sealer.
2. Sealer
Due to the porous nature of cement grout, it would be best to use an approved grout sealer for added defense against moisture penetration. By adding grout sealer, you are also adding color-preserving properties and overall strength to your grout.
You may select between an additive that you mix with the grout itself or decide to seal grout post-installation. Whichever route you go, ensure that the sealer you choose is compatible with the grout you are using.
Additives
Most of today’s grout contains polymer additives for increased strength and flexibility, which provides much improvement over earlier grout options.
The various additives readily available include:
- Sealant additives add strength and bonding power to grout while also protecting against stains and discoloration.
- Colorant additives create an aesthetic appeal for those who want to add extra pizzaz to their tiled area.
- Latex additives increase grout’s flexibility and make joints less susceptible to water penetration.
In most cases, sealant manufacturers will include an anti-fungal and mildew-resistant additive to their mixtures.
3. Epoxy Grout
Epoxy grout is a polymer composite that provides greater flexibility and robust defense against stains and discoloration. Whereas cementitious grout typically requires mixing it with water, you can find several pre-mixed options of epoxy grout.
Epoxy grout does not require any additional sealer. It is also highly durable, waterproof, and resistant against harsh stains and chemicals.
In the past, epoxy has had the reputation of being more difficult to apply due partly to its quick cure time; however, with continuous improvement in mind, manufacturers like Mapei are redesigning products with ease-of-installation in mind.
Epoxy grout is generally more expensive than traditional cement grout; however, its benefits are worth your consideration.
Cleaning Tips for Keeping the Luxury in LVP
Whether you choose to apply cement or epoxy grout to your vinyl tile, adopting a proper cleaning and maintenance schedule for your flooring is critical for maintaining the longevity of your flooring.
Here is a quick list of best practices to follow so that your vinyl tile floors will keep their glamour year after year, no matter what life throws on them.
- Sweep on a regular (daily) basis when possible.
- Spot clean accidents or other harsh spills immediately.
- Mop your vinyl plank flooring once a week.
- Don’t use harsh cleaners on your floor.
Always use manufacturer-recommended cleaners for grout-specific cleaning needs. Usually, a soft-bristle brush, soft cloth, and vinegar solution should do the trick.
Grouting Vinyl Tiles
You can use either cement or epoxy grout with some vinyl tile options. However, since cement grout tends to be more brittle and prone to cracking, it may be a good idea to find an epoxy counterpart.
As I always advise, first consult with your flooring manufacturer to find the most suitable grout combination for your project.
In any case, applying grout to vinyl tile is identical to that of traditional stone or porcelain tile.
Grouting Tools
As with any project you undertake, I imagine that walking away with a good experience will help determine your overall satisfaction. Well then, once you have selected the appropriate materials, it is time to purchase the correct tools.
Here is a quick reference tool checklist if you decide on groutable vinyl tile:
- groutable peel-and-stick vinyl tile
- suitable and manufacturer-approved grout
- tile spacers
- utility knife
- straight-edge
- floor roller
- grout float
- margin trowel
- grout sponge
- bucket of water
- spray bottle
- ammonia-based cleaner (a vinegar solution will also work)
DIY Install
Even if you have no experience in home improvement, be confident that you are fully capable of installing and grouting vinyl tile flooring. The satisfaction from completing a DIY project will leave you empowered and ready to take on the next challenge or item of that dreaded to-do list of a homeowner.
First and foremost, be sure that the vinyl tile you select is groutable. Then ensure you purchase an approved grout such as a pre-mixed TEC Specialty Vinyl Tile Grout for your flooring tile.
Upon installing your peel-and-stick vinyl tile, you will be immediately ready to grout its joints and seams.
- Remove the spacers that you used to secure a proper gap between your vinyl tiles.
- Use a floor roller to ensure adequate adhesion of your vinyl tile to its subfloor. (Loose tiles can cause your grout to crack)
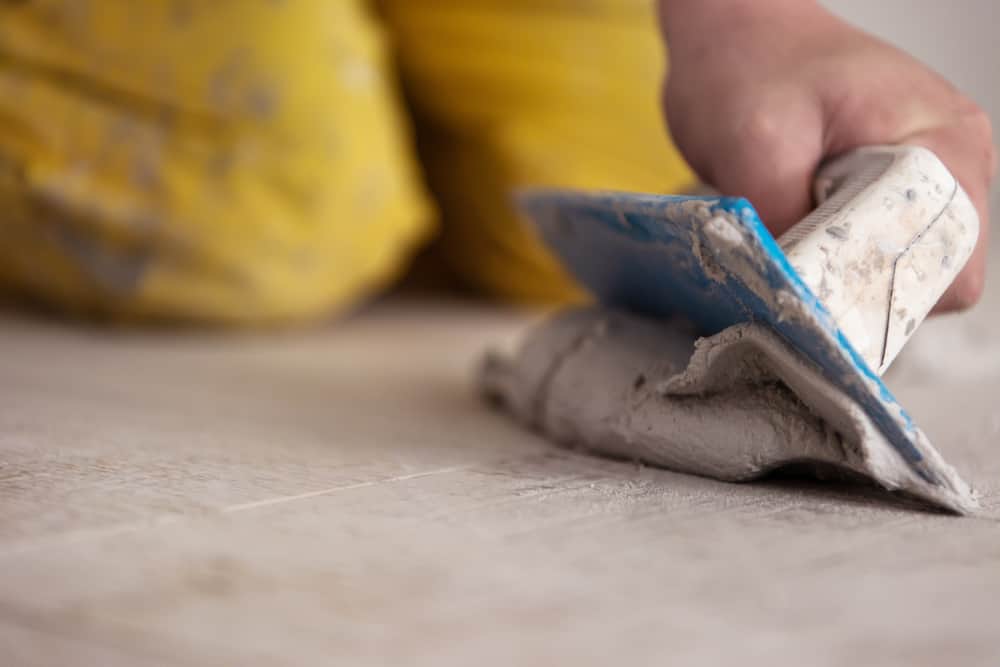
- Apply grout to the grout joints using a grout float.
- Work on small sections at a time.
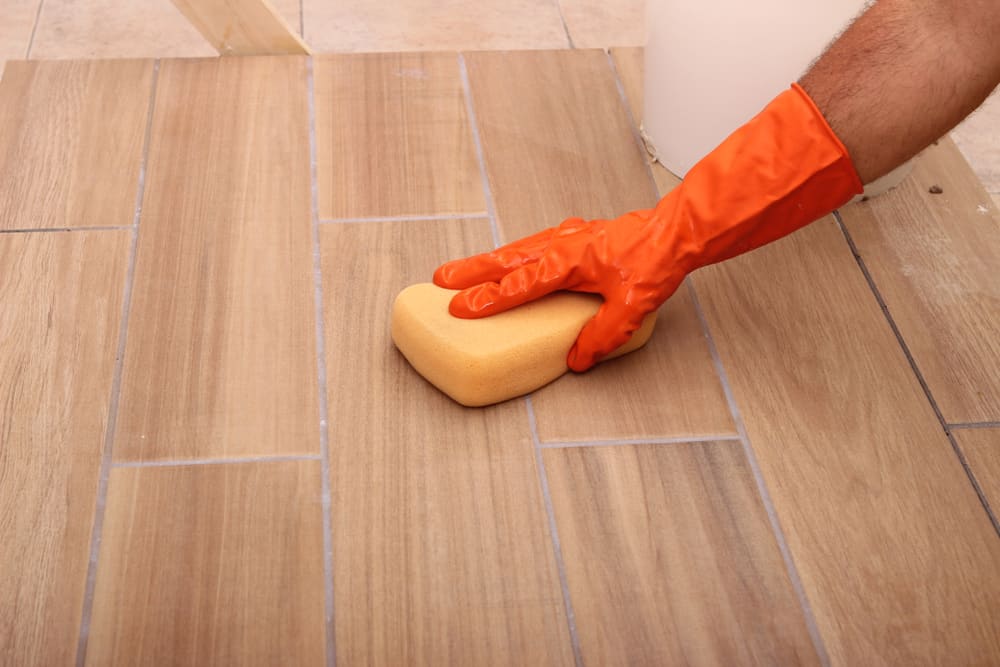
- Gently wipe excess grout from tiles. After an appropriate dry time, use a sponge and gently scrub away residual grout; doing so will remove any unwanted haze.
- Wait for manufacturer-recommended cure time before walking on your newly grouted floors (usually 24 hours).
Pros of Grouted Vinyl Tiles
- Using a groutable vinyl tile adds a sophisticated look and feel to your area. For a fraction of the cost, you can have that stone look you may want to achieve.
- Total installation time is practically cut in half because you can begin grouting immediately. Not necessary to wait for the dry time of traditional stone and porcelain tile.
- Grout provides an added layer of protection against water penetration to your subfloor, which will prevent future damage. Although vinyl tile is waterproof, its joints are not. Therefore, grout is an excellent choice to protect your investment as it sealants the seams between your vinyl tiles.
- Grout adds durability and rigidity to your vinyl tile. If you apply grout properly, it will prevent damage to corners of your vinyl tile (a problem many customers seem to have, especially in wet spaces such as kitchens, bathrooms, and laundry rooms).
Cons of Grouted Vinyl Tiles
- Although vinyl tile is generally a more affordable option than stone and porcelain, material costs can significantly increase the total price of your project if you decide to grout your flooring.
- Careful installation of vinyl tile is critical. Make sure to correctly map out your floor before you remove the backing on your peel-and-stick tile. The self-adhesive backing makes it difficult to adjust after being laid.
In a Nutshell
Vinyl tile is a lighter and less expensive alternative to its stone and porcelain counterparts. In addition, it takes less time to install (even if you choose to grout), and you need no experience should you decide to take on this project.
In addition, vinyl tile is a highly durable and versatile flooring option and provides quality comfort to your underfoot.
Selecting a groutable vinyl tile is a personal preference that you may choose for aesthetical reasons or if you want the added protection for your flooring.
Please feel free to comment below with any questions or concerns regarding vinyl tile flooring and available grouting options.
For vinyl groutable floor tiles should I use a grout sealer once the grout has properly dried?
Although I am not a Professional, as a DIY’er, I WOULD highly recommend it after reading this article. I do believe he mentions to use a Sealer (independently) or a Pre-Mix that has the Sealant added.
Knowing that companies supposedly add a Sealant in Pre-mix, I would (for added protection) use a Stand-Alone Sealer. Why not Double the protection?
Just my $0.02.