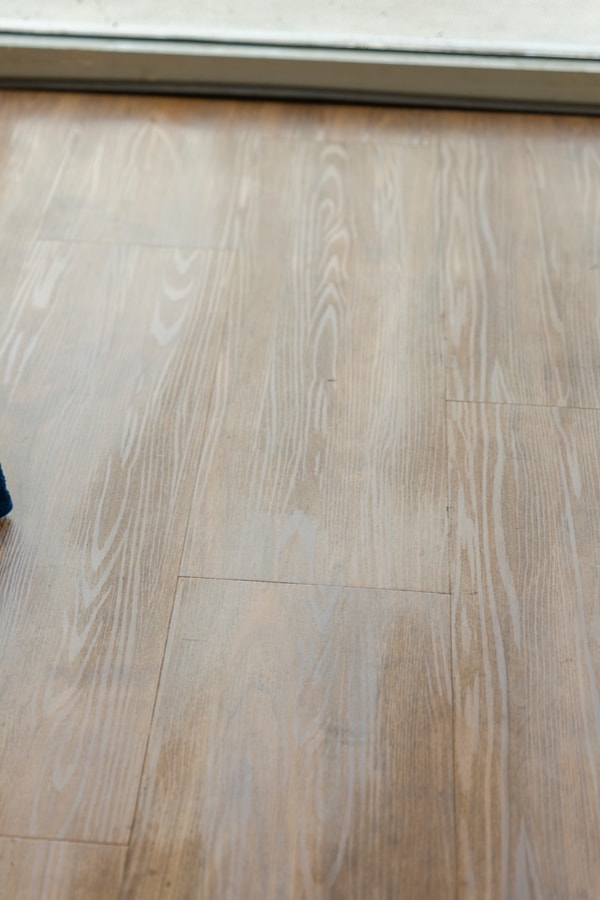
Nowadays, vinyl tiles are an extremely popular material to use for floor surfaces. It’s easy to understand why they’re such a common choice too – because they’re relatively inexpensive, they’re easy to install and require little maintenance once they’re in place.
Many vinyl tile floors don’t need sealing since the tiles line up against each other perfectly, but doing so can help increase the lifespan of your flooring. So for anyone who’s thinking of trying, here’s our guide to how to seal a vinyl tile floor to explain how it’s done.
Table of Contents
Why you should consider sealing your vinyl tile floor
Before we talk about how to seal your floor, let’s take a step back and think about why you should consider doing it in the first place.
As we’ve mentioned, many vinyl tile floors are designed to be laid without the need for sealing – the tiles simply fit together and are held in place by adhesive.
Furthermore, sealing tiles is a boring job, and it’s also quite labor-intensive – you can expect to spend a couple of days completing the job, depending on which of the steps you need to follow.
There’s also the cost of buying the sealing product – it’s not expensive, but it’s still not free – and once it’s done, the tiles will also be harder to remove when you want to give your floor a fresh look.
However, sealed floors will last longer, and sealing a floor will make it more resistant to wear and damage. Since sealed floors will last longer, applying sealant will also save you money in the long run since your floors won’t need replacing as often.
Pros of sealing a floor
- Makes it tougher and longer lasting
- Increases resistance to wear and tear
- Protects against water damage
- Makes it easier to clean
- Saves you money long-term because it needs to be replaced less often
Cons of sealing a floor
- Time-consuming and boring job
- Costs money
- Makes it more difficult to remove tiles later
Different approaches and situations
There are a couple of approaches to sealing vinyl tile floors, and there are different situations when you might choose to do so – so it’s a good idea to be clear about the details to help you work out the best methods for your needs.
You may choose to seal your vinyl floor when you lay it new, or you may choose to seal it later when wear begins to show.
Alternatively, you may also want to reseal a floor that was sealed previously to restore the protective properties of the sealant.
Another decision you face is whether to seal the whole floor or just the seams.
If you seal the seams, it will stop dirt and grime becoming encrusted in the gaps and will also make your floor more water-resistant, protecting against spills and water damage.
Sealing the whole surface, on the other hand, will provide all the benefits of sealing the seams but will also protect the surface of your floor, ensuring it looks great for longer.
It is also possible that you need to seal individual tiles as a way of repairing them when they are damaged or start peeling up.
Once you understand how and why you want to seal your floor, you can then get started with the work.
Sealing the whole floor
For maximum protection, you can seal the whole floor. Here are the steps to follow:
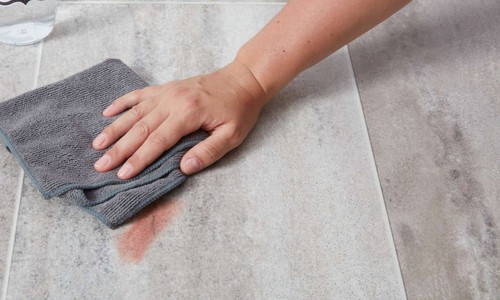
Step 1. Clean the floor and prepare it for sealing

It is important to make sure the floor is completely clean and free of dust and dirt before you start the sealing process.
Begin by sweeping the floor with a regular soft-bristle broom to pick up the worst of the dirt and follow this by wiping it clean with a microfiber cloth to ensure no dust is left on the surface.
Once this is done, use a vacuum cleaner to clean out the seams to make sure nothing remains between the tiles.
Step 2. Remove existing polish or wax from the surface (optional)
If you are sealing a newly laid floor, you can skip this step, but if you a sealing or resealing an existing floor, you will need to remove any wax or polish that remains on the surface of the tiles.
To do this, once you have cleaned all the dirt and dust from your tiles, you need to wash the surface with vinyl floor stripper.
You’ll need to follow the instructions on the bottle of the product you’re using, but generally speaking, this will involve mixing the product with warm water wiping the floor with a mop.
Once you’ve wiped the whole floor with the solution, mop the floor again with warm water to clean the surface. You may need to repeat the procedure several times if the layer of wax or polish is particularly thick.
After you are satisfied that there is no more wax or polish to remove, let the floor dry and then move onto step 3.
Step 3. Apply the sealant
Using a suitable cloth – like a lambswool finishing pad – apply the vinyl sealer evenly over the surface of the floor.
It’s important to work slowly, carefully and methodically to ensure you don’t miss any spots. If you try to go too fast, you also risk creating bubbles in the sealant.
When you have applied the sealant to the whole surface of the floor, leave it to dry for 10 hours or overnight, as recommended in the instructions for the product you are using.
Step 4. Clean again and reapply a second coat
When the sealant is dry, wipe the surface of the floor again with your microfiber cloth and reapply another coat of sealant as in Step #3. You may need to repeat this a third or even a fourth time, depending on the product you are using.
Sealing the seams only
If you decide you only need to seal the seams rather than the whole surface of your floor, here are the steps to follow:
Step 1. Clean the floor

Before applying the sealant, you need to clean the floor as in Step #1 above. Sweep with a broom, clean with a microfiber cloth and then vacuum the gaps between the tiles.
You need to pay special attention to the seams because you don’t want any dust or debris to remain when you apply the sealant.
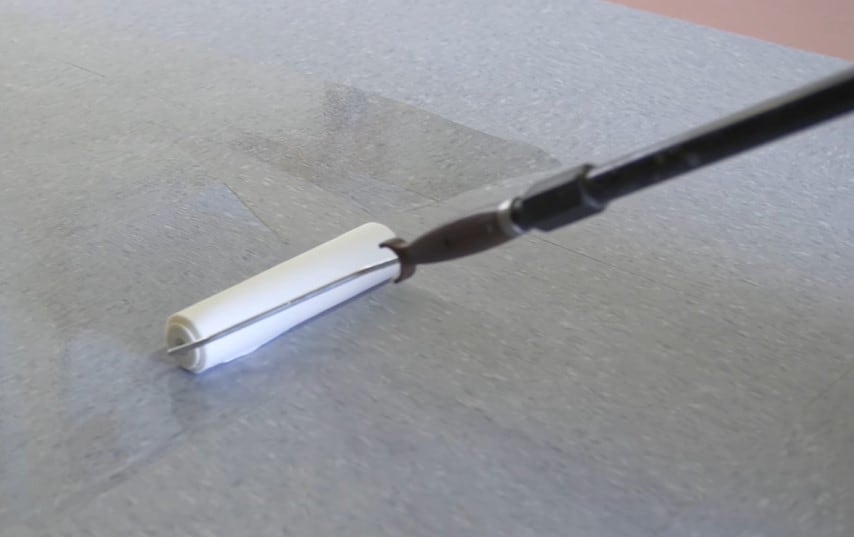
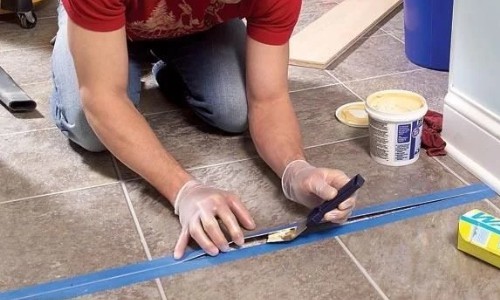
Step 2. Use a straightedge to apply sealant into the seams
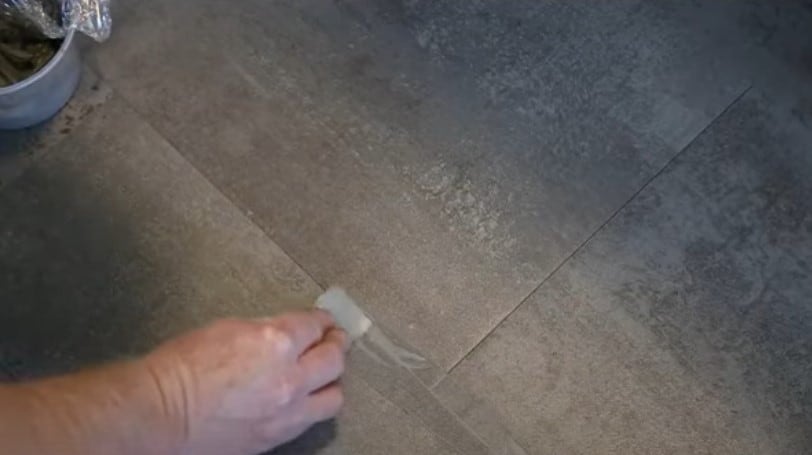
Once you are ready to apply the sealant, use a straightedge to guide you. Place it about ¼” from the seam and carefully apply the sealant as required.
Work around the whole surface of the floor, using sealant to fill all the seams and then let it dry completely before you walk on it.
Repairing vinyl tiles with adhesive and sealant
If your tiles begin to peel up or become loose, you can repair them by using adhesive to fix the tiles back in place and then sealing them again. Here’s how:
Step 1. Clean the area thoroughly
Clean the tiles you need to repair thoroughly, making sure there is no dirt, dust or grime encrusted in the seam.
You can also peel back the tile slightly to scrape off any loose adhesive from beneath the tile, although you don’t need to scrape off all the old adhesive.
Step 2. Protect the top of the tile with masking tape
Place a strip of masking tape along the top edge of the tile. This will prevent any adhesive from oozing out and marking the tile when you push it down into place.
Step 3. Apply adhesive under the tile
Apply some adhesive beneath the tile and push the tile down into place. Wipe off any adhesive that comes out through the seam with a cloth.
Once you have cleaned off any excess adhesive, place a strip of plywood along the seam and weigh the tiles down with something heavy like some bricks. Leave it to dry overnight.
Step 4. Apply the sealant
Once the tiles are fixed firmly in place and the adhesive is dry, remove the weights and the masking tape and use a straightedge to help you apply the sealant as in #2 above. Leave to dry – and the job’s done!
Tips and tricks
Here are a couple of tips and tricks that will help you get the job done:
- Take action early
If a tile is damaged or peeling back, take action early. The longer you leave it, the worse it will become, which may make the repair job more difficult.
- Use a hairdryer on stiff vinyl tiles
If your tiles are stiff and hard to peel back, you can use a hairdryer to warm them up and make them more pliable.
- Use masking tape to protect furniture etc.
When applying sealant to seams or whole floors, you can protect furniture, walls and other items you don’t want to damage by applying masking tape before you start working.
- Choose an appropriate sealant
When choosing a sealant, make sure you use an appropriate product for your floor. For example, if you have imitation stone vinyl tiles, applying sealant with a sheen will cause the tiles to appear more plastic and less authentic.
An easy job that’s worth doing right
As you can see, sealing a vinyl tile floor is not difficult – it just takes a bit of time and effort. However, it will be time well spent, and doing a proper job of it will help protect your floor and keep it in optimum condition for longer.
Your article explains how to seal a vinyl tile floor, but it makes no mention of what type of sealant to use. Could you please offer the names some suitable products?
I agree with Leslie! I need to know what kind of sealant and adhesive. There is nothing at Lowes or Home Depot that says it is for sealing vinyl tiles.
I would also like to know what sealant to use.
What kind of sealant do I use?
what is the name of the sealant to be applied to the vinyl floor after cleaning up the floorm?