A subfloor is an essential part of any room in your home. Though invisible, it acts as a supportive base for tiles, laminate, and wooden floors, protects them from moisture build-up and cold temperatures and fixes them in one place.
Because the bathroom is one of our home’s coldest and wettest rooms, the subfloor is essential in keeping everything in place. But at some point, it will need repairing and replacing.
This article will explain how easy it is to replace your bathroom subfloor. Regardless of your skill level, we will share our top tips and tricks to ensure you can replace your floor with little to no worries!
Table of Contents
Before you replace the subfloor
Like any DIY task, there are certain things you need to do before you begin to set yourself up for success.
You don’t want additional water surging through pipes or fixtures, causing more water damage and trouble. Turn off the water valves connected to your bathroom. If your bathroom isn’t separated from the rest of your home’s plumbing, turn off your home’s water system.
Next, remove any fixtures from the bathroom, including the toilet and sink. A small amount of water may surge from pipes as these are removed. This is just the water pressure being released. Use a sponge and soak up any spillage.
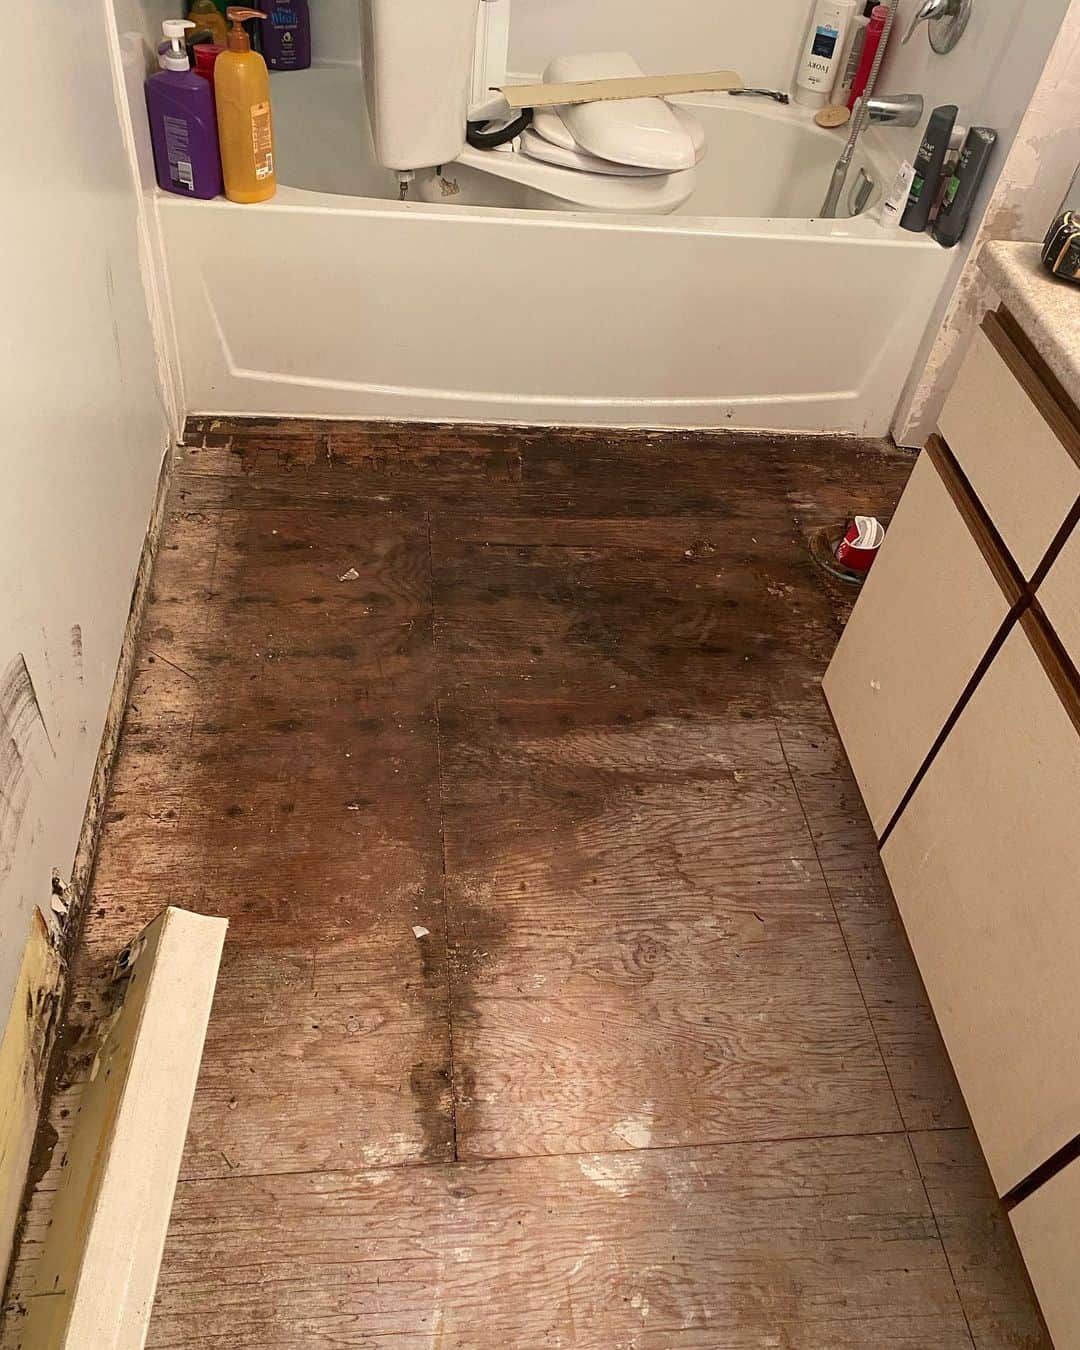
Finally, begin to remove the floor covering. You only need to remove enough material to expose the damaged subfloor fully.
5 Steps on replacing your bathroom subfloors
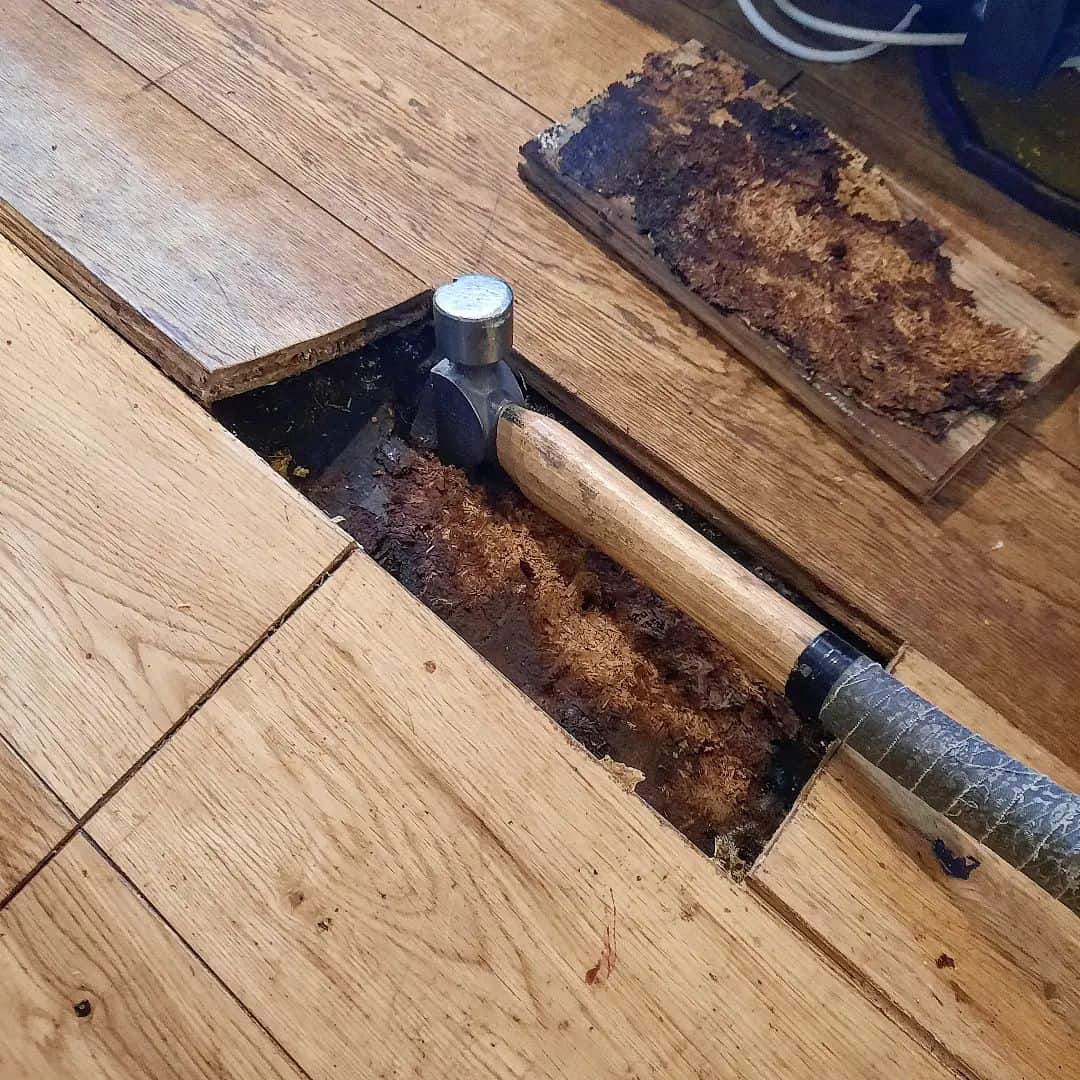
1. Locate the floor joists and which direction they run in
A joist stretches between your room’s foundations and supports the weight of the floor. They will all run in one direction. You can quickly locate the beam by placing your hand underneath the subfloor (as seen in the above video) or using a snake drain with a camera attached.
It is essential to see if any nearby electrical wires or pipes can cause problems if struck. Map these out and avoid them at all costs.
2. Begin to cut away the damaged subfloor
Now that you’ve mapped out the nearest joist, it’s time to cut away the damaged subfloor. You do not want to cut over the joist, so be careful not to overextend yourself. A typical beam will measure 1 ½ inches in width.
Using a circular saw, gently cut into your flooring and remove sections piece by piece until all the damaged material has been removed. A typical subfloor is ¾ inch thick, so adjust your equipment accordingly. Once cut, use a pry bar to remove nails attaching the damaged subfloor to nearby joists.
3. Install sister boards around the perimeter of the area
Sister boards are especially important if you replace subflooring in the corner of your bathroom. This is because there won’t be joists supporting the new subflooring on one or more sides, e.g., the external wall.
To solve this problem, nail sister support boards perpendicular to the nearby joists. Nail two or three supportive frames together until they extend into the open space. Repeat on every side until a “frame” surrounds the area.
4. Cut your subfloor
Using a measuring tape (or the old subflooring you’ve removed), plot the template you need to cut from your new subfloor material. Align the new piece over the damaged part; it should fit without visible gaps.
Secure your new subfloor with deck screws, ensuring they make contact with the sister boards underneath. You can also use wood glue to ensure the new subfloor stays in place.
Once you’ve secured the perimeter of your new subfloor, clean the area.
guelph_lake_contracting
5. Allow to dry, and set new flooring
Once you’ve secured the perimeter of your new subfloor, clean the area thoroughly and allow it to dry if you have used adhesives. The final part of this process is laying the bathroom flooring over your subfloor material.
Tap both the new and old parts of your bathroom floor, and listen to see if they produce the same sound. You can gently step on your newly installed flooring to see any shift in your tiles or laminate.
What causes problems with a bathroom subfloor in the first place?
Below, we’ve listed five of the most common ways to identify the root cause of your problem.
1. Squeaky tiles? Your joists have become loose
If your bathroom floor begins to make squeaking sounds as you put weight on it, this is a tell-tale sign that the underneath subfloor has become loose from nearby joists.
This is often a result of the distorted subfloor, and the nails holding it are now out of position. When inspecting the area, look for any signs of leakage or moisture that could be causing this problem.
2. Foul smell? Your subfloor is rotting from water damage
If your bathroom tiles feel normal but smell bad, this can be an early sign that your subfloor is beginning to rot underneath. Given the location, the cause of this rot will almost always be water-related.
When removing your bathroom floor, examine the subflooring closely to see the leak’s extent. Chances are it will be concentrated around or nearby a pipe that has become loose.
3. Loose, cracked, or bubbling tiles suggest the subfloor has become detached
The subfloor should be flat and level throughout your rooms. It can push your flooring upwards if it becomes distorted, warped, or detaches from the supportive joists.
The problem with bathroom floors is that when this happens, it almost always cracks your tiles in several places, as unequal pressure is applied to them. Sadly, when this happens, you will most likely need to replace not just your subflooring but your actual floor too.
peresreno
4. Wood cupping suggests you have a moisture problem
Some bathrooms might have wooden floors. Instead of cracking, wood might instead “cup.” This is when the material absorbs moisture unevenly, swelling on just one side. The result is a “ridged” look across your floor, where every piece of wood resembles a jigsaw.
Depending on the severity, restoring wood without replacing the subflooring may be possible – if you act quickly. Vacuum up visible water in your bathroom, and use a dehumidifier to gradually saturate the wood and return it to its original form. That said, you must address the source of this moisture build-up to prevent it from happening again.
5. A leaking ceiling suggests major problems upstairs
If you have an upstairs bathroom, any leaks will often appear in the ceilings of the rooms downstairs. Usually, you see dark, patchy circles begin, expanding slowly.
The cause of this leak might not necessarily be your subfloor – it could be a nearby burst pipe. But you should still act quickly to ensure that any nearby subfloor section doesn’t become damaged.
What is the best type of floor material to use?
We highly recommend opting for one of the following materials:
- Plywood: Made from gluing wooden layers together, plywood has impressive resistance to humidity and moisture. That said, prolonged exposure will cause it to warp and swell.
- Enhanced plywood: This has additional water-resistance coatings, making it even better at resisting moisture, humidity, and leaks. That said, it will cost you more.
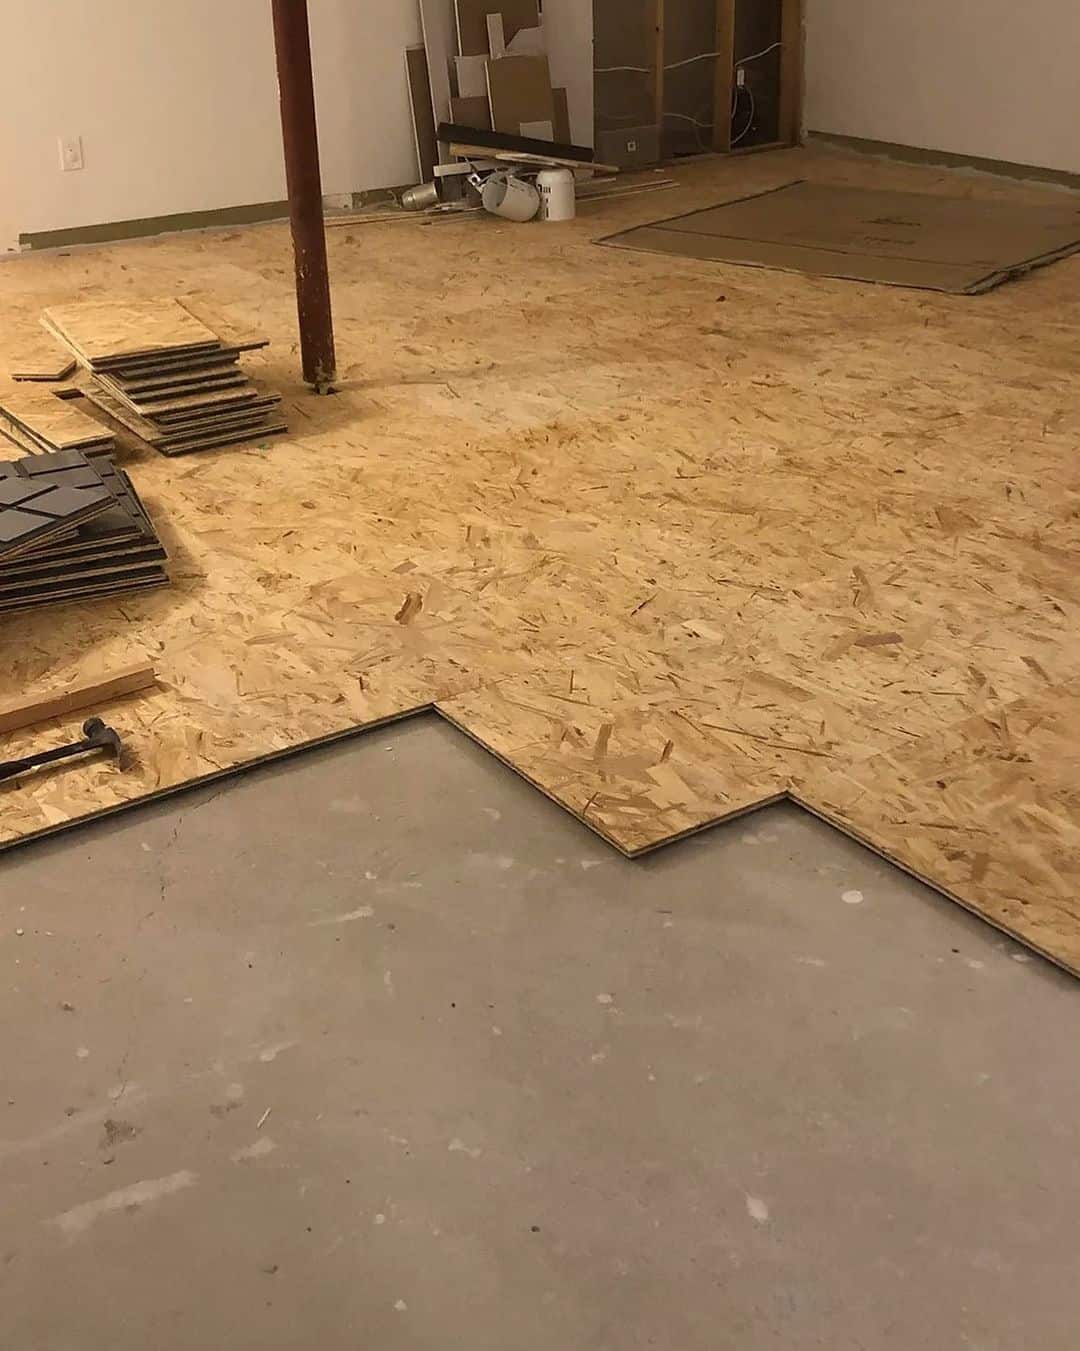
- OSB: Oriented strand board is an engineered wood that, like plywood, is a series of wood layered on each other with adhesive. It also performs on par with plywood, though it is often cheaper.
- Enhanced OSB: Again, this type of subfloor is on par with enhanced plywood, promising additional water-resistance coatings.
pearwoodps
Expert Tips
- A subfloor can last between 20 to 30 years. Use this as a way to measure your floor’s condition.
- Always turn off the water connected to your bathroom to avoid water spillage.
- Scout the nearby area for any electrics or pipework. You do not want to cut these during your repair work accidentally.
- Wear protective clothing, as removing rotted or broken flooring can be incredibly dirty.
- Remove tiles as you go and use clear markings to diagnose and map the extent of the rotted floor.
- Ensure that a nearby joist is properly secured to secure your new subflooring—drill support boards in place to bridge any gaps.
- Subfloor repairs take time – plan to have your bathroom out of commission for two to three days, especially if the room needs to be dried out.
- If the damage to your subfloor is extensive and spreads into other rooms, consider contacting a professional for advice.
- A contractor usually charges $3-10 per square foot of flooring material or $25-30 per hour.
Conclusion
For many homeowners, seeing their bathroom floor damaged can be very upsetting. Not only do they think of the rising costs, but also the amount of time and effort it takes to identify the problem and fix it.
As our article shows, repairing and replacing your bathroom subfloor is relatively straightforward – once you follow a tried and trusted method.
If you still have questions about the process or have expert tips to share, please leave a comment.
If in doubt, remember:
- Common signs your subfloor needs replacing are sunken or loose parts, a musty smell, and bubbling appearing. Old age is another factor.
- Switch off water valves and identify nearby pipes and wires near the affected areas.
- Connect your new subfloor to nearby joists or support boards to hold it firmly in place.
This step-by-step guide by What Is Vinyl is a lifesaver! I recently tackled a bathroom subfloor replacement, and their advice on locating floor joists and dealing with potential issues like loose joists and water damage proved invaluable. Following their expert tips, especially the reminder to turn off water valves and scout for nearby electrics, made the process surprisingly manageable. What Is Vinyl’s clear instructions and practical insights turned a potentially daunting task into a successful DIY project.