Laminate flooring is a great alternative to hardwood floors because they are cheaper and more durable, which makes them great for high-traffic areas. However, like hardwood, vinyl is prone to scratches and even water damage.
So, if you want to know how to fix laminate flooring, keep reading! In this article, we show you how you can fix your beautiful laminate floors, whether they are barely scratched or have significant damage.
Table of Contents
Tools You’ll Need
- Floor Repair Kit
- Rag
- Cleaning Solvent
- Fine-grit Sandpaper
- Utility Knife
- Circular Saw
- Drill
- Hammer
- Pry Bar
- Measuring Tape
- Putty Knife
- Gloves
- Safety Glasses
Detailed Steps To Fix Laminate Flooring

Whether you installed your laminate floors yourself or paid to have them installed, it can be upsetting when you discover they are damaged.
If the damage is small, such as scrapes or scratches, you will likely be able to remedy the problem fairly easily.
However, if you have significant water damage from excess water sitting on your floor for too long, you will have a bigger repair project on your hands. In either case, here are the best ways to repair laminate flooring.
Step 1: Assess The Damage
The first step is to assess the damage. This will let you know not only what tools you will need for the project but also how much money you will need to invest. Carefully look over your floor, and note which parts have damage.
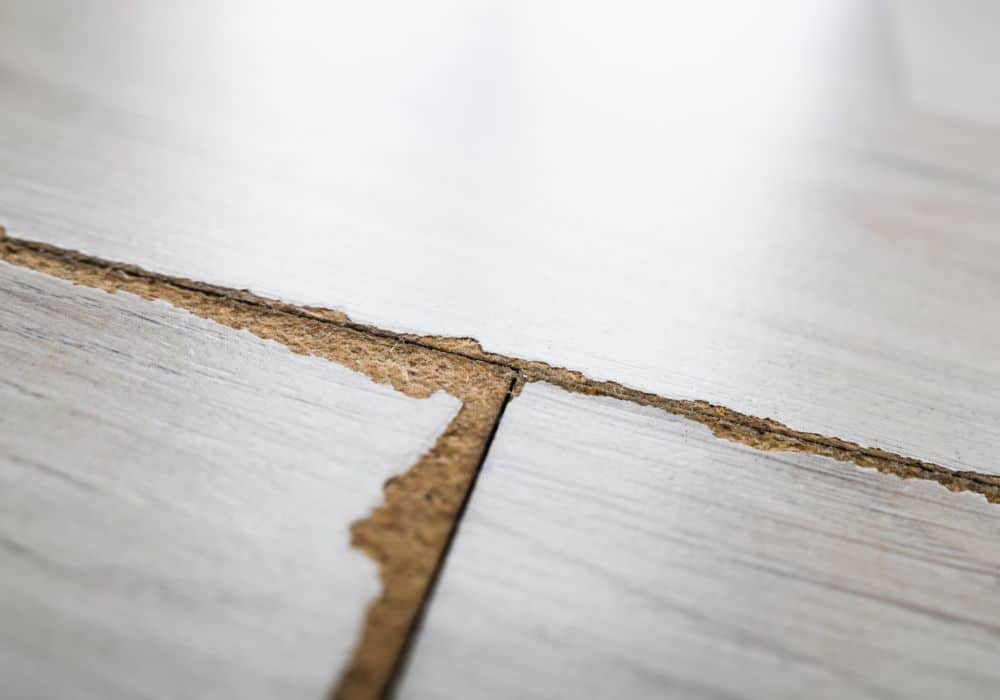
Water damage occurs when the water has penetrated the surface of the laminate flooring. Since laminated flooring is made out of fibreboard that contains some wood materials, it expands when it comes in contact with moisture.
You can tell if your floor has water damage by looking for swollen spots and places that may look uneven or blistered, especially near the edges between the joints.
Scratches, on the other hand, are merely on the surface and haven’t significantly damaged the components of the board itself.
Step 2: Repair minor damages
For slight damage, such as scratches, a universal repair kit should do. If the damage is more severe, skip to the next step.
You can find repair kits at your local home improvement store, and they come in various types. Some come with markers and wax pencils, and others with wax or putty. If your floor has multiple shades in it, you may have to purchase two kits to make sure you have the right color for the scratches.
Start by cleaning the damaged surface with a cleaning solvent or acetone. For light scratches, a marker or wax pencil will do just fine. Gently fill in the scratch until you can not see it anymore, and you are done.
For deeper scratches or holes, you will need to use wax or putty. Follow the manufacturer’s instructions to mix the putty, then apply it lightly to the scratch or hole. Lightly sand the surface with fine-grit sandpaper to even the putty with the rest of the floor, then apply a thin coat of varnish to protect it.
Pro Tip: Carry a piece of your laminate flooring with you to the store to ensure you get the kit that best matches your flooring.
Step 3: Ensure You Have Enough Extra Pieces
If the damage to your laminate floor is more severe, you will have to replace the planks. The first step to replacing the planks is to ensure you have enough laminate planks to replace the old ones. If you installed the flooring yourself, you likely have a few boxes left over.
If you do not have any extra planks, you will need to find some that match. The best option is to remove a piece of your flooring and take it with you to the hardware store. You can consult a professional that can help you find the exact match or one close to it.
Keep in mind you will likely have to buy at least one whole box of flooring, even if you only need a couple. After you know you have enough planks for the project, it makes it time to get started.
Step 4: Remove The Boards
Starting From The Wall
If the damage is near the wall, you will start by removing your baseboards.
Gently pry off the baseboard closest to your damaged planks using a pry bar or the claw of a hammer. Make sure you don’t damage the boards when removing them, as you will need to reattach them after you have fixed your flooring.
Next, pry out the first piece of planking closest to the wall. Most newer laminate flooring is installed using a tongue and groove structure where they are not glued down but snap together and float over the subflooring.
Simply unsnap the damaged planks one at a time, or unsnap each plank until you get to the damaged one. Make sure you set the boards aside in case you need to measure them.
If you have older laminate flooring that is glued in place, you may have to pry all of the boards up instead of unsnapping them.
Removing from the middle
If the damage is closer to the middle of the floor, it may be better to cut the planks out instead.
You will need to use a circular saw to cut the boards. Start by setting your saw to the thickness of your flooring. Use tape to mark the plank 1 inch from the top and bottom and cut between these lines.
Cut the plank directly down the middle, then pry the board up using a pry bar or putty knife.
Step 5: Cut The New Planks To Fit
Before you install the new planks, you will need to make sure they fit. If you start from the wall, you may be able to simply snap in the new boards. However, most boards right next to the wall are cut to fit the area.
To do this, measure the old boards and write them down. Then mark your new boards where they should be cut. Use your saw to cut the plank to the correct measurement. You may need to use a utility knife to trim some of the tongues.
Step 6: Install The New Planks
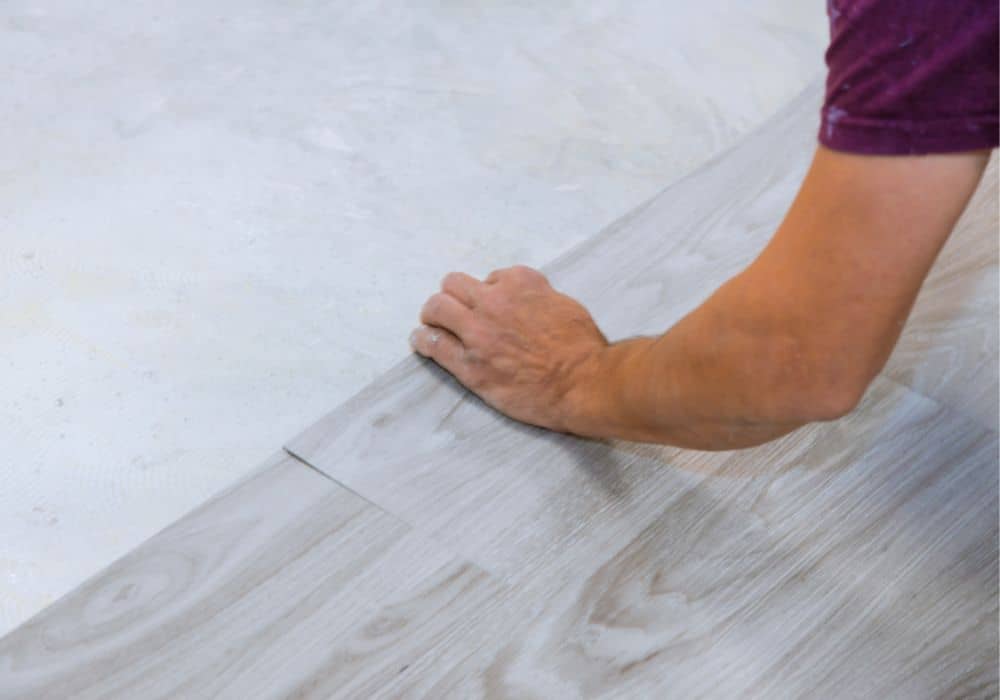
Now, it is time to install new planks. If you didn’t make cuts, you could simply snap your new boards together to lock them into place.
If you do need to make cuts, you will need to apply glue to the surface of the subflooring, then gently fit the new plank into place and apply pressure.
Clean up any excess glue from the area, then apply a heavy board over the area and let it sit for 24 hours to give the glue enough time to dry.
Step 7: Reattach Your Baseboards
If you cut your planks from the middle of the room, you are done. If you took them off starting from the wall, it is time to reattach your baseboards.
If your baseboards are without damage, simply use a drill to secure your baseboards back in place.
If you accidentally damage your baseboard, you will need to replace them. Just measure the height of your old baseboard, then measure the width from wall to wall. If you want to change the style of your baseboard, this is a great opportunity to do so.
More Helpful Information
- While most floor repairs can be an easy DIY project, there are times when you may need to hire a professional for the job, such as if there is excessive water damage covering a large area or you have an infestation, such as termites.
- If your planks were laid with glue, you may want to chisel any remaining glue leftover from the old boards before securing your new boards.
- Always remember to read the manual before operating major tools like a saw. These can be dangerous if not handled correctly.
- Make sure you are wearing appropriate gloves and safety glasses to ensure you don’t hurt yourself when starting any DIY project.
- If your flooring is buckling because it is uneven, you should have all of the floor taken up and level your flooring before reinstalling the flooring
Conclusion
While damage to your laminate floor can catch you off guard, there are a few ways to fix your floor so that you won’t be able to even tell it happened to begin with. We hope you found this article helpful!
If you have any questions or comments, please let us know in the comment section below. We love to hear from our readers!