Are you planning on embarking on a tiling project? Then you need to get hold of the right tools – specifically the ones that professional tilers use.
To make sure that your tiling job goes perfectly, you’ll need to gather all the things from this essential tiling tools list:
Essential Tiling Tools List
1. Tile Cutter
This tool, which also goes by the name of the snap cutter, comes with a platform equipped with a frame and a cutting wheel. It can help you make straight glazed tile cuts while indoors.
There are different types of tile cutters, with prices varying according to platform size and/or cutting material (tungsten carbide or hardened steel.)
To use manual tile cutters, you need to place your glazed tiles on the platform. Make sure that the edge is flush for this will hold your piece down.
Next, press the cutting wheel on the tile to score it. With the use of a cutter lever, you can easily split the tile apart.
2. Tile Nippers
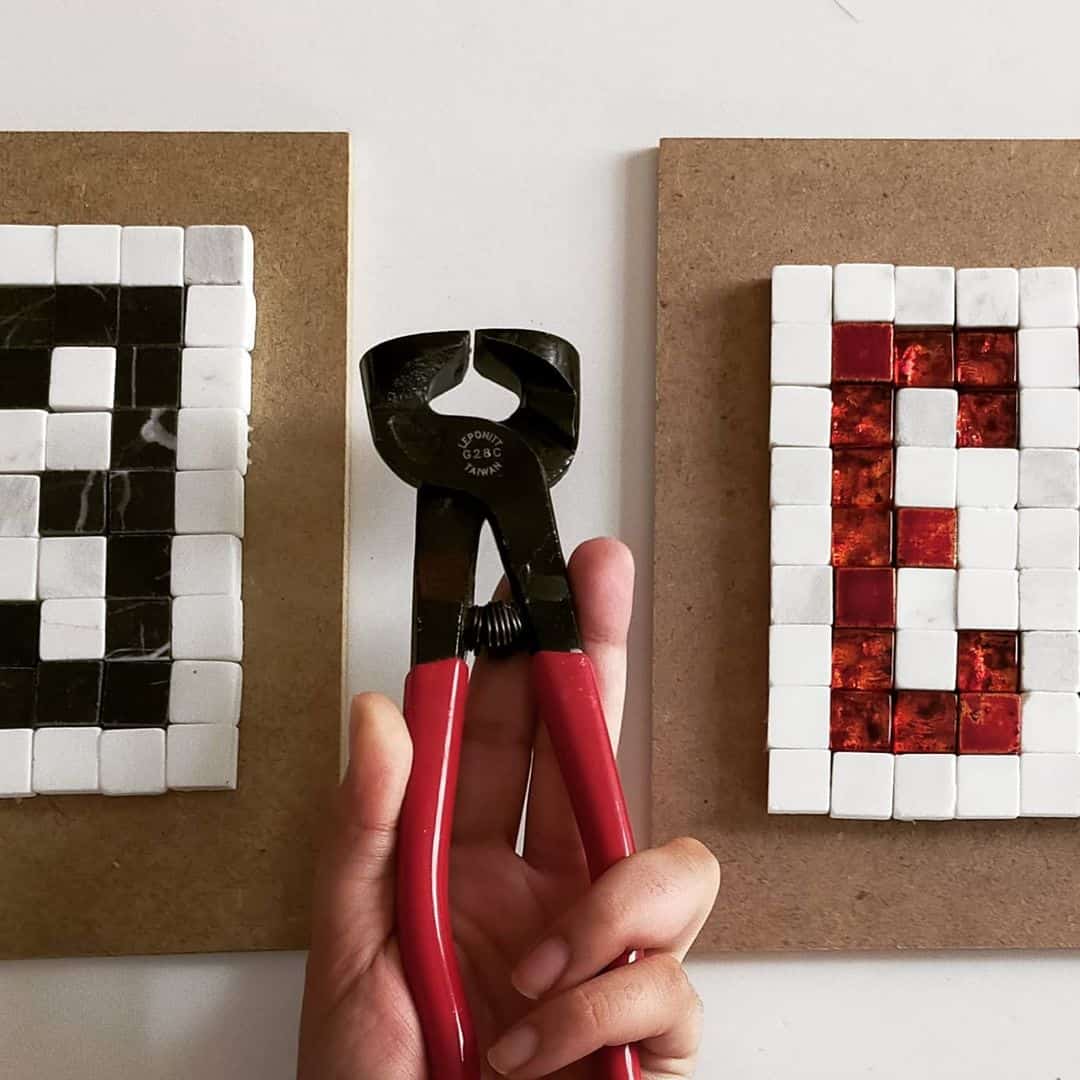
rehamayamarts
Nippers are tools you can use to cut irregular or curve-shaped tiles or remove thin edge strips. Likewise, they can help you create unique designs as inscribed on the tile surface.
Shaped like pliers, nippers often come with one flat jaw and one curved cutting jaw. The latter keeps the tile in place by latching onto its bisque layer.
Some styles, on the other hand, are designed with two cutting jaws.
Remember: nippers work best if the area has already been scored with a tile cutter.
3. Wet Tile Saw
If you have the money to spend, then be sure to include a wet saw in your tool list. The good news is you can easily rent/loan one!
A wet saw is equipped with a circle-shaped saw that is affixed to a frame. It also comes with a water-filled trough, which keeps the blade cool by spewing jets of water.
With the help of wet cutting, you can fashion thicker tiles quickly. Additionally, it can help you make smooth curves on other tiles.
4. Diamond Blades
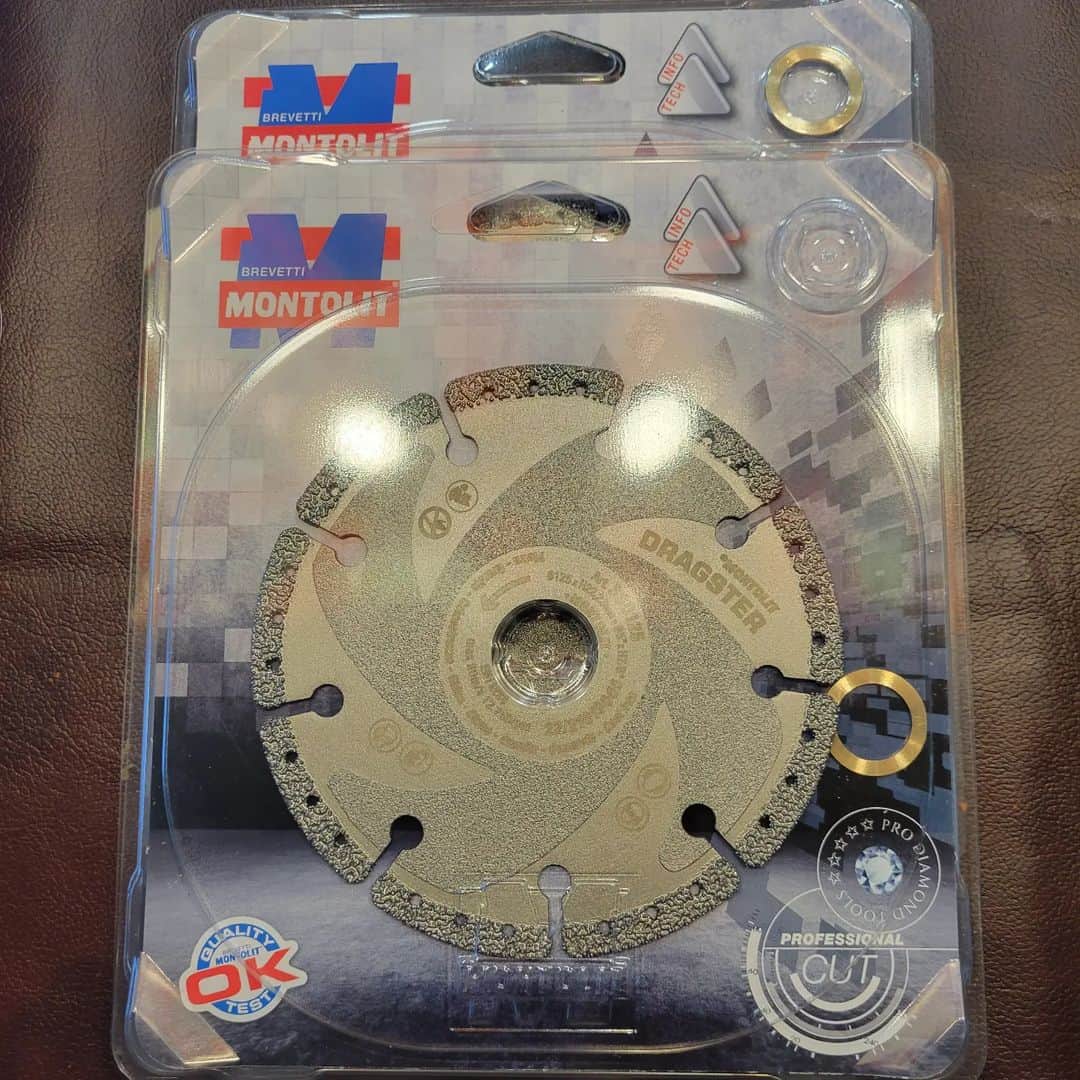
k_nardonecustomtilework
Diamond blades are attached to wet saws to make clean tile cuts.
Such action is made possible by its synthetic diamond particles. They make for a sharp cutting blade, which is why they can be used for most types of tiles – be it porcelain, ceramic, granite, or marble.
When buying diamond blades, be sure to pick one that matches the tile you wish to install. For example, the blade you use for cutting a ceramic tile may not be applicable for a porcelain tile – the latter is sturdier, of course.
5. Diamond Drill Bits
If you need to punch holes in your tiles (especially the porcelain ones), you’re going to need drill bits as well. They come in varying diameters, thus allowing you to create any hole size you want.
When purchasing diamond drill bits, it’s imperative to choose ones with a wet-cutting feature. That way, you won’t end up producing a lot of dust (and noise) as you make your holes.
6. Tile Scribe
If you want to make straight cuts, you need to mark them accordingly. That’s why you need to invest in a good tile scribe, which allows you to label the area you wish to cut.
Here’s a good video on how to use the tile scribe.
For best results, remember to use it with the item I’ll discuss below.
7. Straight Edge
As mentioned, a straight-edge tool can help you mark the tiles accurately. But it can do more than just guide you in inscribing, for you may end up using this tool in other projects as well.
8. Tile Nippers
Tile nippers can help you cut weird angles that don’t need to be as precise. Although they can be harder to use compared to the other cutters in this list, there are times when only nippers can do the trick.
To use, first make straight cuts – with the use of a tile cutter – near the area you wish to nip. Afterward, you can cut the irregular angles as you deem fit.
9. Tile Rub Stone
When you use any of the cutting tools above, you may end up leaving rough edges on the tiles. Not only will these rip your clothes, but they may end up hurting you as well.
To prevent such accidents from happening, it’s wise to keep a tile rub stone (or two) on hand. As the name suggests, this will help you smooth out the tile edges.
10. Notched Trowel
A notched trowel helps disperse adhesive material on the surface of a small area. With the help of this adhesive, mastic, or serrated trowel, you can create ridgelines with which you can attach the tiles.
The trowel’s action is made possible by its flat blade with a notched spreader. Depending on the manufacturer’s discretion, it can be configured squarely or triangularly.
Since the notched edge comes in varying styles, you must be careful when picking one. As such, make sure to read the tile manufacturer’s instructions for tile installation.
11. Grout Float
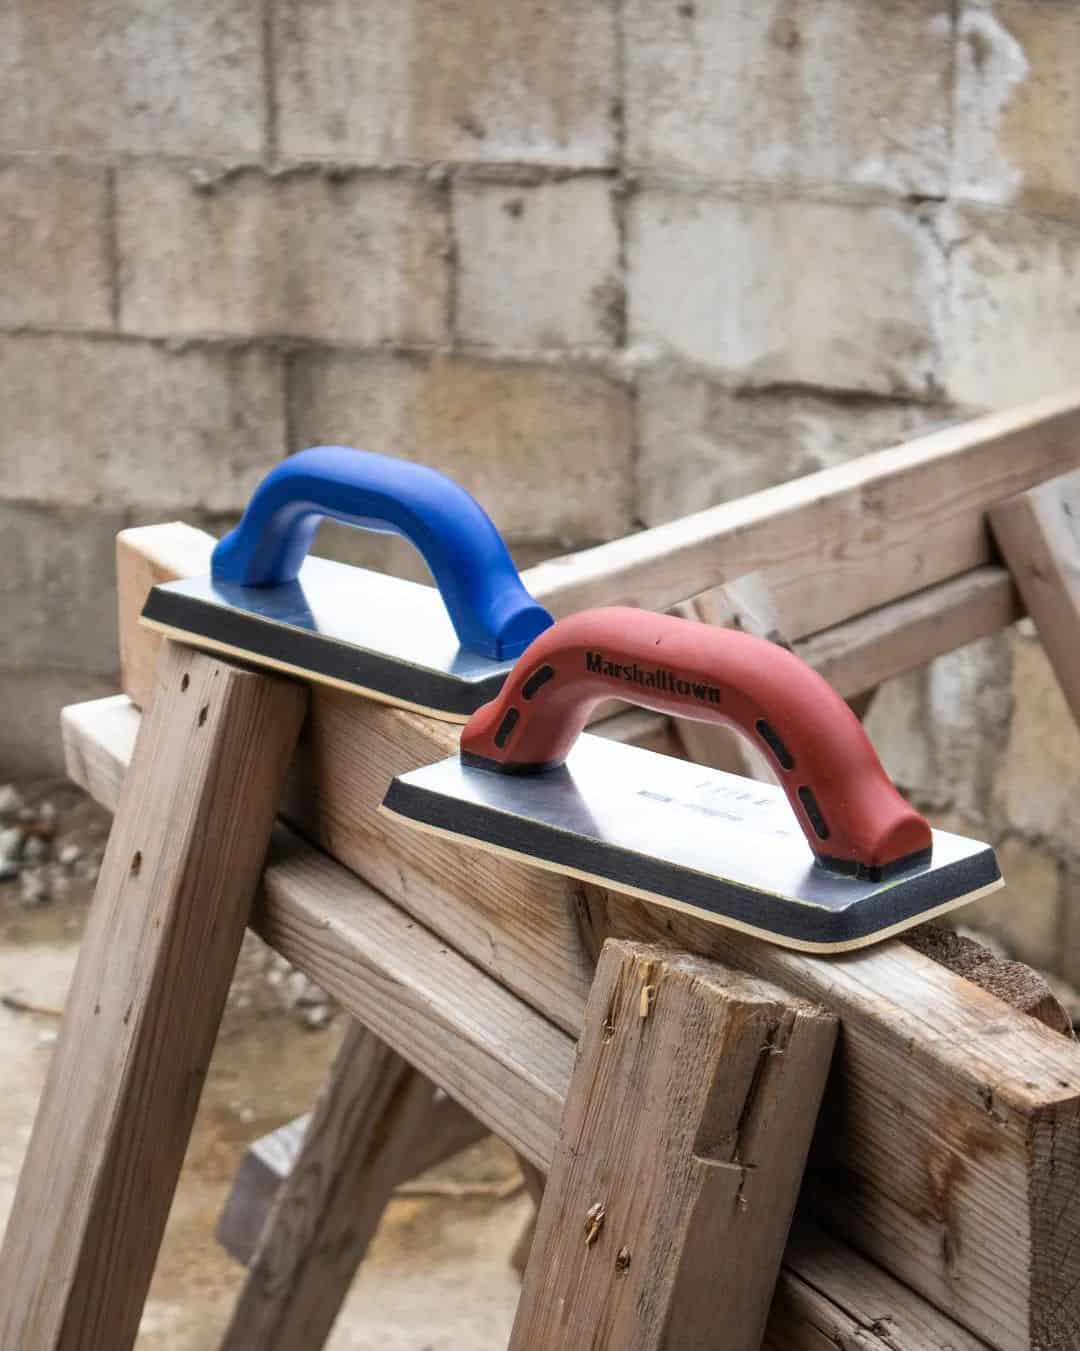
gn_distribution
Once you have ‘glued’ your tiles and left them in place for 24 hours, you may proceed with grouting. While you can do so with the help of a sponge, the best way to go about it is by using a grout float.
This tool comes with a rubber float and a body made with wood or other durable material. It can be used for unsanded or sanded grout, though you will need to use epoxy grout if you’re planning on using the said material.
Like a trowel, you need to sweep it across the area while holding the edge at a low angle. For best results, remember to apply some pressure as you do so.
12. Grout Sponge
While it’s best not to do grouting with a sponge, you’ll still need one to clean up the grout you’ve placed. Enter the aptly-named grout sponge, which is bigger and denser than the usual sponge you’ll see in the market.
Although you may use other materials for this task, there’s no denying that a grout sponge does the best job possible.
13. Paddle Mixer
If you’re not going to use premixed grout for your tiling job, you’ll need to get a paddle mixer. It comes with a grip that secures it while you mix grout material.
A paddle mortar mixer can help you combine powdered material with water quickly, as doing so manually will take a lot of time. Moreover, doing so can lead to lumps that negatively affect the grout’s adhesive properties.
14. Tile Spacers
Tile spacers help you keep the proper distance between your tiles.
Many types are available, with measurements ranging from 1/4 to 3/8 of an inch. That said, the best one to have is that with 2-millimeter joints. This will come in handy for ceramic tiles, whether large-format or rectified.
As a bonus, 2 mm spacers are more resistant to damage (i.e., smashing or bending.)
15. Chalk Line
A chalk line is a tool that can help align your tiles.
To use this, you first need to remove the excess chalk by snapping the line. Next, place it against the area you wish to mark. Pull the line and snap it once.
Hold the line down the center if you need to mark a long area. Snap one side before proceeding with the other. According to this video, this technique will ensure that the entire area is marked accordingly.
16. Tile Leveling Tool
As the name suggests, this tool helps level tiles – especially the ones placed on the floor. Without this, floor tiles may come out uneven. For example, one edge can end up higher – a phenomenon known as lippage.
Leveling problems can lead to many issues, such as a feeling of ‘unevenness’ or dirt catching under the ‘lip.’ Worse, it could lead to tripping accidents!
To use a tile leveler, all you need to do is insert braces in the tile spacers. Doing so will apply pressure on the tiles, thus keeping them leveled.
Of course, remember to remove this tool before grouting!
17. Rubber Mallet
There comes a point in your project when you’ll need to pound on the tiles. To do so safely, you’ll need to use a rubber mallet. It can help you ‘hammer’ the tiles into place without chipping them.
18. Rubber Bucket
Although a rubber bucket isn’t deemed essential by most, it actually is. Not only is it a great place to mix your materials, but you can also use it to transport other items. Best of all, it’s easier to clean compared to plastic containers.
Conclusion
If you plan on doing some DIY tiling, you’ll need to have the right tile tools. They are:
- Tile cutter
- Tile nippers
- Wet tile saw
- Diamond blades
- Diamond drill bits
- Tile scribe
- Straight edge
- Tile nippers
- Tile rub stone
- Notched trowel
- Grout float
- Grout sponge
- Paddle mixer
- Tile spacers
- Chalk line
- Tile leveling tool
- Rubber mallet
- Rubber Bucket
Once you’ve gathered all of them, you won’t have a problem with your DIY tiling project!