So, recently you remodeled your bathroom and noticed some white-colored haze on your freshly installed tiles! Very often, some grout is left out on your tiles, which creates cloudiness and ruins the overall effect and aura of the bathroom.
Although you might be tempted to think he is some excess from your soap scum, in most cases, it is not, especially if you had the tiles installed recently. The grout usually appears several days after the installation and hardens over time.
It is vital that you deal with this problem the moment you see it because removing the grout will be a very challenging task if it gets rock solid. These grout stains are very different from the usual dirt and grime that accumulate due to everyday use.
So, let’s check what causes grout and how to remove it.
What Causes Grout?
As you might already know, grout is a composite material made of water, sand, and cement. When the contractor applies the grout to tiles or other surfaces, it happens that they use too much grout and forget to remove the excess.
Then you try to remove it yourself using a sponge and water. However, you might notice certain stains forming as you wipe the grout off the tiles.
The tricky part is that it often looks clean, and only a couple of days later, you will see that you have not removed it properly. The most problematic is the sand or the minerals, which remain on the tiles after the water dries out.
How to Prevent Grout?
During the process of remodeling and tile installation, clean the entire area very diligently. The grout is caused mainly by the incorrect or sloppy removal of the excess grout after the process is finished.
While cleaning the grout, make sure that you are using a sponge or cloth and clean water. If you notice minerals floating in the water, that is your clue that the tiles are still not clean.
Furthermore, you will have to rinse the sponge very well because these minerals or particles tend to stick to it and are very hard to remove.
Methods for Grout Removal
Before we dive into the methods of removing grout, there are a couple of things that you need to determine first.
- What kind of tile material do you have?
Certain tile materials are not suitable for every cleaner out there, and there is a chance that you might damage it by applying the wrong or highly abrasive cleaner.
For example, you can expose ceramic or porcelain tiles to cleaners such as white vinegar. However, we do not suggest that you try it with slate tiles.
- What kind of grout is used between tiles?
You are probably, thinking that all grout is the same. Well, not really. There are certain types of grout such as epoxy grout which is known for its incredible strength and chemical resistance. This means that cleaning this type of grout is even more challenging.
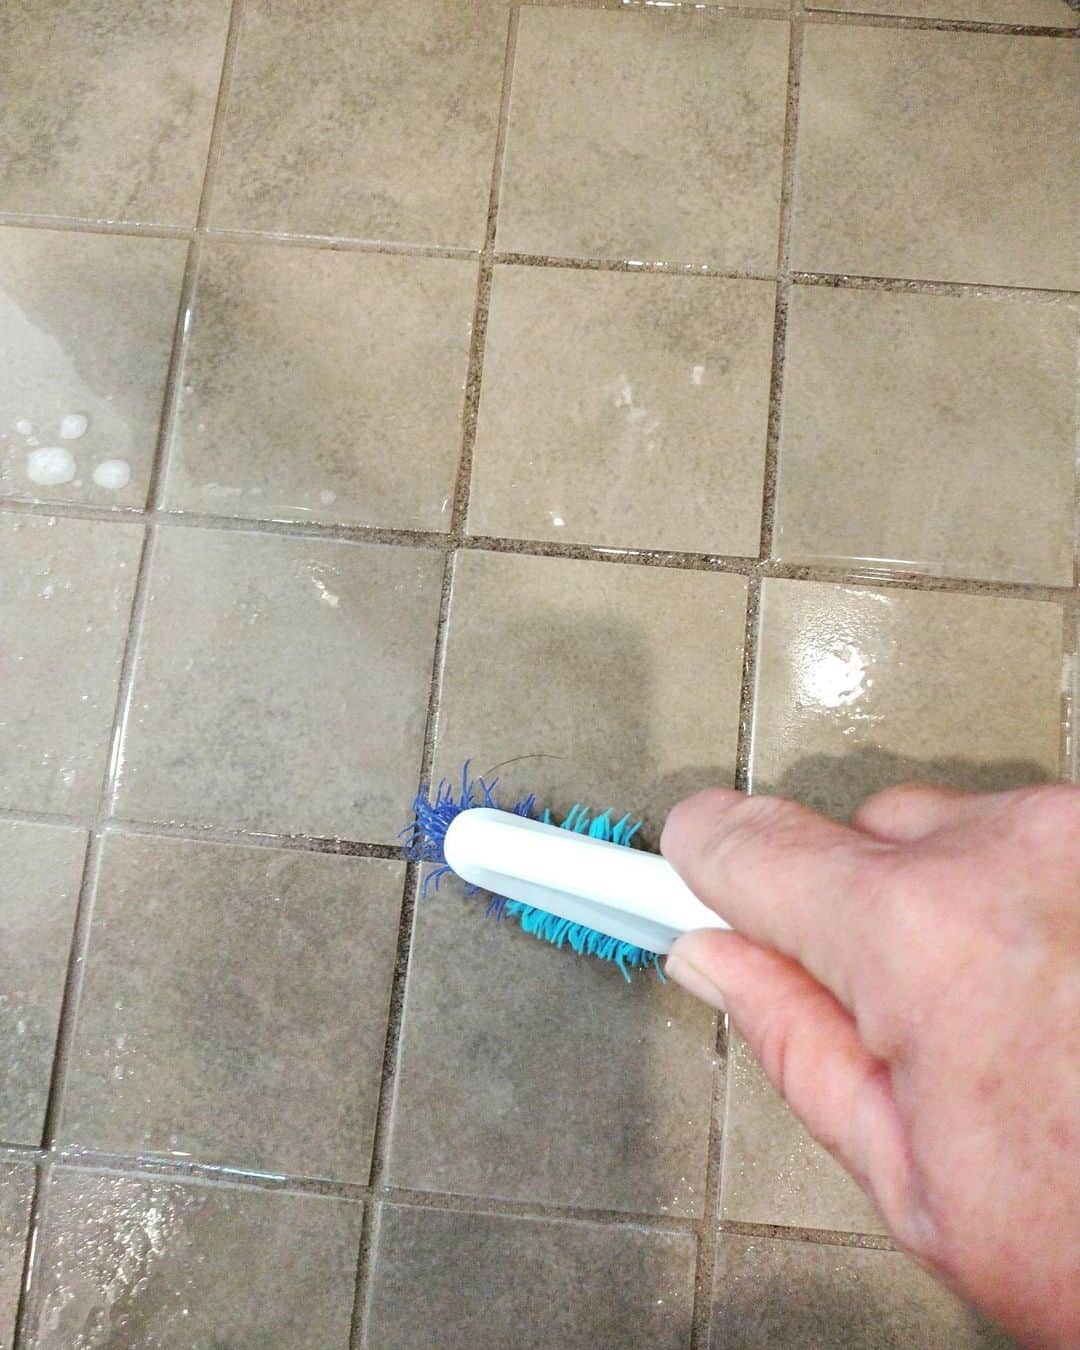
1. Water and a Cheesecloth or Sponge
Before going in with various abrasive or chemical cleaners, try out the most common method for cleaning anything. As a precaution, we suggest you buy some safety glasses and wear gloves during any of these methods.
So you need to take your cheesecloth, submerge it in water and wring it out before you apply it to the clouded area because too much water can cause damage. Using hot or warm water can soften the minerals; hence you can remove them quickly.
Then, use a clean and dry cloth to pick up the excess moisture. This method will ‘activate’ the dry particles of sand, making them easier to remove.
2. Rubber Grout Float
If you are dealing with cracking grout, we suggest you try a rubber grout float, a tool used to apply grout in spaces between tiles or mosaics and protect them.
However, you can also use it to press grout between the tiles and secure it if you see it cracking. Furthermore, this tool has a very soft edge that you can use to drag the grout minerals in the desired direction without causing any damage to the new tiles or grout.
Repeat this process until you have cleared the minerals off the entire surface. To be sure, you can use the cheesecloth or a regular sponge for dishes and go over it and buff it several times.
3. Vinegar Solution
If the first two methods fail you, it is time to take it to the next level. Acidic cleaners such as vinegar or vinegar solution are beneficial with grout haze. However, apply it only if your tiles are ceramic or porcelain.
How to make this vinegar solution? Just mix one cup of vinegar with 4 cups of lukewarm water in a bucket or spray bottle for easier use. Do not forget to wear rubber gloves and safety goggles during this process!
You can add more vinegar to the mixture if you want to make it more potent or add essential oils to counter the smell. Then, use a mop or tiling sponge to apply the solution. Afterward, use a clean mop or nylon scrub pad and go over the area to remove the residue.
A nylon scouring pad is also a great alternative to regular sponges because it is much more effective and abrasive.
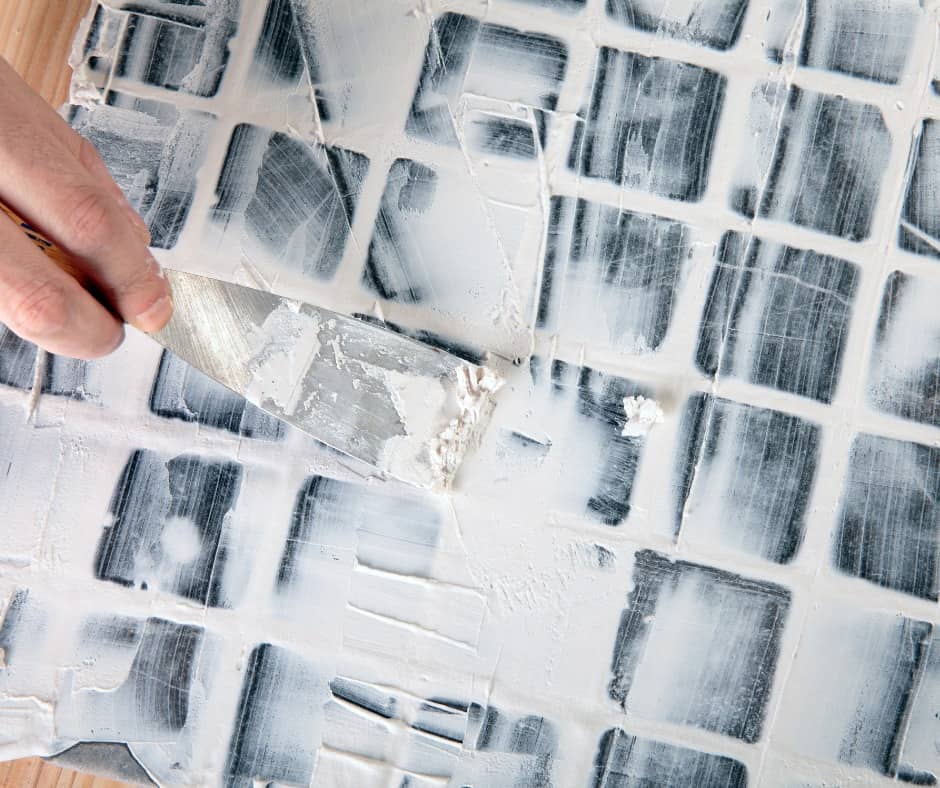
If this method does not work, do not worry, there are other options. Even though you might be tempted to use a metal tool or a putty knife to remove the stubborn grout, that is not a good technique.
Using these tools, you can easily scratch or scrape the surface of the tiles.
4. Baking Soda and Vinegar
Another homemade cleaner you can use to clean the grout haze is a mixture made of baking soda and vinegar. Baking soda is a common household cleaning agent that provides extra scrubbing power.
On the other hand, vinegar is very effective at cleaning because of its high acidity levels, making it a great agent for breaking down the build-up of soap, dirt, and in some cases, cloud haze.
So, how to make this solution? Combine unequal amounts of baking powder and winger and mix until you get a paste-like consistency.
Apply the mixture while it is bubbling (combining these two materials will cause a reaction) because it will not be as effective when it stops bubbling. Note that this mixture is not suitable for marble, granite, and stone materials and will damage them.
5. Grout Cleaner
If you have tried the methods mentioned above, and the grout is still there, you should try to remove them with a graze cleaner or an agent specifically for dealing with grout stains.
Today, there are numerous cleaning products that you can purchase in your local hardware or tile supply store. Some of those grout cleaners include Black Diamond and Clean-EEZ. Before you start applying any of these products, make sure that you have read the instructions.
In addition, do not forget to wear gloves and goggles. If you want to explore other cleaning agents for grout, click here.
Interestingly, you would be surprised to know that most professionals use this solution with vinegar to remove the grout rather than specific cleaners.
6. Vinegar, Ammonia, and Baking Soda
Before mixing this solution, use some eye protection, which is a general rule when dealing with any chemicals. In addition, open the window or turn a going on in the bathroom or wherever you intend to apply it.
Use a spray bottle because it makes the application much more manageable. So, how to make this cleaner? Mix or dilute 1/4 cup of vinegar, 1/4 cup of ammonia, 1/2 of baking soda, and 1 liter or 33 fluid ounces of water. (1 liter of water roughly equals 0.26 gallons).
Using the spray bottle, apply it all over your tiles or the targeted area. Wait a couple of minutes for the solution to do its magic, and then use a damp sponge and water to wipe down the tiles, and the haze should come off onto the sponge.
Rinse the sponge and change the water frequently to ensure you have done an excellent job. This recipe effectively cuts through the grout haze and removes it from the tiles.
Keep in mind that vinegar and ammonia have a nasty smell, so you will probably want to wipe them a couple of times more to neutralize the foul odor.
If you are wondering where to purchase ammonia, you can buy it from any company selling refrigerators.
Conclusion
There are numerous products and homemade solutions that you can use for the hardened grout haze on your tiles.
Some of those include a solution made of hot water and vinegar, a mixture made of baking soda and vinegar, a rubber grout float, and a mix of ammonia, baking soda, and water.
Before applying any of these or commercial grout haze removers, inspect the type of tiles and the grout itself. These solutions can damage some materials, such as marble, hardwood, and stone.
Which mixture is the best for you? Have you already tried some of these recipes? Please share your experience with us! If you have any questions, do not be shy and ask away!