Is the vinyl siding on your house broken, aged, or discolored? Vinyl is a tough material, but it may need to be replaced at some point. The good news is you can replace vinyl siding on your own with a few basic tools.
The difficulty level of this project is moderate but what most people find challenging is color-matching the replacement vinyl with the original one. Not to worry, though; in this article, you will find some amazing tips on replacing and color-matching your siding.
Table of Contents
Tools for Replacing Vinyl Siding
- Zip tool
- Metal pry bar
- Replacement vinyl siding
Step-by-Step Guide To Replace Vinyl Siding
Follow these easy steps to replace a broken or damaged vinyl siding and give your walls an uplift.
Step 1: Understand the anatomy of vinyl siding
It helps to familiarize yourself with the anatomy of vinyl siding for a successful replacement project. Each piece of siding is designed to look like two planks, and at the top of each piece is a strip of holes through which you can drive nails to fasten the siding to the wall.
Underneath the nail strip is a channel. When you install a new piece of siding, the bottom lip of the panel slides into the channel and snaps into place.
When you understand how vinyl siding works, installation becomes so much easier.
Step 2: Remove the damaged vinyl siding
Now that you know the make up of vinyl siding, you can remove the piece of siding you want to replace. For this step, you will need a zip tool. This small metal bar features a hook bent at an almost right angle, making replacing vinyl siding easy.
Slide the zip tool underneath the damaged siding starting from one end of the piece. Hook the tool onto the bottom lip of the damaged panel. Apply pressure on the tool to disconnect the bottom lock joint. Then, run the zip tool along the panel’s length to disconnect it from the piece below it.
Step 3: Disconnect the top lock
Once you release the bottom lock joint, you want to disconnect the top lock of the damaged panel. The top lock is the bottom lock of the vinyl panel that is above the damaged siding.
Slide the zip tool on the lip flange of the top lock. Apply downward pressure to release the panel from the channel. This will expose the damaged panel’s nail strip, which attaches the panel to the wall.
Step 4: Pull out the nails

Because the damaged panel is attached to the walls with nails, you must first remove the nails to replace the vinyl siding. For this part of the project, you will need a pry bar and hammer.
Wiggle the pry bar behind the nail hem on the damaged siding. Lift the hem using the pry bar to loosen the nails from the walls.
Use the pronged side of the hammer to pry out the loose nails. This will finally remove the damaged panel.
Step 5: Remove the neighboring panel
Once you remove the damaged panel, you will expose the nail hem of the siding panel below it. Use the pry and hammer method to remove this bottom panel.
The easiest, most hassle-free, and practical way to replace the damaged vinyl siding is to remove the adjacent siding panels first. You will have enough space to slide the new panel, and snapping back the neighboring sidings is a breeze.
Here is a video you might find helpful if you want to replace one damaged piece of vinyl siding.
Step 6: Install the new vinyl siding
Slide the lower lip of the new siding panel onto the locking channel of the siding below it. Push this lower lip of the new panel upward to lock it into place.
Next, you will need to fasten the new vinyl panel to the wall. To do this, drive 1¼ inch nails through the nail flange at the top of the new vinyl panel.
A common reason for vinyl siding replacement failure is when the pieces disconnect from each other. A neat trick to avoid this is to push the panel upward as you drive in each nail. A little pressure is all that’s needed to ensure the panels are completely locked and won’t come apart. Don’t push too hard, as this could cause the vinyl siding to break.
Pro Tip: Space out the nails about 15-17 inches apart. It is also good to leave a small space between the panel and nail head to allow the vinyl panel to expand and contract with temperature changes. Driving in the nail too tightly will cause the siding to bend when the temperatures rise.
Step 7: Lock the upper siding to the new siding
With the new panel locked in at the bottom and nailed in at the top, it is time to lock in the upper vinyl siding into the new siding beneath it.
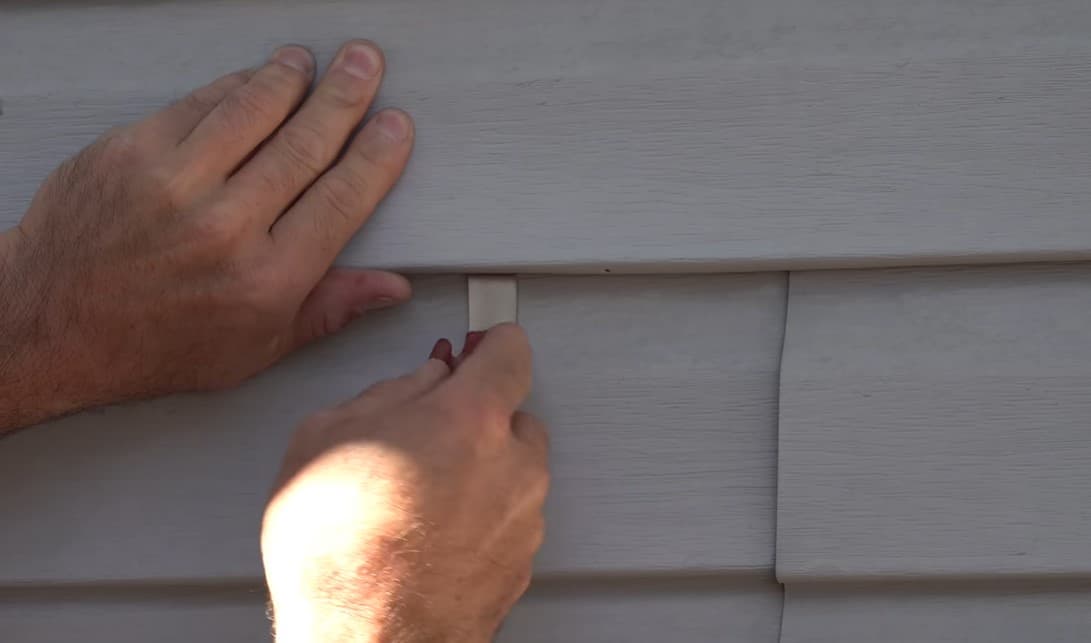
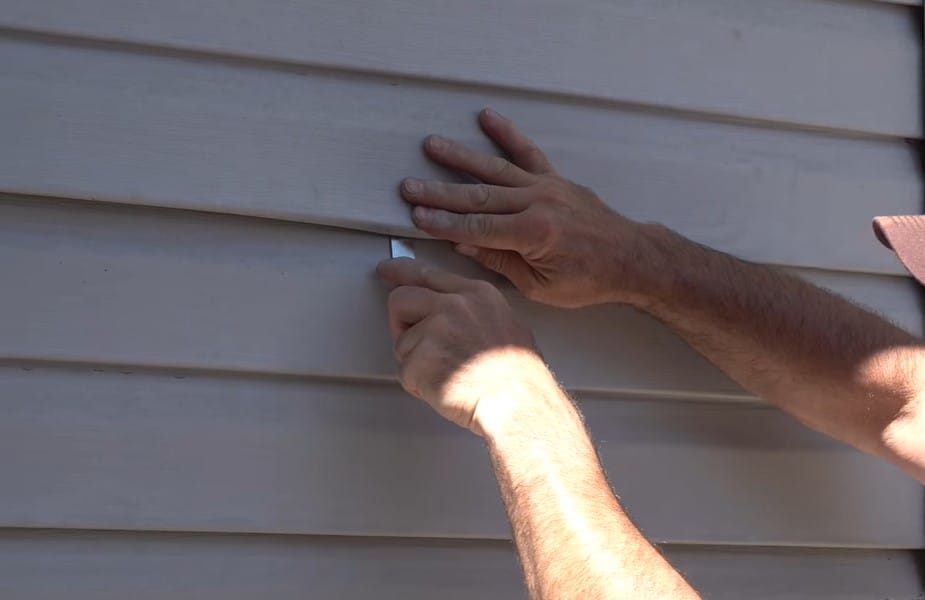
Using a zip tool, pull down the upper siding’s lip to create space for the lip to lock into the channel at the top of the new vinyl piece.
As you pull the lower lip to create space, use your palm to push the lip into the channel at the top of the new siding. Essentially, you will be using the zip tool to pull out the lip and your palm to push it up for the siding to lock into place.
That’s it! You have successfully replaced your vinyl siding. This is a pretty easy project, but I have included some extra tips to help you along.
Extended Tips
- Use wood blocks to hold up the upper panel as you install the new siding piece. Simply place the wood blocks along the length of the bottom lock of the panel above the one you want to replace.
- Siding typically doesn’t come with identification marks, making it difficult to find replacement pieces that match the color and style of the original piece. If you cannot find the right color, bring the old siding to a paint shop and have it color matched.
- Paint the replacement siding with a layer of acrylic primer followed by the paint. Opt for acrylic paint as it can accommodate any contraction and expansion of the vinyl panels.
- Your local vinyl siding distributor might also help you find a replacement piece that closely matches your siding.
- I recommend installing vinyl when the weather is warm, as the siding will be flexible and easier to work with. When it is cold outside, vinyl becomes rigid and prone to breaking.
- To get the panel to lay flat next to the adjacent panels, use a small cutting tool such as a blade to cut about one inch of the nailing strip. Do the same for the bottom lock. Cutting out these pieces will also allow the siding to contract and expand without buckling.
- If the whole siding panel is not damaged, you can cut the damaged section and replace it with the same siding. You will need a utility blade and speed square to cut the new piece accurately.
Summary
There’s no doubt that vinyl siding has many outstanding benefits. For one, it is easy to replace in case of damage, and with the right tools, you should get the job done in half an hour or less.
That said, keep in mind that vinyl will expand and contract easily in response to temperature changes. Follow the recommended tips to ensure the panels stay locked together regardless of the ambient weather.
Its interesting when you said that vinyl is a tough material, but it needs to be replaced at some point. I want to replace the siding in my room since there are some holes. I would need to talk to a professional to get a suitable window siding for my room. Thanks for the article!
It’s funny that you mentioned that vinyl is a robust material, yet that it eventually needs to be replaced. Because my room’s siding has some gaps, I’d like to replace it. To find the right window fitting for my room, I’d have to see a professional. Thank you for writing this article!