When an extensive part of your vinyl siding is damaged, the most effective way to get the exterior of your home looking alive again is to pull out the old siding.
But having an entire wall of vinyl panels taken down by a professional can be expensive, so why not do the job yourself and save the money toward new siding?
If you have a bit of time, this guide will show you how to remove vinyl siding using appropriate tools so you don’t ruin the panels and the insulation material in the process.
Table of Contents
Tools Needed to Remove Vinyl Siding
Before you start, make sure you have the following tools and materials:
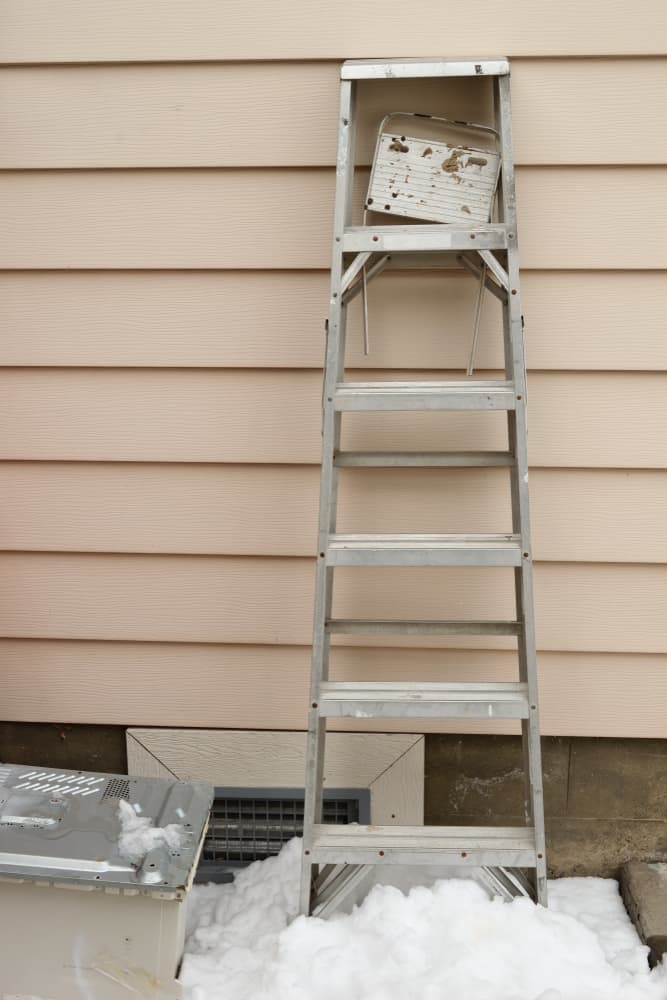
- Extension ladder: A ladder will help you remove vinyl panels that are hard to reach. If the pieces you are removing can be reached from the ground, you won’t need one.
- Tarp: Spread this or a large plastic sheet on the ground to keep any piece of siding that you will be reusing clean.
- Truck: If you will be throwing the vinyl siding away or sending it for recycling, have a truck standby.
- Trash bucket: Use this to throw the siding fasteners in as you go.
- Nail puller pliers: If your vinyl siding is held in place by nails, you will need a pair of nail puller pliers to remove the nails.
- Zip tool: A zip tool is used to detach a higher vinyl panel from a lower panel. You can buy it from any hardware store or big box store near you.
- Crowbar/flat bar/claw hammer: A crowbar or flat bar works best when it comes to removing nails from the vinyl siding because they are shaped better than a hammer. But if you can’t find any of these, you can still use a claw hammer.
- Lawn magnet: Use this to pick up any nails that don’t make it to the trash container to avoid leaving your yard in a mess.
6 Easy Steps to Remove Vinyl Siding
Depending on how fast you work, removing vinyl siding from a typical house can take anywhere between a day or two. Here are some simple steps to help you do it right.
Step 1: Prep Your Work Area
Start by removing any clutter, obstacles, and ground debris from your work area. Move toys, rocks, sticks, potted plants, garden furniture, and anything else that may prevent you from using your ladder properly. Also, ensure there is a stable area to set up the ladder.
It is also important that you set aside some area to pile up the vinyl siding. And because most siding panels are between 10 ft and 12 ft long, make sure the area is large enough especially if you are taking down an entire wall.
If you will be reusing the panels, consider laying out a tarp first to keep them clean. If you plan to recycle the planks or throw them away, park a truck near the work area so you can directly throw the panels inside for removal from your home.
Step 2: Set Up the Ladder and Nail Bucket
If you will be using a ladder, now it’s time to set it up. Look for a level, stable area and place the ladder 45° degrees against the house. You will want to extend it such that it reaches the highest panel you intend to remove. It would be a good idea to have someone nearby to help you balance.
Once you have your ladder in the right position, look for the most appropriate spot to place your nail bucket. Ideally, it should be placed close to the wall, underneath the area you are currently pulling the nails from so the nails can fall directly into it.
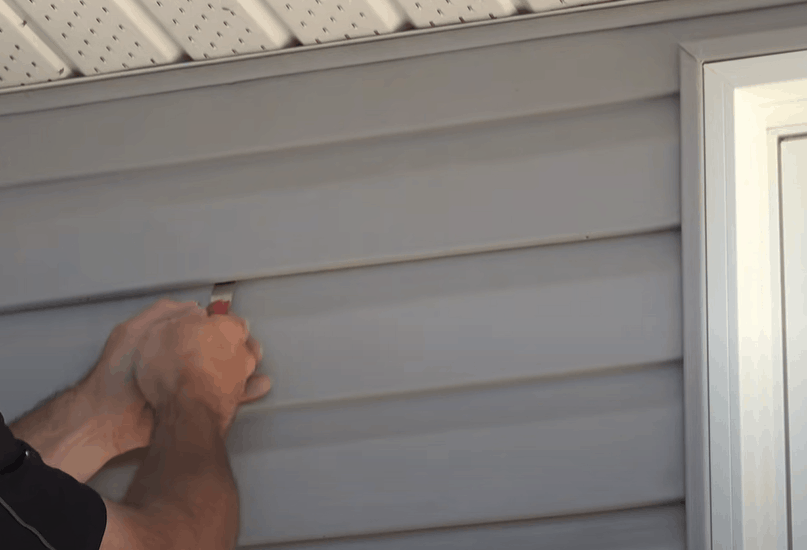
Step 3: Detach the Vinyl Panels

Insert a zip tool underneath the bottom of a higher panel to reveal the nails holding the piece in place. Any time you want to pull out a panel, stick the zip tool under the panel above that one.
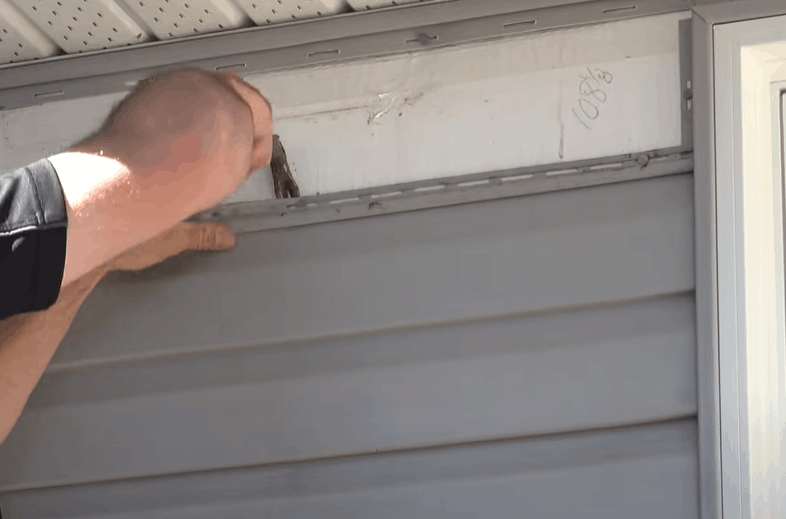
Keep in mind that the topmost panel will have a channel covering its nails instead of another siding panel. You may have to pull the channel out to correctly remove the top panel.
Once you have the zip tool in position, slide it about five inches sideways, then pry it upward. Slide a little bit further then pry again. Keep doing this until you have unhooked the entire length of the panel from the panel below it.
Step 4: Pull Out the Nails Securing the Panel
Lift the piece of the upper siding and look underneath it; you will see the nails that attach the panel you want to remove to the wall. Pull these out, working methodically from right to left or left to right.
Make sure you are not skipping any nails or fasteners, as this can prevent the siding from coming off the wall.
Now, push the panel downward to detach it from the one below it. If it doesn’t pop free, check to see if it is still connected to the wall. There could be a channel at the end of the panel anchoring it to the wall. Gently pull the panel outward so it detaches from the channel.
If the piece is still giving you trouble, try tapping it with your hand, then pull outward again. You may also want to check whether there are nails still holding it in place.
Step 5: Remove the Rest of the Siding (Optional)
If you are only removing one piece of vinyl siding, then steps 3 and 4 are all you need to do. To take down a whole wall of siding, apply the same technique you used to remove the first plank. Start from the top and work your way down the wall because that is how the panels are connected.
Step 6: Clear the Ground
If you took down an entire wall of vinyl siding, the ground is likely messy from stray nails that fell outside of the trash bucket or panels that didn’t make it to the designated piling area. You will need to collect these to avoid posing a danger to feet and lawnmowers.
Because some nails may be hard to find, use a lawn magnet to collect them. You can then dump them in a trash container or keep them safe for later use. Do not transport nails in a trash bag, as they can tear the bag and spill.
Also, dispose of any siding that you don’t need. If the panels still look good, you could recycle or sell them for secondhand use. If they are completely ruined and you need to throw them away, schedule pickup with your trash company.
Additional Tips for Removing Vinyl Siding
Pull out the anchoring nails carefully
The nails holding the vinyl siding in place are usually attached directly to the insulation material. As such, you need to carefully pull them out when removing the panels to avoid damaging the material.
This is particularly important if you are not planning to install new insulation. Also, keep in mind that the more damages you have, the more time you will spend on repairs and the longer it will take to install the new siding.
Do not extend the ladder beyond your reach
If you are using a ladder, make sure it is set to the right length. A ladder positioned too high or too low over or below the panel you are working on will only make your work harder.
Install new siding as soon as possible
The part of the wall you uncover when you remove vinyl siding is usually not designed to be exposed to harsh weather and elements. As such, it is important that you lay new siding as soon as you can so you are not putting the interior wall at risk of damages.
If you only removed a small section of the siding, you may be able to get away with covering the area with a plastic sheet. But even then, don’t leave the area like this for way too long especially if the sheet is not strong enough to withstand the elements. Also, remember to check for moisture damage and do thorough repair before installing new siding.
The Takeaway
As you can see, removing vinyl siding is a pretty easy process. All you need is the right tools and the right attitude. Make sure to remove any obstacles before you start so you can have a clear working area.
And if you are using a ladder, ensure that it is stable and extended to the right length. It is also important that you remove both the nails and panels carefully to avoid damaging the insulation material. And don’t take too long before putting up a new siding, as this too can put the insulation material in danger.