Are you looking for a way to cover up your old and dingy hardwood floors? One alternative is to install vinyl tiles over the wood floor. This might seem unconventional given the popularity of hardwood floors
, but vinyl is an affordable and practical solution if yours are damaged and can no longer be polished to shine.
For the best results, you will first install a plywood underlayment before laying your glue-down or peel and stick vinyl tiles. Read on for step-by-step instructions on how to install vinyl tiles over a wood floor.
Table of Contents
Tools will need for Installing Vinyl Tiles Over a Wood Floor
- Plywood panels
- Pnematic nail gun
- 5/8 inch galvanized ring shank nails
- Vinyl tiles
- Adhesive for glue-down tiles
- Vacuum and brooms for cleaning the floor
- Seal filler
- Wood leveling compound
- Trowel
- Flooring roller or kitchen roller
Step-by-Step Guide to Install Vinyl Tiles Over A Wood Floor
Follow these simple steps to lay vinyl flooring on a hardwood floor.
Step 1: Prepare to install plywood underlayment
Theoretically, you can install vinyl flooring directly over a hardwood floor. However, this can be particularly difficult in the real sense if your wood floors are damaged and uneven.
Successful installation of vinyl flooring requires a flat, smooth, and completely level surface. Even the slightest imbalance on the subfloor will hurt the longevity, stability, and comfort level. For this reason, you should take every precaution to level the surface upon which you want to install vinyl flooring.
In this case, the best way to achieve a level surface is to first install a plywood underlayment over the existing wood floor. This is easier and more cost-effective than repairing old and worn-out wood floors.
Step 2: Install the underlayment
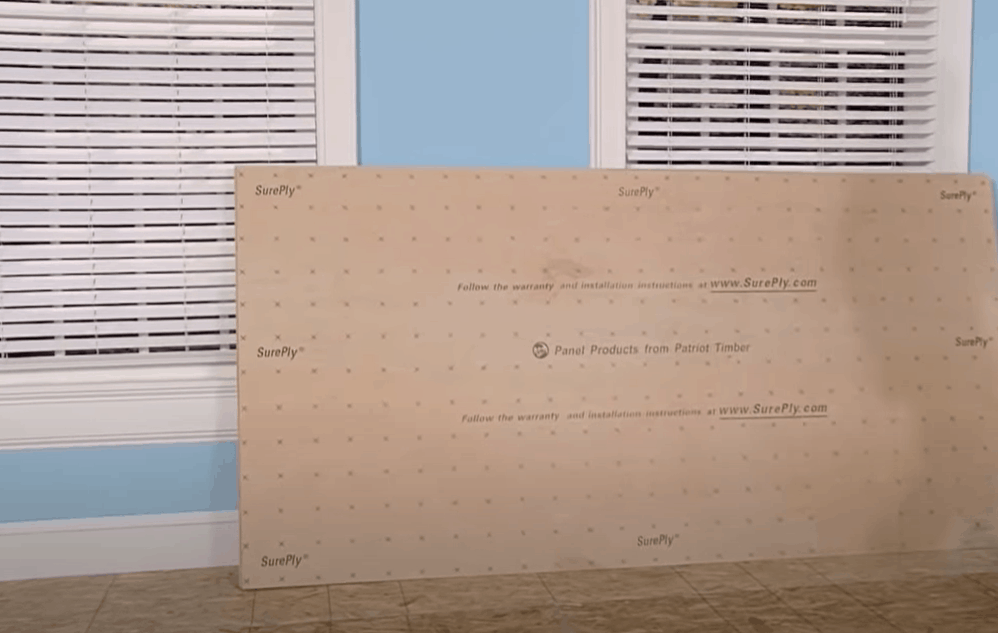
Plywood panels typically come in sheets measuring 4×8 feet with a thickness of about ¾ inch. Determine how many panels you will need to cover the entire wood floor. Measure the length and width of the room where you want to install the tiles and divide that by 4×8 to buy the correct number of panels.
Lay down the panels to cover the entire floor. The plywood boards should be perpendicular to your floor joists. Start by laying a whole 4×8 foot panel in one corner of the room. Lay the next panel adjacent to the first one with the factory-cut edges butted against each other. Here is a neat video on installing plywood underlayment.
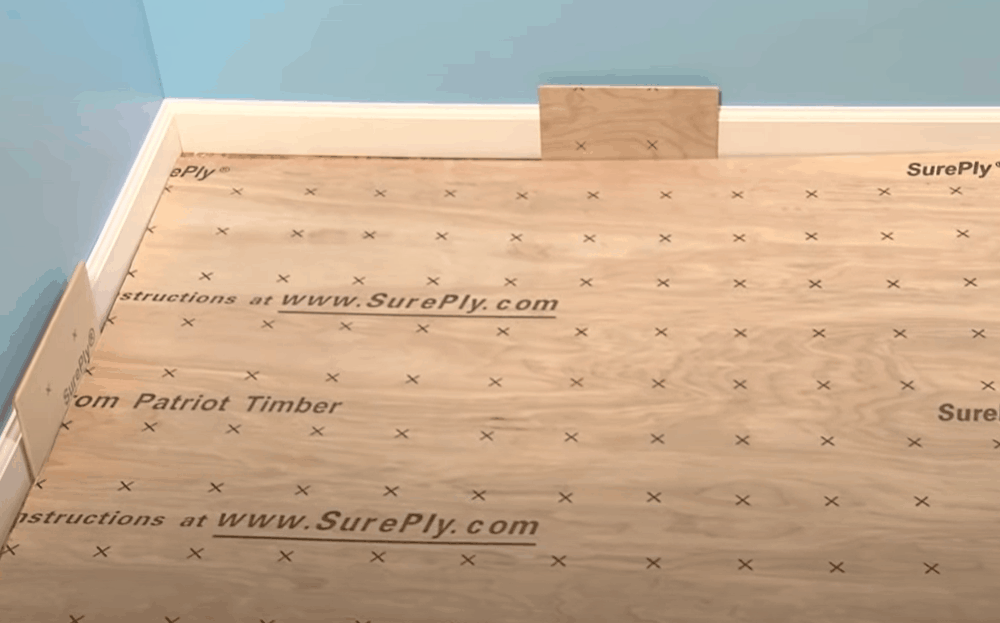
If your room requires several plywood panels, start the second row with a cut panel and continue as needed to create a staggered pattern. This approach achieves two goals, which are crucial to the stability of the floor.
First, no four corners will intersect, and secondly, the seams between the plywood panels will not be in the same position as the seams in the wood floor underneath. This setup allows pressure to spread out evenly throughout the underlayment and wood subfloor to prevent breakage or weak spots on the floor.
Leave an expansion gap of about 1/8 inch between the plywood panels and walls to allow safe expansion and contraction with temperature changes. Ideally, you should remove the baseboard and other accessories when working on your floors.
Install as many panels as are needed to cover the entire room before fastening the underlayment to the wood floor.
Step 3: Fasten the plywood underlayment
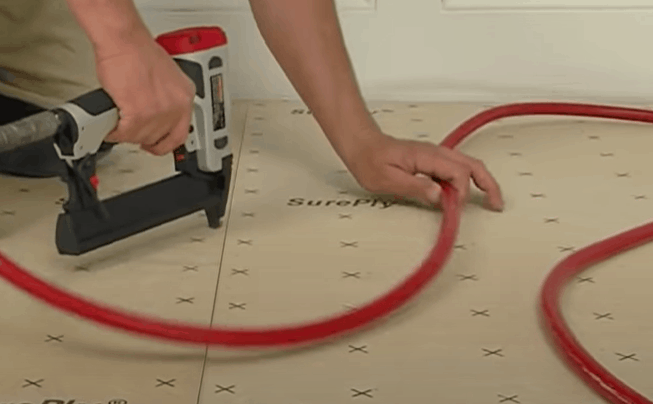
Fastening your plywood underlayment has a big impact on the success of the vinyl tile installation process. Remember, vinyl tiles need a flat, smooth and stable surface to adhere properly.
Start by fastening the panels from one corner of the room toward the opposite corner. Place a thick wooden board under your foot and stand on each panel as you drive in the fasteners. The wooden board spreads your foot pressure evenly across the entire panel, and standing on the panels ensures that the underlayment is flush with the wood floor underneath.
Use galvanized ring shank nails; these are less prone to rusting and have stronger holding power, so they won’t back out of the panels easily.
Drive each nail 4 inches apart along the edges of the panel and 6 inches apart in the field of the panel. Place the nails in a random pattern and sink the head into the plywood underlayment to not telegraph through to the vinyl tiles.
Pro Tip: If you notice protruding nails or the sunken nails leave a depression on the underlayment, apply a small amount of wood leveling compound on those spots and sand to make them flush with the rest of the underlayment surface.
Step 4: Apply primer to the underlayment
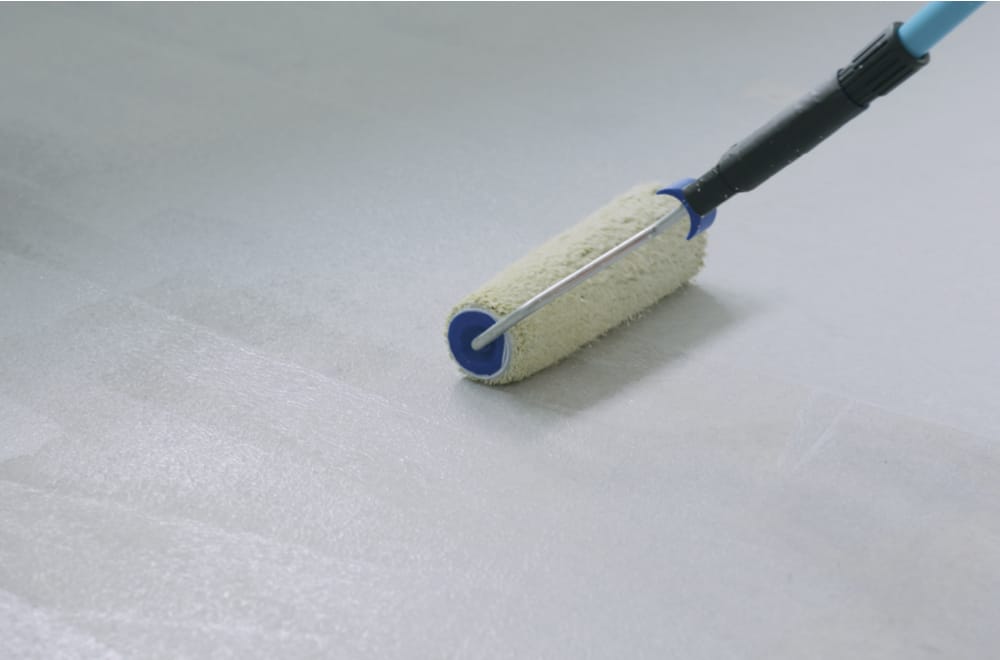
Applying a latex primer is an excellent way to improve the adhering power of vinyl glue-down or peel and stick tiles. The primer will seal the plywood, preventing moisture from seeping through and ungluing the tiles after some time.
Mix one part of water with three parts of the latex primer and apply evenly to the plywood underlayment. Diluting the primer allows it to seep into the plywood better. Apply the second coat of primer without diluting it.
Step 5: Mark the guide lines
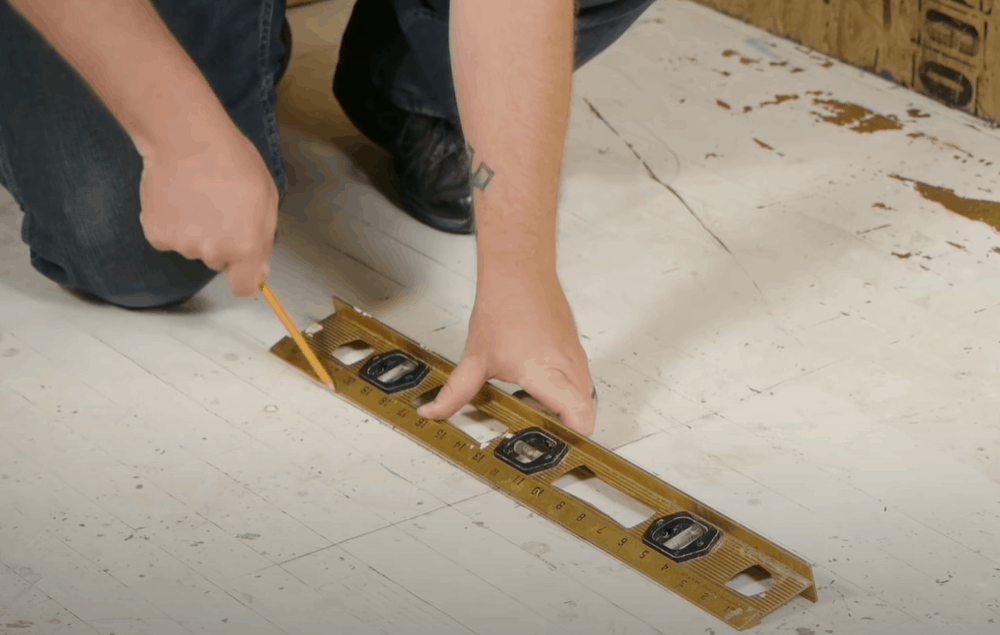
Once you finish installing the plywood panels, sweep and vacuum the underlayment thoroughly to remove all debris. You can also use a damp mop to ensure the underlayment is completely clean before laying the tiles. Minuscule debris can cause vinyl tiles to lift with time and subsequently trap moisture underneath, reducing the flooring’s lifespan.
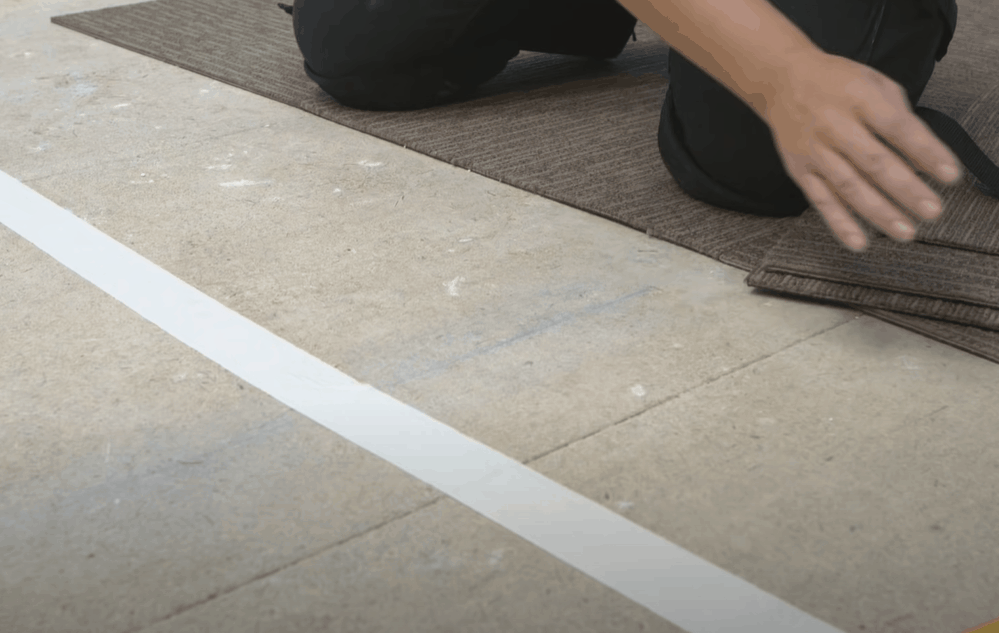
Next, mark the guide lines to help you lay the tiles in a straight line throughout the room. Measure the length and width of the room. Then, use chalk to mark the center point of each wall.
Snap a chalk line between the center points of the sidewalls and another one between the longer walls to form a cross that divides the room into four quadrants. The goal here is to work from the center of the room toward the walls. Draw a more permanent line along the chalk line using a pencil or marker.
Step 6: Apply vinyl tile adhesive
If you are installing glue-down vinyl tiles, you will need to apply the appropriate adhesive first. Pour enough adhesive on one quadrant and use a grooved trowel to spread the adhesive compound across the area where you want to install the tiles.
Give the adhesive enough time to dry, usually 10 to 15 minutes, but this may vary from one manufacturer to the next. The adhesive should feel tacky to the touch when it is ready. Don’t wait for it to dry, and don’t install too soon that the tiles slip on the adhesive.
Pro tip: It is best to use an adhesive compatible with your chosen vinyl brand. Most manufacturers will recommend the best adhesive compound to use with their tiles.
Step 7: Install the tiles
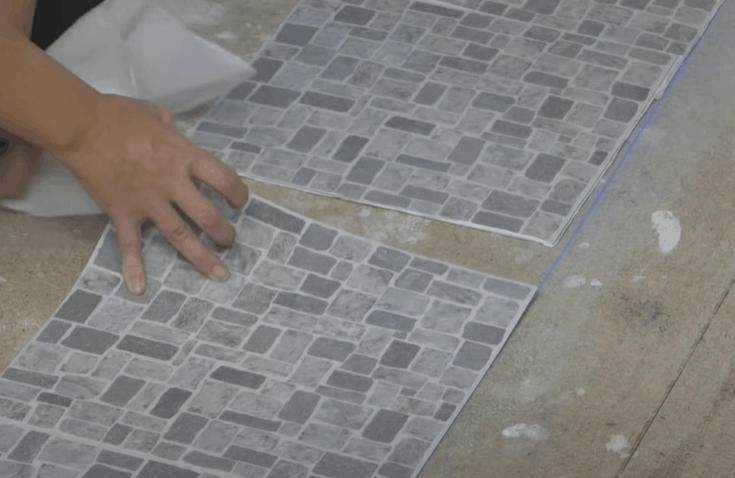
Position the first tile squarely on the intersection of the guide lines. One edge of the tile should align with the horizontal guide line, and the other edge with the vertical guide line.
Apply pressure on the tile with your hands to adhere it to the plywood underlayment. Install the next tile with the edges closely but not too tightly butted. Continue this process until you fill out the whole quadrant. Apply adhesive to the remaining area of the floor and lay down the remaining tiles.
The process is similar when installing peel-and-stick tiles. Instead of applying adhesive to the underlayment, peel the paper backing and stick the tiles to the floor using the guide lines.
Finally, use a vinyl tile cutter to trim smaller pieces to install in the expansion gap you left between the underlayment and walls around the room. Allow the tiles to settle for 24 to 48 hours before using the room.
Congratulations on installing vinyl tiles over a wood floor! Check out these extra tips to help you along.
Extended Tips
- Acclimatize vinyl tiles for ease of use. Place the tiles in the room at least 24 hours before installation. Unbox and mix up tiles from different boxes to achieve a natural pattern and avoid installing similar-looking tiles adjacent to each other.
- If possible, rent a flooring roller and drive it across the room to ensure that the tiles adhere to the plywood floor, therefore increasing the flooring’s lifespan. Alternatively, use a kitchen rolling pin to apply pressure to the tiles once the installation is complete.
- Consider using seam filler in the seams between two plywood panels. The filler seals any spaces between the panels, provides a smooth and level surface for vinyl tiles, and acts as a moisture barrier. Check with your plywood panel manufacturer if using seam filler is appropriate for your particular brand of panels.
Summary: How To Install Vinyl Tiles Over a Wood Floor
Vinyl tiles and wood floors don’t seem compatible. But, there are times when vinyl can save you from the burden of scruffy or old hardwood. Installing vinyl tile over a wood floor can uplift the look and feel of any room on a budget.
Laying vinyl directly over wood may not get you the best results, so the trick is to install a smooth and level plywood underlayment and then install the vinyl glue-down or peel-and-stick tiles as usual. All the best with this bold but worth it flooring project!
I recently had LVT flooring laid in my kitchen on top of old wooden planks, with plywood in between. The end result is a floor that very visibly undulates. The installer insists it is because the sub floor is not level.( I live in an old Victorian mansion converted into flats). Can that really be the reason why? I’m so disappointed in the way it has turned out.