There is nothing more frustrating than finding your hardwood floors squeaking when you walk on them. Some people think that squeaky floors are simply an indication of old age and should be repaired right away. Others think that with a little care and attention, the flooring can be restored. Whatever the source, there are a few simple things you can take on your own to stop a squeaky floor.
Friction between the floorboards and the floor joists is typically the source of noisy floors. Because of the friction, the wood dries up and shrinks with time, which produces this annoying squeaky sound. Fortunately, there are a number of fixes you can make to quiet down squeaky flooring in your house and stop it from happening again.
Table of Contents
What You’ll Need
Repairing squeaky floors may be as easy as inserting a shim or could be an indicator of a larger problem in the flooring system. Below is an extensive list of everything that you may need in this project.
However, not everything listed is necessary in accomplishing the job. The approach that you will choose will change the items you’ll need in fixing your floor. You can also find these materials in a kit if you don’t want to manually buy them.
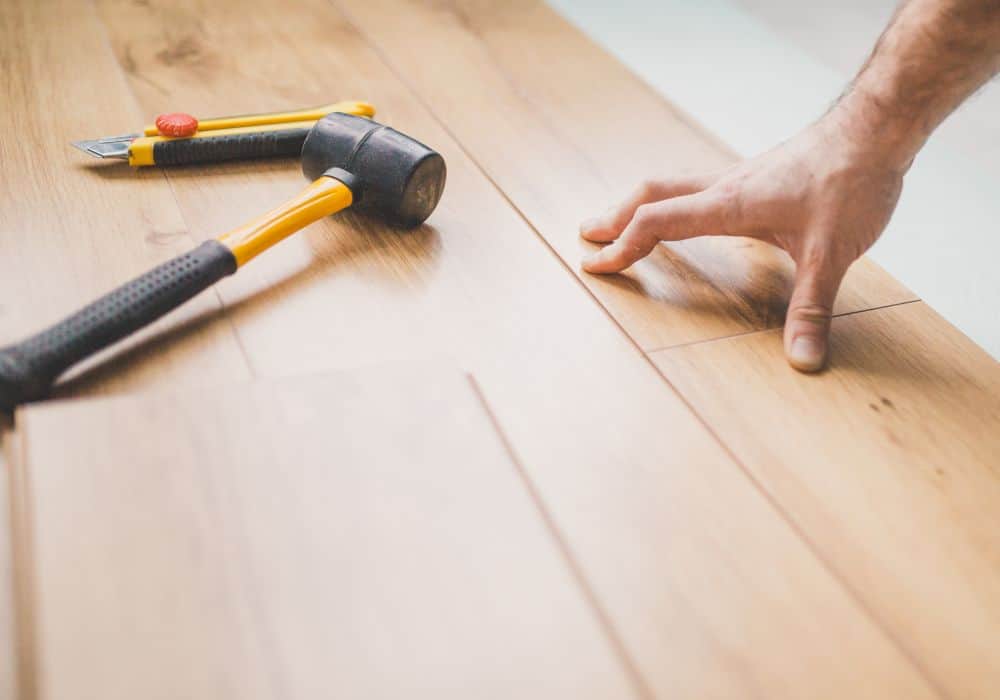
Equipment:
- Hammer
- Nail Set
- Drill
- Cloth or rags
- Soft brush
- Vacuum
Materials:
- Wood shims
- Wood glue or Construction adhesive
- Screws
- Finish Nails
- Powdered graphite
- Wood filler
- Pine Board
Fixing Squeaky Floors From Above
Before navigating below the surface area, let us try to see what we can do from above. Although not much can be done from above, it is usually much cheaper than having to fix them yourself from below. Eliminating the floor squeaks without causing harm to the polished floor is the challenge here.
Step 1: Locate Joist
Finding joists can be quite a challenge when trying to locate the framing members in a wood frame. The problem is that joists can be hidden behind other members. The trick here is to use a stud finder. Remember to mark where the joist is with a pencil.
Step 2: Apply Lubrication
When wooden floorboards scrape against one another, hardwood or engineered flooring often makes a squeaking noise. Sometimes all this needs is a little lubricant to eventually stop. In this scenario, the best lubrication available is powdered graphite. Baby powder, talcum powder, and a wood-safe spray-on dry lubricant work too.
The lubricant should be applied between the boards, then with a soft brush or cloth, the product should be lightly rubbed into the gaps. Make sure that the powder makes its way into the gaps. Clean up with a dry cloth after.
Step 3: Drill Pilot Hole
If applying lubrication doesn’t do the job, drill a pilot hole in the flooring. Drilling into the joist will increase the likelihood of a solid grip while reducing the likelihood of hitting any unseen vulnerable factors underneath the flooring such as plumbing and electrical wires, but you don’t need to necessarily hit the joist. You can make do by drilling somewhere in a neighboring area.
Step 4: Drive a Screw
After drilling the pilot hole, you then screw into it. Use a drill to tighten the screw until it breaks. When you take out the tool, the screw head and top portion ought to come off, leaving the threaded portion to support the floor below the surface. Fill the pilot hole with wood putty to hide the screw. Sand the area very lightly when it has dried. You can also use a putty stick similar to a crayon.
Fixing Squeaky Wood Floors From Below
Squeaky floors can be fixed in a variety of ways from below. While some choose to spend a lot of money on repairs or replacements, you can always choose to resolve the problem yourself. Here are a few steps to help you get started.
Step 1: Locate the Source of Squeak
Looking at what’s initially creating the noise is the first action we suggest doing. To do this, have someone carefully move across the upper floor around the noisy area. Ask the person to pause and step down in the same location once a squeak is heard. You then mark the area where the sound was heard.
Step 2: Insert Shim to Gaps
Once the source of the problem is located, the next thing to do is to stop floor movement in that area. When you notice a gap, utilize the wood shim method. No matter how small, if a gap is seen, put some carpenter’s glue on a thin piece of wood, and insert it into the area. For a tight fit, insert a pair of shims into the space.
To indicate the depth, mark each shim with a line. Just enough force should be applied to the shim to eliminate the squeak. Driving them in would expand the gap and perhaps produce a new squeak.
Step 3: Reinforce Joist
Oftentimes, floor joists may twist, warp, bow, or shrink, particularly if they were moist when they were built. Between the joist and the plywood flooring, a gap may arise. So, if you notice large gaps along drooping or damaged joists or notice that a subfloor edge is not adequately supported, add blocking to stabilize the flooring and restrict movement.
To fix this, pine boards should be trimmed to fit between the midpoints of the joists, tapped into place, and then nailed into the joists.
Squeak-Free Floors
There is no doubt that having a squeaky floor can be annoying and inconvenient. However, there are steps you can take to reduce the risk of a squeaky floor frustrating you (or your visitors). The most important thing to remember is that a little maintenance can go a long way when it comes to keeping your floors in good condition and in avoiding those pesky squeaks.
Choosing the Right Floor Type
It goes without saying that the look and feel of a room can be greatly influenced by the various types of floors. However, we recommend looking into the various features of various flooring options in your home to make sure that your floor can survive for a very long time.
For example, the classic look of solid hardwood flooring may be suitable for living rooms but definitely not for kitchens and bathrooms due to the high levels of moisture and humidity levels that can quickly cause a finished floor to bend, rot, or discolor.
For bathrooms and kitchens that will see a lot of use, tiles are a popular option. It is more expensive than other types of flooring but has a resilient surface and keeps up well to daily use.
Conclusion
If your floors are making annoying sounds, there is likely a fix available. For as long as the issue is addressed, you can get your floors back to their usual sound level. However, if the extremity of your problem can’t be fixed by the methods stated above, we recommend seeking professional help regarding this matter.
Great blog post on fixing squeaky floors! It’s definitely frustrating to hear those annoying sounds when walking around. I recently had the same issue in my own home, and following these steps from above and below made a noticeable difference. It’s such a relief to have squeak-free floors again, and I highly recommend trying these remedies before seeking professional help.
It’s refreshing to see such a comprehensive guide on fixing squeaky floors, a common yet often overlooked problem in many households. The step-by-step instructions and the detailed list of materials make it accessible for both novice and experienced DIYers. Kudos to the author for providing solutions for working both above and below the floor, offering options to suit different scenarios and preferences!
I found the information to be incredibly informative and practical. The step-by-step guide provided clear instructions and useful tips for addressing this common household issue. It’s reassuring to know that with a little effort and the right tools, anyone can tackle squeaky floors and enjoy a quieter and more comfortable living space.