Installing vinyl wrap over a flat surface is easy, as all you got to do is lay the vinyl and squeegee it up. Things get difficult when the area being wrapped has contours and crevices, as one has to make sure the vinyl not just takes the shape of the surface but also sits properly on it.
It can be a daunting task if you are just getting started, but with practice, it gets easier. Here, we show you how to apply vinyl wrap to curves and the entire vehicle so you don’t have to hire a professional every time you need your car wrapped.
Tools and Materials Needed to Apply Vinyl Wrap to Curves
- Vinyl Wrap: Use cast vinyl; it’s flexible and will be much easier to handle around curves, and if possible, choose a material that has built-in air release channels so it smoothens out easily. Measure your vehicle to know how much vinyl you will need and buy about 10 feet extra to account for damages.
- Measuring tape: A tape measure will help you cut accurate vinyl sizes to fit the appropriate areas of application.
- Cleaning solution: Get a product designed for cleaning car surfaces. You can buy this from the local car detailing shop or online from sites like Rapid Tac.
- A piece of cloth: Use a soft, lint-free, microfiber cloth.
- Painter’s tape: This will help you determine how much vinyl will extend beyond the edges.
- Utility knife: Use this to cut the vinyl wrap to fit a specific section of your car.
- Marker pen: You will need this to put marks on your vinyl wrap so you know where to cut.
- Straight edge: A straightedge will help you make clean, precise cuts.
- Squeegee: Use this to remove creases and air bubbles from underneath the vinyl.
- Heat gun: With a heat gun, you will be able to make the wrap more malleable so it can properly stretch over curves and fit into crevices.
9 Easy Steps to Apply Vinyl Wrap to Curves
Because you can’t wrap the curves and edges of your car without first wrapping the rest of the surface, in this project, we will show you how to apply vinyl in an ordinary car surface in a manner that enables you to properly transition to curves, edges, and contours.
Step 1: Buy the Right Vinyl

Before anything else, you have to make sure the vinyl material you are working with is appropriate for the job. Vinyl comes in two types – cast vinyl and calendared vinyl. Cast vinyl is light and more flexible, which makes it easier to manipulate around curved areas and edges, while calendared vinyl is thicker and more rigid.
Step 2: Clean the Exterior Surface of Your Car
For the wrap to adhere firmly to your car, the surface must be clean and dry. So, grab your cleaning product and spray it directly onto the surface of your vehicle to remove dirt, then buff with a clean, soft cloth to dry. Move the cloth in circles until there is no moisture left.
If you are wrapping a trailer unit or any large truck, consider taking it to a carwash instead or use this video to clean the vehicle at home. However, do this a day before the application so the vehicle can have enough time to dry.
Apart from cleaning your vehicle, it is also important that you don’t place your vinyl wrap on the floor or any other surface where it is likely to attract dust. These loose dirt particles will not only leave scratches on the wrap when you start your installation but if transferred to the adhesive, they will also prevent it from sticking properly.
Step 3: Measure the Surface You Want to Wrap
Start with the length and stick your painter’s tape at the edge of the part you are wrapping, leaving at least three inches of the tape hanging off the edge. Then, unroll the tape to the opposite side and cut it off, leaving at least three inches hanging off the edge.
Use the same technique to measure the width. When you finish, you should have two lines of tape crossing at the center of the surface you are measuring.
By applying the tape first, you will be able to determine the amount of wrap you need to cover the edges and any contours present on the surface you are covering. Because a vehicle’s body has multiple sections, you’ll need to measure and tape each part individually.
Step 4: Cut the Vinyl
Remove the seal of your vinyl roll, then carefully remove the upper piece of tape you just stuck onto the surface of your car. Place one end of the tape at the opening edge of the vinyl roll and unroll the vinyl as you stretch the tape across its back. Mark where the edge of the tape reaches. Then remove the second tape, place it on the vinyl and mark the length.
Now place a straightedge over the marks and cut the wrap in a straight line to obtain a precise piece for the part you are covering. Most vinyl wraps will have built-in lines that you can use to keep your cut straight.
It would be nice to have a friend while you make the cuts. Have them hold and pull out the vinyl edge and one end of the tape while you hold the other end of the tape against the unrolled vinyl. This will ensure the wrap is not touching the ground and attracting dirt particles.
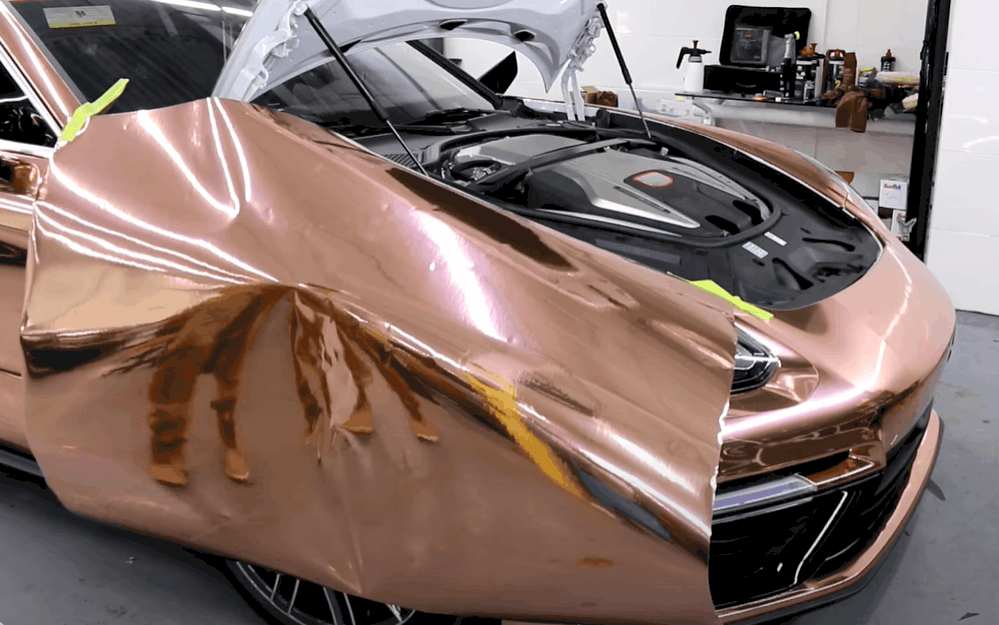
Step 5: Place the Vinyl Wrap Over the Surface You Want to Cover
Peel off the film at the back of the vinyl and place the wrap in the middle of the surface you are wrapping. Because you will be readjusting the vinyl, just drape it roughly. Your goal is to make sure it covers the surface completely and no edges are showing.
The wrap will adhere to the surface but won’t form a permanent bond until some heat is applied to seal it. So basically, you can reposition it until you are completely satisfied with the coverage.
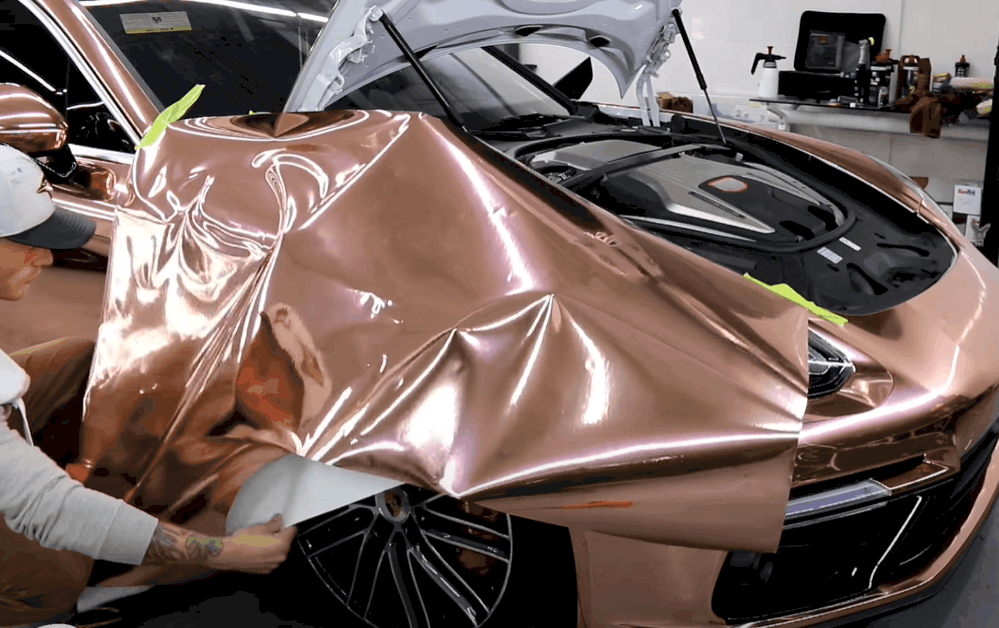
Step 6: Pull the Ends to Remove Wrinkles
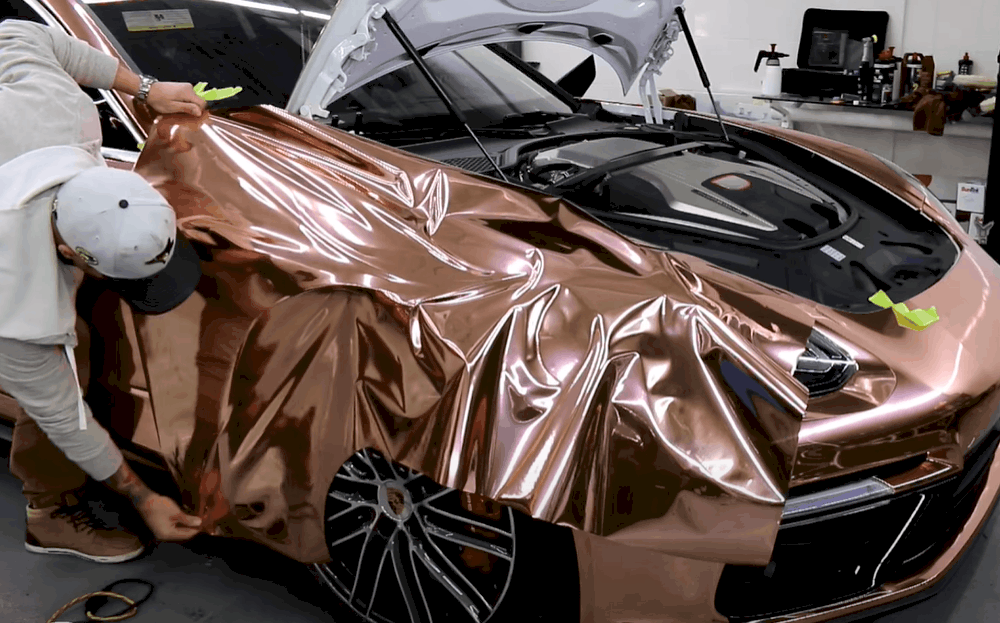
This process will work best with a friend. Have them hold and pull two corners of the vinyl while you hold and pull the opposite two corners. Pulling the sides away from each other will create tension that will help remove any wrinkles and creases from the middle.
For best results, slightly lift the wrap off the surface while you pull. Once most of the wrinkles are gone, carefully lay the vinyl back on the surface.
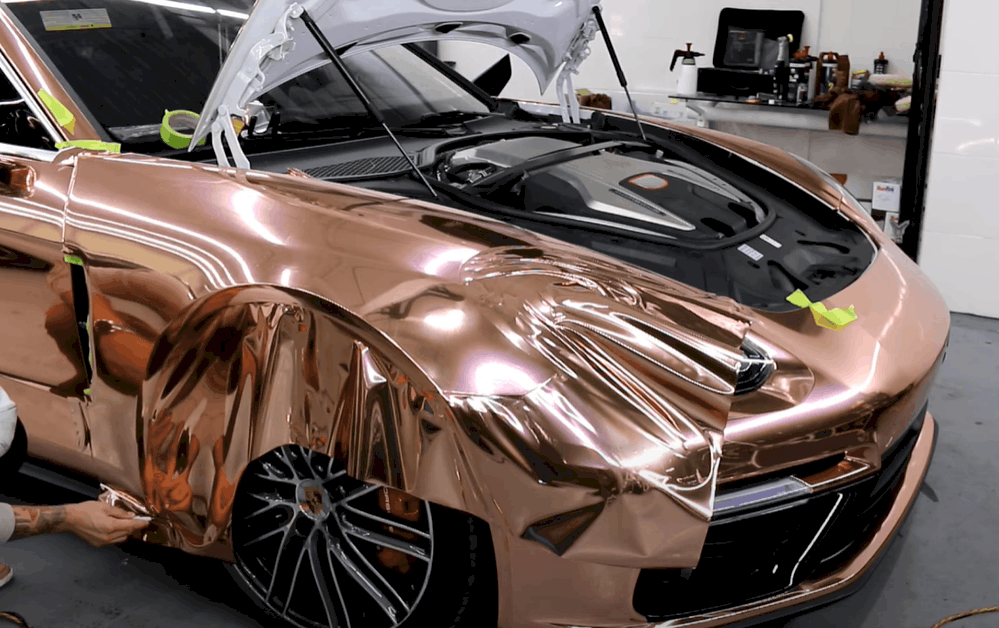
Step 7: Remove Leftover Wrinkles
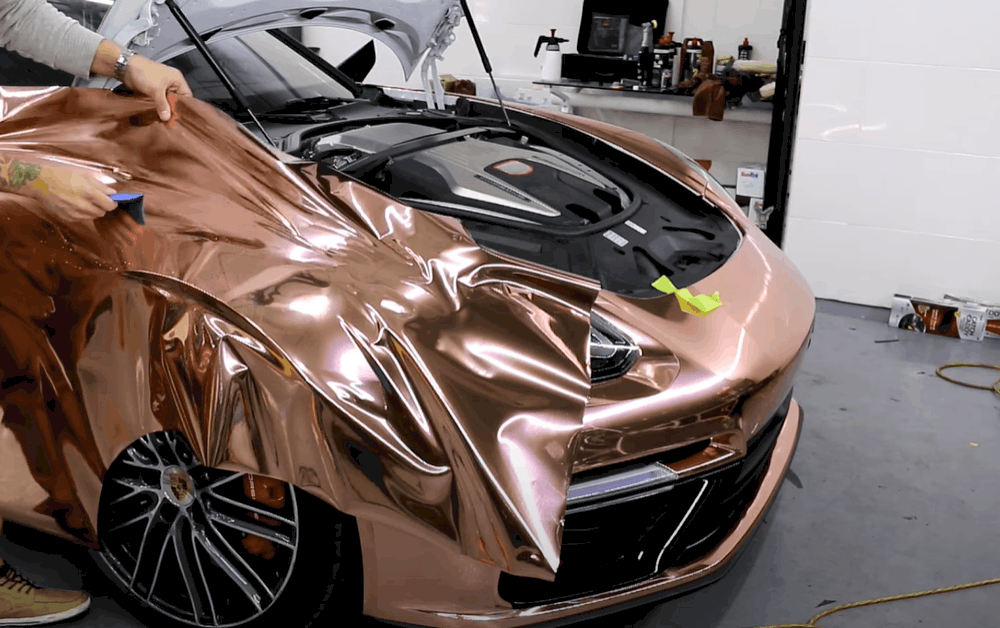
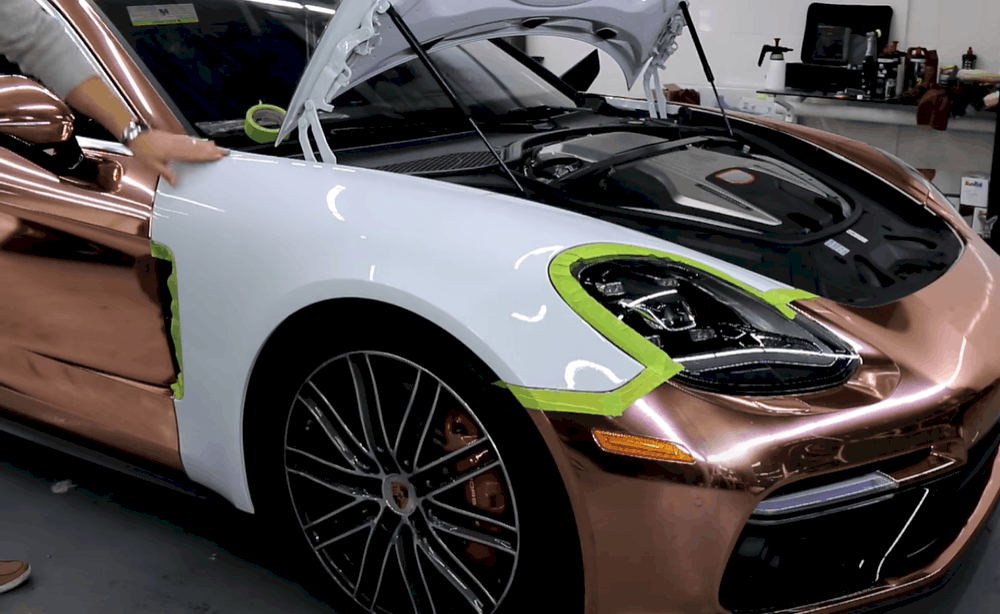
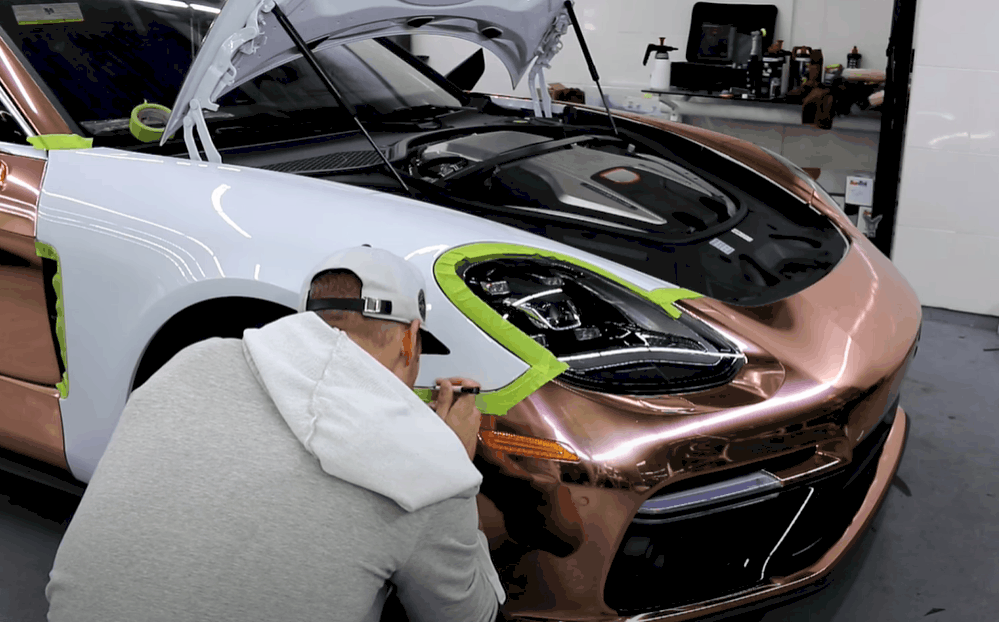
Hold a squeegee at a 45° angle over the wrap and run it from the middle outward to remove leftover wrinkles and push air out through the edges. If you run into bubbles that are too big, tap with the squeegee to split them into many smaller bubbles; it will make the air easier to remove. If you reach a curved area, arc the squeegee and move it over the contour to smoothen the vinyl.
Place a heat gun over the curves and edges to soften the vinyl and make it more flexible; it will make it easier for you to mold the wrap around these areas. Use the hard side of the squeegee to stuff the wrap down into crevices and other hard-to-reach areas. Heat the vinyl first so it can get easily into these places.
Apply heat to the rest of the vinyl and use your squeegee to remove imperfections. If some wrinkles won’t come out even after heating, lift that part of the vinyl up starting from the edge, heat it up, then apply it onto the surface again. Do not pull the wrap while you heat, as this could make it stretch.
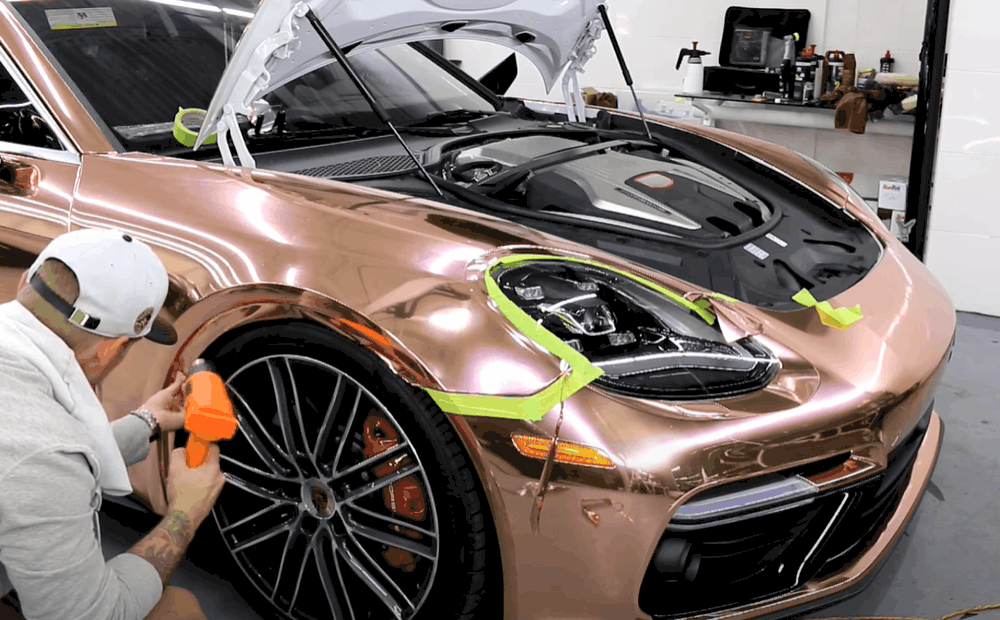
Step 8: Trim Down the Edges and Door Knobs
Once you are done wrapping your vehicle, use a utility knife to cut off any extra vinyl around the edges, doorknobs, and other parts jutting out of the surface. Use a squeegee to press edges down around doorknobs. Take your time to do the cuts and use a sharp blade to keep them straight and even.
Also, when trimming the edges, keep in mind that the wrap will shrink when you heat, so do not trim too much. Slightly heating the vinyl before you cut can help minimize shrinking.
Step 9: Heat the Vinyl One More Time to Secure It
After everything is laid in place, set your heat gun to a temperature of about 225°F, then run it in a sweepy motion over the vinyl to secure the wrap firmly to the vehicle. Let sit for 24 hours and that’s it.
The Takeaway
Applying vinyl wrap around curves takes practice but after the first two applications, everything gets much easier.
With this information, it should be easy for you to tackle any vinyl wrap job and most importantly, navigate through curves, contours, creases, molds, and edges. The secret is to pull and stretch the vinyl and apply heat where necessary. It’s also important that you start with a clean, dry surface.