If you have vinyl siding installed on your house, there is a good chance that you will find yourself requiring to cut a piece of vinyl panels at some point in your life. It could be to replace a damaged part of the siding, to patch a hole on one of the panels, or just to get rid of parts of vinyl panels you don’t need.
Learning how to cut vinyl siding prepares you for the task, and enables you to pick the right tools so you can make neat cuts. We have provided below a walkthrough of the basics.
Table of Contents
Tools Needed to Cut Vinyl Siding
There are three ways to properly cut vinyl siding, and here are the tools you need:
- A pair of tin snips: Use this to make long, vertical cuts.
- Tape measure: A measuring tape will help you take the necessary measurements so you can cut only what is needed.
- Pencil: You will need this to put marks on the vinyl siding and section wall. If you are cutting dark vinyl panels, you may want to use chalk to make the marks visible.
- Notebook: Use this to note down any important measurements.
- Carpenter’s square: A carpenter’s square, also known as steel square, will enable you to make straight lines on the siding so you can obtain clean cuts.
- Utility knife: Use this to cut your vinyl siding horizontally. To get clear cuts, make sure the knife is as sharp as possible.
- Flat table/workbench: Any of these will provide a flat surface for you to work on.
- Circular saw: Use this to make short, vertical cuts on your vinyl siding. For best results, use a fine-tooth plywood cutting blade. Other saw blades may not give you the clean cuts you are looking for. You can buy saw blades online or at your nearest hardware store.
- Safety gloves: Because you will be using sharp tools to cut the vinyl siding, it is important that you wear a pair of gloves to keep your hands safe.
Cutting the Vinyl Siding Vertically (Long, Vertical Cuts)
The most suitable tool for making long, vertical cuts on vinyl siding is a pair of tin snips. Below are the steps to follow to obtain clean cuts.
Step 1: Determine How Much You Need to Cut
Using a measuring tape, measure the length of the wall on which you want to install the vinyl siding. Note down the measurement. Then, measure the length of the vinyl panel you will be using and subtract the measurement of the wall. The balance is how much you will need to chop from the vinyl.
For instance, if the wall you wish to cover is 7 feet long and the siding panel is 12 feet long, the total amount of siding you need to cut off would be 5 feet.
Mark where you want to cut and draw a straight line along the mark, making sure the line is dark or light (in the case of dark vinyl siding) enough so it’s visible.
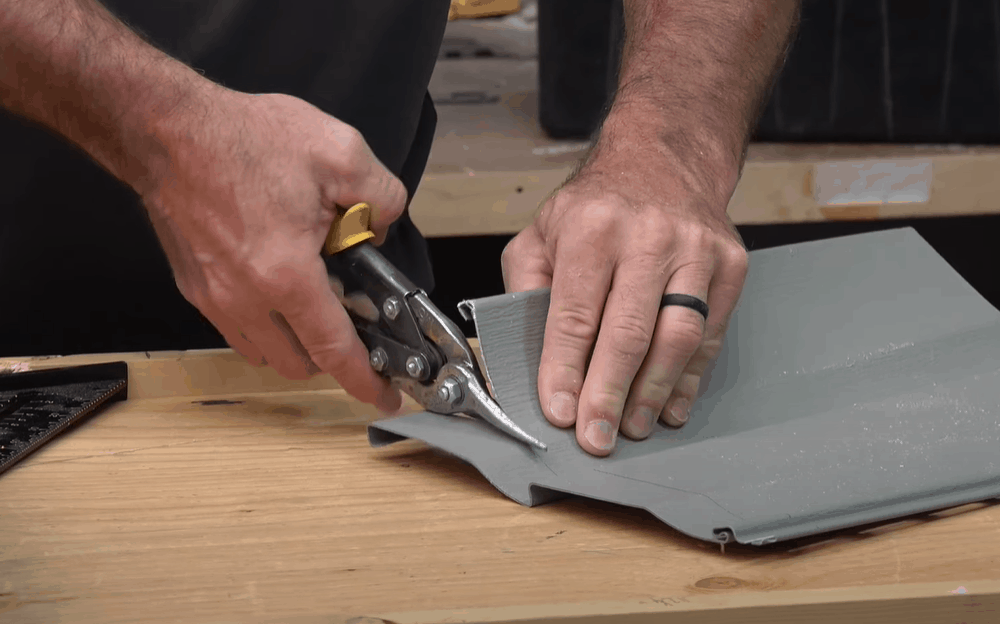
Step 2: Cut Along the Line
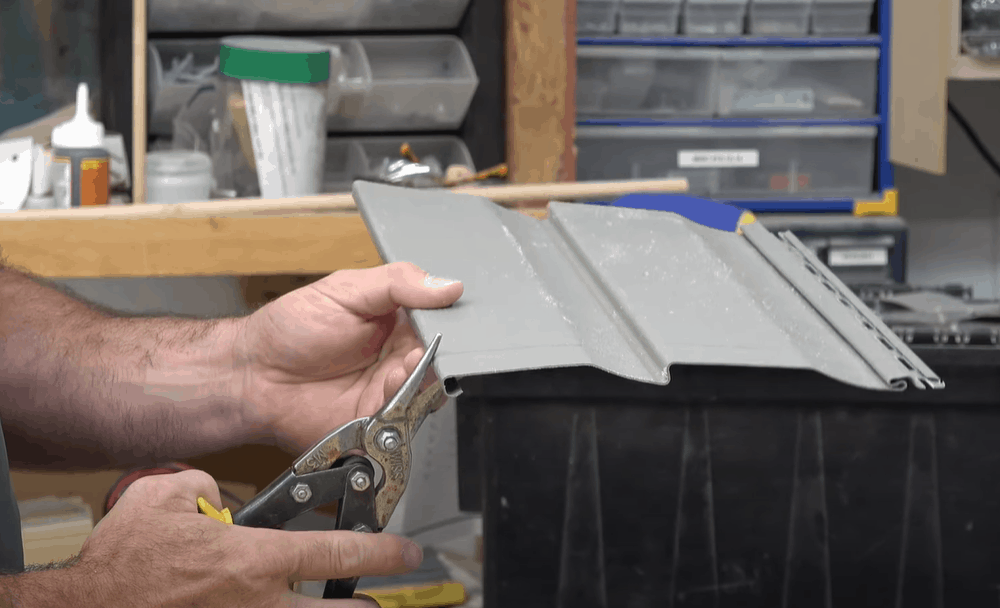
Using your non-dominant hand, firmly grip the siding near the marked line so it doesn’t move about when you start to cut.
Next, grab your tin snips and cut along the line. Make sure you are not closing the blades all the way, so you can get a clean cut. Follow the marked line to the end to cut across the vinyl panel.
Now, place the newly-cut piece of siding on the rest of the panels to mark where you need to cut. Then, cut each piece using the same technique you applied in the first panel.
Cutting Vinyl Siding Horizontally
To make clean, horizontal cuts on a piece of vinyl siding, you will need a utility knife. Here is how to do it right.
Step 1: Find Out How Much You Need to Cut
The first thing you need to do is figure out how much siding you need to slice off. Just like when making vertical cuts, begin by taking the measurement of the wall. Measure its height, then subtract from the height of the piece of siding you wish to cut. That’s how much you will need to cut.
For example, if the area of the wall you are covering is 6 inches tall and the piece of siding you want to cut is 10 inches tall, the amount of siding you will need to chop off will be 4 inches.
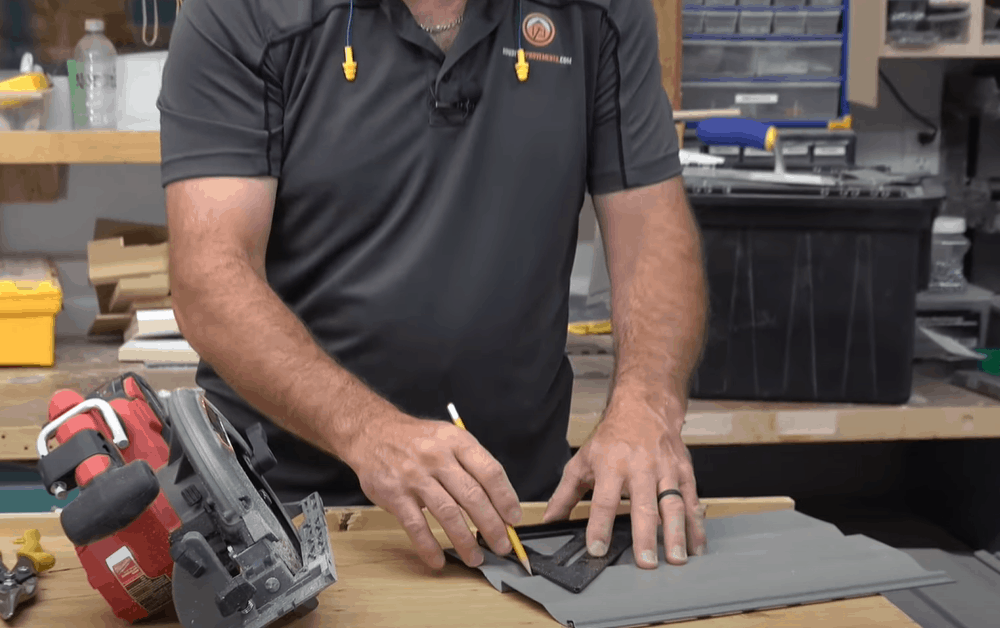
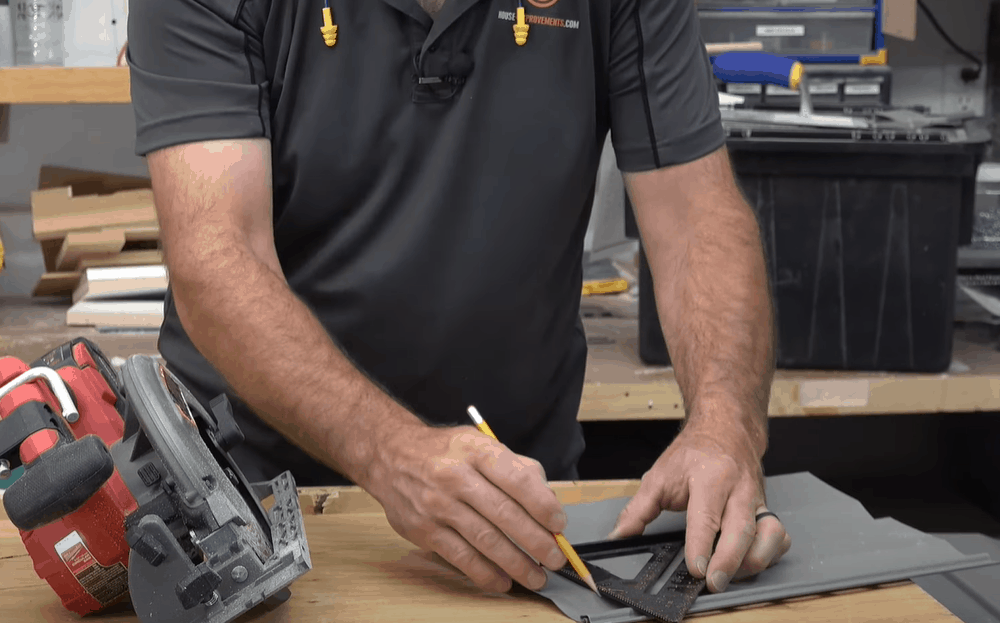
Step 2: Mark Where You Want to Cut
Place your vinyl siding on a workbench or any other flat surface and draw a straight line along the point where you intend to cut. Have this line running end to end along the length of the siding. The flat surface will prevent the plank from shifting when you start to cut.
Step 3: Score the Line and Cut the Siding
Using a utility knife, carefully score the siding along the marked line from end to end. If you can push the knife all the way through the panel, even better, as it will make snapping it afterward much easier. But don’t push too hard or you will score the workbench.
Now, grip the siding on each side of the score line and snap it in half. Make sure to bend it along the scored line so you can get clean cuts. If the siding does not break, try scoring it again along the same line.
Making Short, Vertical Cuts
If you plan on making short vertical cuts on your vinyl siding, then the most appropriate tool for the job would be a circular saw. Use the following steps to make clear cuts.
Step 1: Attach Your Blade to the Circular Saw
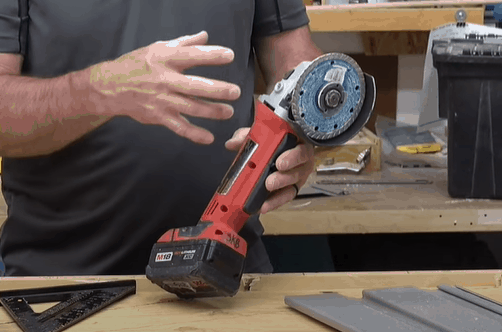
Mount your plywood saw blade such that its teeth are pointing opposite of how the blade spins. Setting up the blade this way enables you to get a smooth, clear cut.
Step 2: Mark the Part of Siding You Want to Cut

Lay the piece of vinyl siding on the workbench and mark a straight line over the point you want to cut. Make the line dark or light enough so it can be visible while you cut. Depending on the color of your vinyl, you can use either a pencil or chalk to mark visible lines.
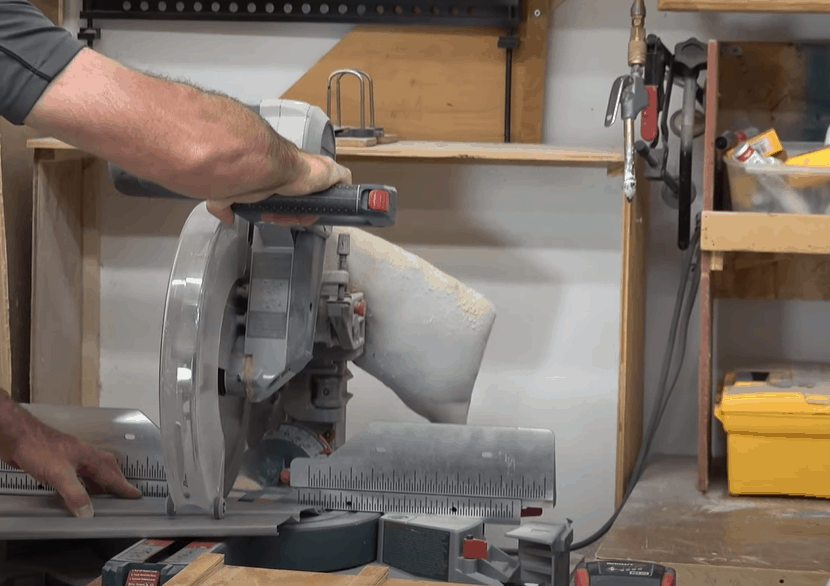
Step 3: Cut the Vinyl Siding
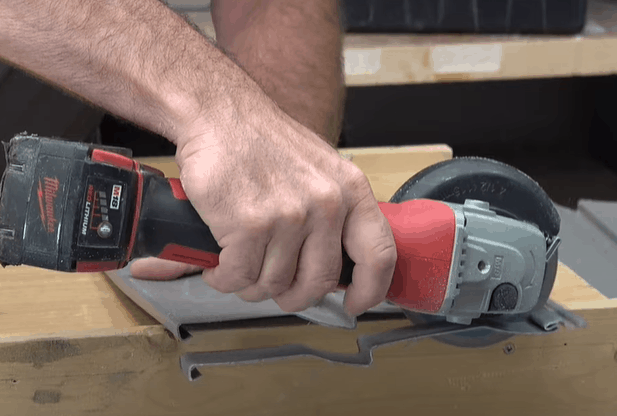
Make sure the part you need to slice off is hanging off the edge of the bench. You don’t want to have the line you are cutting lying over your workbench, as the saw will cut right into the bench. If you insist on having the line on the bench, place two blocks of wood on the bench, then lay the vinyl on that so the part you are cutting is raised.
Once you have the siding in the right position, slowly push the circular saw along the line to cut. Pay attention to the blade as you cut to make sure it is not straying from the line. You can use your free hand to grip the siding and hold it down so it doesn’t move about while you cut.
Additional Tips for Cutting Vinyl Siding
- Whichever tool you choose to cut your vinyl siding, make sure it is sharp enough to give you clean, smooth cuts.
- If you are using a circular saw, don’t mount the blade too deep, as it can cause the saw to bind and kick back. Also, the more blade you have exposed, the more dangerous the saw will be. Set your blade at the right depth and you will not only stay safe but also get better cuts.
- If you are cutting your vinyl siding with a pair of tin snips, use only your hands to exert pressure. Do not hammer the edges to get extra pressure. If you find yourself resorting to such a measure, the snip you are using is probably too small. Try using a bigger one.
- If you are making a quick straight cut with a utility knife, hold down the vinyl siding a little bit further away from the cutting line and keep the part of your body that is close to the end of the line away too; it will help prevent injuries.
- Focus on the task at hand. If possible, do not look away or talk to people as you cut, as this can make you deviate from the line and make crooked cuts.
The Takeaway
Cutting vinyl siding may seem like a daunting task if you haven’t done it before. After going through the steps outlined here, however, we hope that you now feel more confident about doing the job yourself.
The important thing is to decide how you want to cut your siding – whether horizontally or vertically, and choose a tool that is most suitable for the task. Also, choose a sharp tool so you can keep the cuts clean.
This is a great tutorial! I’m going to try it out this weekend!